| 图源-slice
| 工具:dpabi5.0, spm12, NIfTI_20140122(密码:iizk)
我们知道在进行fMRI预处理的时候,要求所有被试时间点相同,它将直接影响到slice timing的顺利执行,另外要求每个体素的尺寸也相同。fMRI数据一般是4D的,不能直接看个数,但是可以通过MRIcro查看每个被试的时间点数和体素尺寸,不过很麻烦。笔者没有找到可以一次性审查全部被试时间点和体素尺寸的程序,所以自己写了一个,放在这里供大家参考。
另外,dpabi是一个比较强大的脑影像分析工具,但它难以在不能显示图形界面和弹窗的服务器上使用,笔者想在那样的服务器上跑,所以也自己写了一个脚本,它可以完成在GUI能上完成的DPARSFA的所有操作,放在这里供大家参考。
copyright ©意疏:https://blog.csdn.net/sinat_35907936/article/details/113425845?spm=1001.2014.3001.5502
fMRI 时间点与体素尺寸批量审查
matlab上的一个工具包NIfTI_20140122,是一个便利的nifti图像解析工具。其中load_nii() 函数,用于载入3D的影像,如T1像。load_untouch_nii() 函数用于载入4D的影像,如功能态影像。载入的nifti文件以一个结构体的形式储存,其中包括数据头(包含时间点,像素尺寸等信息)和图像数组。
我们需要审查的项由右下图红框标出——nii_file.hdr.dime.dim(5)和nii_file.hdr.dime.pixdim(2:4)。以在左下图MRIcro上显示的为参考,我们可以发现两者时间点和体素尺寸是一致的——240, [3.4375,3.4375,4.6]。

随机查看多个被试,以确定全部被试正确的时间点和体素尺寸,笔者这批数据即为240, [3.4375,3.4375,4.6]。所以代码通过该标准来对数据进行批量审查。挑出时间点,像素尺寸等有问题的文件。
代码适用于如下所示的三层目录结构:运行后,通过GUI选择Root_dir。

% accurate timepoint and voxelsize
TimePoint = 240;
VoxelSize = [3.4375, 3.4375, 4.6];

folder = uigetdir;
root_dir = dir(folder);
h=waitbar(0,'time point checking, please wait'); %进度条
[D1, D2] = size(root_dir);

ErrorOut1 =  fullfile(folder, '_timepoint_error');    %存放错误文件的文件夹
if exist(ErrorOut1,'dir')==0
  mkdir(ErrorOut1)
end
ErrorOut2 =  fullfile(folder, '_voxelsize_error');
if exist(ErrorOut2,'dir')==0
  mkdir(ErrorOut2)
end

ErrorOut3 =  fullfile(folder, '_filemiss_error');
if exist(ErrorOut3,'dir')==0
  mkdir(ErrorOut3)
end

for i = 3:size(root_dir)
  files = dir(fullfile(root_dir(i).folder, root_dir(i).name));
  [d1, d2] = size(files);
  if d1 > 2
      nii_file = load_untouch_nii(fullfile(files(3).folder, files(3).name));
      time_point = nii_file.hdr.dime.dim(5);        % 时间点比较
      voxel_size = nii_file.hdr.dime.pixdim(2:4);   % 体素尺寸比较
      if time_point ~= TimePoint
          movefile(fullfile(root_dir(i).folder, root_dir(i).name),ErrorOut1);
      elseif VoxelSize ~= voxel_size
          movefile(fullfile(root_dir(i).folder, root_dir(i).name),ErrorOut2);
      end
  else
       movefile(fullfile(root_dir(i).folder, root_dir(i).name),ErrorOut3);
  end
  waitbar(i/(D1-2), h);
end

disp('All Files Done!!!');
delete(h);
效果与结果图:

copyright ©意疏:https://blog.csdn.net/sinat_35907936/article/details/113425845?spm=1001.2014.3001.5502
服务器上无GUI无弹窗跑DPARSFA
dpabi官网上提供了无GUI跑DPARSFA的方法,即直接调用DPARSFA_run(),它共有四个参数,可以通过以下方式调用:DPARSFA_run(Cfg)、DPARSFA_run(’/XXX.mat’)或者 DPARSFA_run(’/XXX.mat’,WorkingDir,SubjectListFile,IsAllowGUI)等。
其中Cfg是一个结构体,它包含了包含Time Points等在内的几十个参数,它是XXX.mat的内容,而XXX.mat就是我们在如下GUI中选择参数后,save的.mat文件。

如果输入的数据是nifti格式,或者没有勾选Crop——切脖子选项,且需要处理T1时,DPARSFA_run会因为找不到co开头的切了脖子的nifti图像。而在有GUI时产生如下弹窗——no co*T1 image is found,选yes则可以用T1像代替而继续运行。而在没有GUI的时则出错而停止。

修改方法:查找出DPARSFA_run.m文件中所有含questdlg的代码段,并做如下替换,共需要替换5处。目的是在没有co*T1时能够直接用T1接着运行。
替换前代码
   button = questdlg(['No co* T1 image (T1 image which is reoriented to the nearest orthogonal direction to ''canonical space'' and removed excess air surrounding the individual as well as parts of the neck below the cerebellum) is found. Do you want to use the T1 image without co? Such as: ',DirImg(1).name,'?'],'No co* T1 image is found','Yes','No','Yes');
    if strcmpi(button,'Yes')
        UseNoCoT1Image=1;
    else
        return;
    end
替换后代码
    if AutoDataProcessParameter.IsAllowGUI == 0  % no GUI no pop-up windows
         UseNoCoT1Image=1;
         disp('WARNING:No co* T1 image, use NoCoT1Image instead');
    else
         button = questdlg(['No co* T1 image (T1 image which is reoriented to the nearest orthogonal direction to ''canonical space'' and removed excess air surrounding the individual as well as parts of the neck below the cerebellum) is found. Do you want to use the T1 image without co? Such as: ',DirImg(1).name,'?'],'No co* T1 image is found','Yes','No','Yes');
        if strcmpi(button,'Yes')
            UseNoCoT1Image=1;
        else
            return;
        end
    end
另外,在无GUI的情况下,默认不会产生PicturesForChkNormalization文件夹,而它是后面做质量检测时重要的参考,所以必须要产生它。做如下修改即可。修改完保存。
查找出所有的Generate the pictures only if GUI is allowed字段,共两处,将其所在行的if语句注释掉,并且注释其对应的end。
% if AutoDataProcessParameter.IsAllowGUI %YAN Chao-Gan, 161011. Generate the pictures only if GUI is allowed.
笔者代码如下,它的功能是通过输入参数更新Cfg结构体、运行DPARSFA处理流程并生成log文件。它的参数有四个,Cfg_file是在GUI上选择并保存的.mat文件,work_dir是dpabi指定的工作目录,StartingDirName是DPARSFA处理流程的起始目录,如FunImg。ROI_altas_name是要做ROI分析时指定的脑图谱的名字,它必须存在与dpabi的Template下才能使用。

function dpabi_noGUI(Cfg_file,work_dir,StartingDirName,ROI_altas_name)

% use dpabi pipeline without GUI
% Cfg_file, work_dir , StartingDirName and ROI_atlas_name in dpabi as fuction inputs.
% Cfg_file mat file from dipabi GUI selection saving.
% if you dont do FC with ROI altas, make ROI_altas_name='', if not, make  ROI_altas_name= 'altas_name' such as 'aal.nii'
% command: matlab -nodisplay "$nojvm" -nosplash -r "dpabi_noGUI('/home/pc/fMRI/data/tmp.mat','/home/pc/fMRI/data','FunImg', 'aal.nii')"
% kill progress command: ps -ef|grep 'matlab'|grep -v  'ii'|cut -c 9-16|xargs kill -9


    dpabi_dir = '/home/opt/matlab2018a/toolbox/dpabi';   %dpabi install dir,需要自行修改路径
    template_dir = [dpabi_dir,'/Templates/'];

    sub_dir = dir([work_dir, '/',StartingDirName]);
    log_file = [work_dir, '/log.txt'];

    [D1, ~] = size(sub_dir);
    SubjectID = cell(D1-2, 1);


    for i = 3:D1
        SubjectID{

    i-2} = sub_dir(i).name;
    end


    load(Cfg_file)
    Cfg.WorkingDir = '';
    Cfg.DataProcessDir  = '';
    Cfg.SubjectID = SubjectID;
    if Cfg.IsCalFC == 1 || Cfg.IsExtractROISignals == 1
        if size(ROI_altas_name) == 0
            disp('there is no ROI_atlas_name')
            return
        else
            Cfg.CalFC.ROIDef = {

    [template_dir, ROI_altas_name]};
        end
    end
    Cfg.StartingDirName = StartingDirName;

    f1 = fopen(log_file,'w+');
    diary(log_file)
    diary on

    DPARSFA_run(Cfg,work_dir,'',0);

    fclose(f1);

    disp('Success!')
    diary off

end
将dpabi_noGUI.m传到服务器上,并将它所在路径添加到matlab搜索路径,这样可以直接在matlab中用dpabi_noGUI()使用该函数,当然也可以直接把它传到dpabi的安装目录下。如下是命令行永久添加matlab搜索路径的方法。
matlab -nodisplay
p=genpath('scriptpath')
addpath(p)
savepath
比如我想在服务器上跑协变量回归,滤波,功能连接和ROI时间序列提取操作。我需要这样操作:
第一、在自己电脑上用GUI选好要做的流程,如下图,我勾选了4个我想做的操作。工作目录,被试列表,和起始目录可以默认。选好后保存成.mat文件。

第二、把.mat文件和要处理的数据一起传到服务器上。假设传到了/xx/xx/xx下。
第三、打开终端,敲入如下命令。路径一定要是绝对路径,相对路径会出错。由于我先前做过头动校正和归一化了,所以起始目录选的FunImgRW,然后脑图谱用的400个脑区的Yeo2011_7Networks_MNI152_FreeSurferConformed1mm_LiberalMask.nii
matlab -nodisplay "$nojvm" -nosplash -r "dpabi_noGUI('/xx/xx/xx/xxx.mat','/xx/xx/xx', 'FunImgRW', 'Yeo2011_7Networks_MNI152_FreeSurferConformed1mm_LiberalMask.nii')"
强制停止进程方法
ps -ef|grep 'matlab'|grep -v 'ii'|cut -c 9-16|xargs kill -9
结果与效果
400个脑区的连接矩阵:出现与主对角线平行的两条线的原因是Yeo2011_7Networks_MNI152_FreeSurferConformed1mm_LiberalMask.nii图谱,前200和后200分别对应的是左右脑对称位置的脑区,而在对称位置的功能往往存在较大的相似性,所以出现高亮的线。
figure
imagesc(255*ROICorrelation)

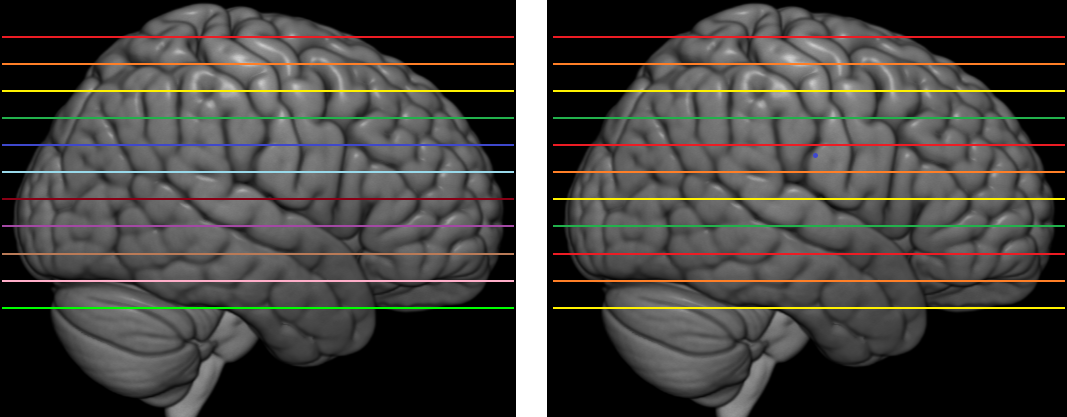
PicturesForChkNormalization:

.mat文件决定了dpabi的执行流程。如果中途发现它需要修改,在本地修改好了,用FileZilla之类的工具传到服务器上,覆盖原来的.mat文件即可。
完成后,重新执行脚本。
copyright ©意疏:https://blog.csdn.net/sinat_35907936/article/details/113425845?spm=1001.2014.3001.5502
参考
http://www.rfmri.org/content/configurations-dparsfarun