因为下个项目使用spring Cloud,就想着自己搭建搭建 康康spring卖的啥药,可惜看了好几篇博文,不是少注解就是yml文件书写的跟粑粑一样,spring Cloud概念就是服务注册中心、服务提供者、服务消费者,说白了就是你跑饭店吃饭,厨师给你做饭,不去饭店你吃不到厨师给你做的饭(说点外卖的我锤你)
废话不说了 直接上干货
一、咱们去创建服务注册中心,先初始化一个springboot项目
file->new->project 选择spring lnitializr next

next next 这里要勾选spring Cloud Config 内的 config Server

首先咱们看一下pom文件(如果复制,注意项目名字)
<?xml version="1.0" encoding="UTF-8"?>
<project xmlns="http://maven.apache.org/POM/4.0.0" xmlns:xsi="http://www.w3.org/2001/XMLSchema-instance"
	xsi:schemaLocation="http://maven.apache.org/POM/4.0.0 https://maven.apache.org/xsd/maven-4.0.0.xsd">
	<modelVersion>4.0.0</modelVersion>
	<parent>
		<groupId>org.springframework.boot</groupId>
		<artifactId>spring-boot-starter-parent</artifactId>
		<version>2.2.1.RELEASE</version>
		<relativePath/> <!-- lookup parent from repository -->
	</parent>
	<groupId>com.example</groupId>
	<artifactId>demo</artifactId>
	<version>0.0.1-SNAPSHOT</version>
	<name>demo</name>
	<description>Demo project for Spring Boot</description>

	<properties>
		<java.version>1.8</java.version>
		<spring-cloud.version>Hoxton.RC2</spring-cloud.version>
	</properties>

	<dependencies>
		<dependency>
			<groupId>org.springframework.cloud</groupId>
			<artifactId>spring-cloud-starter-netflix-eureka-server</artifactId>
		</dependency>

		<dependency>
			<groupId>org.springframework.boot</groupId>
			<artifactId>spring-boot-starter-test</artifactId>
			<scope>test</scope>
			<exclusions>
				<exclusion>
					<groupId>org.junit.vintage</groupId>
					<artifactId>junit-vintage-engine</artifactId>
				</exclusion>
			</exclusions>
		</dependency>
	</dependencies>

	<dependencyManagement>
		<dependencies>
			<dependency>
				<groupId>org.springframework.cloud</groupId>
				<artifactId>spring-cloud-dependencies</artifactId>
				<version>${

    spring-cloud.version}</version>
				<type>pom</type>
				<scope>import</scope>
			</dependency>
		</dependencies>
	</dependencyManagement>

	<build>
		<plugins>
			<plugin>
				<groupId>org.springframework.boot</groupId>
				<artifactId>spring-boot-maven-plugin</artifactId>
			</plugin>
		</plugins>
	</build>
	<repositories>
		<repository>
			<id>spring-milestones</id>
			<name>Spring Milestones</name>
			<url>https://repo.spring.io/milestone</url>
		</repository>
	</repositories>
</project>
其次修改咱们的启动类,只是需要增加一个@EnableEurekaServer 告知Eureka服务随着项目启动

application.properties同目录新建application.yml
(yml是树状结构,书写比properties更直观,删除掉properties。yml文件注释是#)
server:
  port: 8300
eureka:
  instance:
   hostname: localhost
client:
  registerWithEureka: false
    fetchRegistry: false
      serviceUrl:
defaultZone: http://eureka.instance.hostname:{

    eureka.instance.hostname}:eureka.instance.hostname:{

    server.port}/eureka/
保存下启动项目,去浏览器输入http://localhost:8300/ ,不要纠结红框内的内容,拿两个是接下来的服务提供者与服务消费者,至此咱们的服务注册中心就大功告成了。

二、服务提供者
初始化一个新的spring Boot项目,同上步骤勾选spring Cloud Config 内的 config Server
查看pom文件(如果复制,注意项目名字)
<?xml version="1.0" encoding="UTF-8"?>
<project xmlns="http://maven.apache.org/POM/4.0.0" xmlns:xsi="http://www.w3.org/2001/XMLSchema-instance"
         xsi:schemaLocation="http://maven.apache.org/POM/4.0.0 https://maven.apache.org/xsd/maven-4.0.0.xsd">
    <modelVersion>4.0.0</modelVersion>
    <parent>
        <groupId>org.springframework.boot</groupId>
        <artifactId>spring-boot-starter-parent</artifactId>
        <version>2.2.1.RELEASE</version>
        <relativePath/> <!-- lookup parent from repository -->
    </parent>
    <groupId>com.example</groupId>
    <artifactId>demo11</artifactId>
    <version>0.0.1-SNAPSHOT</version>
    <name>demo11</name>
    <description>Demo project for Spring Boot</description>

    <properties>
        <java.version>1.8</java.version>
        <spring-cloud.version>Hoxton.RC2</spring-cloud.version>
    </properties>

    <dependencies>
        <dependency>
            <groupId>org.springframework.cloud</groupId>
            <artifactId>spring-cloud-starter-netflix-eureka-server</artifactId>
        </dependency>

        <dependency>
            <groupId>org.springframework.boot</groupId>
            <artifactId>spring-boot-starter-test</artifactId>
            <scope>test</scope>
            <exclusions>
                <exclusion>
                    <groupId>org.junit.vintage</groupId>
                    <artifactId>junit-vintage-engine</artifactId>
                </exclusion>
            </exclusions>
        </dependency>
    </dependencies>

    <dependencyManagement>
        <dependencies>
            <dependency>
                <groupId>org.springframework.cloud</groupId>
                <artifactId>spring-cloud-dependencies</artifactId>
                <version>${

    spring-cloud.version}</version>
                <type>pom</type>
                <scope>import</scope>
            </dependency>
        </dependencies>
    </dependencyManagement>

    <build>
        <plugins>
            <plugin>
                <groupId>org.springframework.boot</groupId>
                <artifactId>spring-boot-maven-plugin</artifactId>
            </plugin>
        </plugins>
    </build>

    <repositories>
        <repository>
            <id>spring-milestones</id>
            <name>Spring Milestones</name>
            <url>https://repo.spring.io/milestone</url>
        </repository>
    </repositories>

</project>
修改服务提供者的启动类,增加@EnableEurekaClient @RestController两个注解,表明是服务提供者
并且拦截路径为/hi的请求
import org.springframework.boot.SpringApplication;
import org.springframework.boot.autoconfigure.SpringBootApplication;
import org.springframework.beans.factory.annotation.Value;
import org.springframework.cloud.netflix.eureka.EnableEurekaClient;
import org.springframework.web.bind.annotation.RequestMapping;
import org.springframework.web.bind.annotation.RequestParam;
import org.springframework.web.bind.annotation.RestController;

@SpringBootApplication
@EnableEurekaClient
@RestController
public class Demo11Application {


    public static void main(String[] args) {


        SpringApplication.run(Demo11Application.class, args);
    }

    @Value("${server.port}")
    String port;

    @RequestMapping("/hi")
    public String home(@RequestParam String name)
    {


        return "hi " + name + ",i am from port:" + port;
    }
}
接下来配置服务提供者的yml文件(yml文件注释是#)
eureka:
  client:
    serviceUrl:
      defaultZone: http://localhost:8300/eureka/ ##这里端口一定要是服务注册中心的端口
server:
  port: 8763
spring:
  application:
    name: service-hi ##名字随意更换
服务提供者就配置完成了,接下来启动项目,在浏览器输入http://localhost:8763/hi?name=spring

三、服务消费者
初始化spring Boot项目,同一
查看pom文件
<?xml version="1.0" encoding="UTF-8"?>
<project xmlns="http://maven.apache.org/POM/4.0.0" xmlns:xsi="http://www.w3.org/2001/XMLSchema-instance"
         xsi:schemaLocation="http://maven.apache.org/POM/4.0.0 https://maven.apache.org/xsd/maven-4.0.0.xsd">
    <modelVersion>4.0.0</modelVersion>
    <parent>
        <groupId>org.springframework.boot</groupId>
        <artifactId>spring-boot-starter-parent</artifactId>
        <version>2.2.1.RELEASE</version>
        <relativePath/> <!-- lookup parent from repository -->
    </parent>
    <groupId>com.example</groupId>
    <artifactId>consumers</artifactId>
    <version>0.0.1-SNAPSHOT</version>
    <name>consumers</name>
    <description>Demo project for Spring Boot</description>

    <properties>
        <java.version>1.8</java.version>
        <spring-cloud.version>Hoxton.RC2</spring-cloud.version>
    </properties>

    <dependencies>
        <dependency>
            <groupId>org.springframework.cloud</groupId>
            <artifactId>spring-cloud-starter-netflix-eureka-server</artifactId>
        </dependency>
        <dependency>
            <groupId>org.springframework.cloud</groupId>
            <artifactId>spring-cloud-starter-eureka</artifactId>
        </dependency>
        <dependency>
            <groupId>org.springframework.cloud</groupId>
            <artifactId>spring-cloud-starter-ribbon</artifactId>
        </dependency>
        <dependency>
            <groupId>org.springframework.cloud</groupId>
            <artifactId>spring-cloud-starter-config</artifactId>
        </dependency>
        <dependency>
            <groupId>org.springframework.boot</groupId>
            <artifactId>spring-boot-starter-test</artifactId>
            <scope>test</scope>
            <exclusions>
                <exclusion>
                    <groupId>org.junit.vintage</groupId>
                    <artifactId>junit-vintage-engine</artifactId>
                </exclusion>
            </exclusions>
        </dependency>
    </dependencies>

    <dependencyManagement>
        <dependencies>
            <dependency>
                <groupId>org.springframework.cloud</groupId>
                <artifactId>spring-cloud-dependencies</artifactId>
                <version>${

    spring-cloud.version}</version>
                <type>pom</type>
                <scope>import</scope>
            </dependency>
        </dependencies>
    </dependencyManagement>

    <build>
        <plugins>
            <plugin>
                <groupId>org.springframework.boot</groupId>
                <artifactId>spring-boot-maven-plugin</artifactId>
            </plugin>
        </plugins>
    </build>

    <repositories>
        <repository>
            <id>spring-milestones</id>
            <name>Spring Milestones</name>
            <url>https://repo.spring.io/milestone</url>
        </repository>
    </repositories>

</project>
配置消费服务者的yml文件
eureka:
  client:
    serviceUrl:
      defaultZone: http://localhost:8300/eureka/ ##这里端口号要与服务注册者保持一致
server:
  port: 8764
spring:
  application:
    name: service-ribbon ##name随意命名
配置消费服务者项目的启动类

这里增加了@EnableDiscoveryClient @EnableEurekaClient两个注解
@EnableDiscoveryClient注解表明服务消费者的身份
新增一个RestTemplate restTemplate 方法
import org.springframework.boot.SpringApplication;
import org.springframework.boot.autoconfigure.SpringBootApplication;
import org.springframework.cloud.client.discovery.EnableDiscoveryClient;
import org.springframework.cloud.client.loadbalancer.LoadBalanced;
import org.springframework.cloud.netflix.eureka.EnableEurekaClient;
import org.springframework.context.annotation.Bean;
import org.springframework.web.client.RestTemplate;

@SpringBootApplication
@EnableDiscoveryClient
@EnableEurekaClient
public class ConsumersApplication {


    public static void main(String[] args) {


        SpringApplication.run(ConsumersApplication.class, args);
    }

    @Bean
    @LoadBalanced
    RestTemplate restTemplate()
    {


        return new RestTemplate();
    }
}
接下来咱们去创建一个service
import org.springframework.beans.factory.annotation.Autowired;
import org.springframework.stereotype.Service;
import org.springframework.web.client.RestTemplate;

@Service
public class HelloService {


    @Autowired
    RestTemplate restTemplate;
    public String hiService(String name)
    {


        return restTemplate.getForObject("http://SERVICE-HI/hi?name=" + name, String.class);
    }
}
以及创建一个controller
import com.example.consumers.service.HelloService;
import org.springframework.beans.factory.annotation.Autowired;
import org.springframework.web.bind.annotation.RequestMapping;
import org.springframework.web.bind.annotation.RequestParam;
import org.springframework.web.bind.annotation.RestController;

@RestController
public class HelloControler {


    @Autowired
    HelloService helloService;
    @RequestMapping(value = "/hi")
    public String hi(@RequestParam String name)
    {


        return helloService.hiService(name);
    }
}
至此,服务消费者就以及完成了,让我们启动服务,浏览器输入http://localhost:8764/hi?name=admin
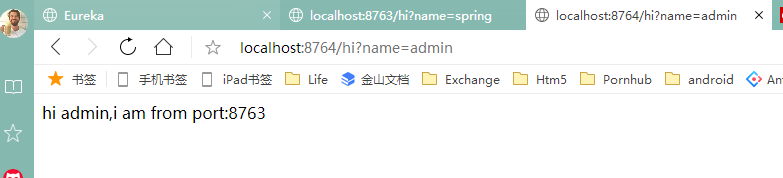
这样咱们就在服务消费者的项目访问到了服务提供者的端口
这个是服务提供者的内容,大家可以进行对比

再去康下你的服务注册中心刷新一下,就会多出两个服务

demo也是复制黏贴别人的不能运行,自己进行改动的而得以运行的,昨天刚搭建好,今天就过来分享,也是希望大家少走弯路,自己重新梳理下搭建的思路。
谢谢大家的观看,有问题请留言。或者加我wx16653144918
