Github搜索案例
一、拆分组件,搭建静态页面
此处就不带大家具体去拆分组件了,大家自己去查看文章底部的源码。
组件拆分

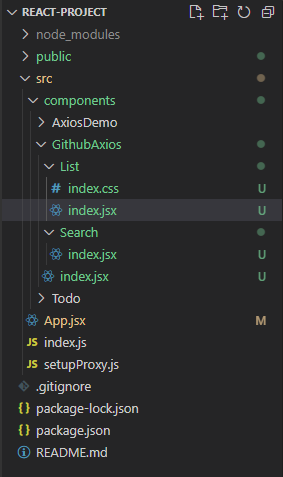
项目结构
二、发送请求获取接口数据
1、在 Search 组件中使用axios对http://localhost:5000/search/users?q=1接口进行请求,报跨域错误
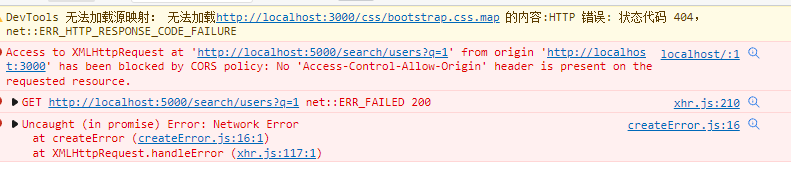
解决办法:
【React 全家桶】脚手架配置代理的两种方法——解决 React 跨域问题
/*Search/index.jsx*/
import React, {
Component } from 'react';
import axios from 'axios';
export default class Search extends Component {
search = () => {
//获取用户的输入(使用连续结构复制+重命名的方式)
const {
keyElement: {
value: name } } = this;
//发送网络请求
axios.get('/api/search/users', {
params: {
q: name
}
}).then(res => console.log('数据', res))
}
render() {
return (
<section className="jumbotron">
<h3 className="jumbotron-heading">Search Github Users</h3>
<div>
<input ref={
e => this.keyElement = e} type="text" placeholder="enter the name you search" /> <button onClick={
this.search}>Search</button>
</div>
</section>
);
}
}
/*setupProxy.js*/
const {

     createProxyMiddleware } = require('http-proxy-middleware');

module.exports = function (app) {


    app.use(
        createProxyMiddleware('/api', {

    //遇见包含/api的请求,就会触发该代理
            target: 'http://localhost:5000',//请求发给谁
            changeOrigin: true,//控制服务器收到的请求头中Host的值
            pathRewrite: {

     '^/api': '' }//重写请求路径
        })
    )
}

请求成功!!!
三、将请求的数据进行展示
/*AxiosDemo/index.jsx*/
import React, {

     Component } from 'react';
import Search from './Search'
import List from './List'

export default class GithubAxios extends Component {


    state = {

     users: [] }
    saveUsers = (users) => {


        this.setState({

     users })
    }
    render() {


        const {

     users } = this.state
        return (
            <div className="container">
                <Search saveUsers={

    this.saveUsers} />
                <List users={

    users} />
            </div>);
    }
}
/*Search/index.jsx*/
import React, {
Component } from 'react';
import axios from 'axios';
export default class Search extends Component {
search = () => {
//获取用户的输入(使用连续结构复制+重命名的方式)
const {
keyElement: {
value: name } } = this;
//发送网络请求
axios.get('/api/search/users', {
params: {
q: name
}
}).then(res => {
//将数据传给父组件
this.props.saveUsers(res.data.items)
})
}
render() {
return (
<section className="jumbotron">
<h3 className="jumbotron-heading">Search Github Users</h3>
<div>
<input ref={
e => this.keyElement = e} type="text" placeholder="enter the name you search" /> <button onClick={
this.search}>Search</button>
</div>
</section>
);
}
}
/*List/index.jsx*/
import React, {

     Component } from 'react';
import './index.css'

export default class List extends Component {


    render() {


        const {

    users} = this.props
        return (
            <div className="row">
                {


                    users.map(item => {


                        return (<div className="card" key={

    item.id}>
                            <a href={

    item.html_url} target="_blank" rel="noreferrer">
                                <img alt='avatar' src={

    item.avatar_url} style={

    {

     width: '100px' }} />
                            </a>
                            <p className="card-text">{

    item.login}</p>
                        </div>)
                    })
                }
            </div>
        );
    }
}
显示成功!!
四、进一步优化
在List组件添加一些状态:
第一次访问的时候:显示欢迎;
搜索的时候:Loading->内容显示;
报错的时候:显示错误信息
GithubAxios/index.jsx
import React, {

     Component } from 'react';
import Search from './Search'
import List from './List'

export default class GithubAxios extends Component {


    state = {

     users: [], isFirst: true, isLoading: false, error: '' }
    updateState = (state) => {


        this.setState(state)
    }
    render() {


        return (
            <div className="container">
                <Search updateState={

    this.updateState} />
                <List {

    ...this.state} />
            </div>);
    }
}
Search/index.jsx
import React, {
Component } from 'react';
import axios from 'axios';
export default class Search extends Component {
//按钮点击事件
search = () => {
//获取用户的输入(使用连续结构复制+重命名的方式)
const {
keyElement: {
value: name } } = this;
this.props.updateState({
isFirst: false,
isLoading: true,
error: ''
})
//发送网络请求
axios.get('/api/search/users', {
params: {
q: name
}
}).then(res => {
this.props.updateState({
users: res.data.items,
isFirst: false,
isLoading: false,
error: ''
})
}, err => {
//将数据传给父组件
this.props.updateState({
isFirst: false,
isLoading: false,
error: err.message
})
})
}
render() {
return (
<section className="jumbotron">
<h3 className="jumbotron-heading">Search Github Users</h3>
<div>
<input ref={
e => this.keyElement = e} type="text" placeholder="enter the name you search" /> <button onClick={
this.search}>Search</button>
</div>
</section>
);
}
}
List/index.jsx
import React, {

     Component } from 'react';
import './index.css'

export default class List extends Component {


    render() {


        const {

     users, isFirst, isLoading, error } = this.props
        return (
            <div className="row">
                {

    isFirst ? <h2>欢迎进入</h2> :
                    isLoading ? <h2>Loading...</h2> :
                        error ? <h2>出错了:{

    error}</h2> :
                            users.map(item => {


                                return (<div className="card" key={

    item.id}>
                                    <a href={

    item.html_url} target="_blank" rel="noreferrer">
                                        <img alt='avatar' src={

    item.avatar_url} style={

    {

     width: '100px' }} />
                                    </a>
                                    <p className="card-text">{

    item.login}</p>
                                </div>)
                            })
                }
            </div>
        );
    }
}
最终实现效果!!!
五、如何直接进行任何组件间的通信
以往的做法都是通过父组件进行通信,现在介绍消息订阅-发布机制的方式让组件之间直接进行通信。
我重新创建一个组件叫做ChildPubsub,内容与Github搜索案例一致,但是实现方式不太一样,需要借助pubsub-js这个库。
1、npm install pubsub-js(通过这个库进行消息的发布和订阅)
2、因为List组件需要获取Search组件的数据,所以List组件要进行
订阅消息,而Search组件进行发布消息,不需要在父组件中设置state状态和进行props传递。
3、因为消息订阅发布机制不涉及父组件,所以state状态需要直接设定在List组件
state = {

     users: [], isFirst: true, isLoading: false, error: '' }
注意:render函数中的值也要直接从state中取。
4、在List组件中使用
PubSub.subscribe订阅消息
//组件挂载完成时订阅消息
componentDidMount() {


    //订阅消息(设置token的目的是我们要在组件即将卸载的时候取消订阅消息)
    this.token = PubSub.subscribe('updateState', (_, stateObj) => {


        this.setState(stateObj)
    })
}
5、在Search组件中使用
PubSub.publish发布消息
/*Search/index.jsx*/
import React, {
Component } from 'react';
import axios from 'axios';
import PubSub from 'pubsub-js';
export default class Search extends Component {
//按钮点击事件
search = () => {
//获取用户的输入(使用连续结构复制+重命名的方式)
const {
keyElement: {
value: name } } = this;
//发布消息
PubSub.publish('updateState', {
isFirst: false,
isLoading: true,
error: ''
})
//发送网络请求
axios.get('/api/search/users', {
params: {
q: name
}
}).then(res => {
//发布消息
PubSub.publish('updateState', {
users: res.data.items,
isFirst: false,
isLoading: false,
error: ''
})
}, err => {
//发布消息
PubSub.publish('updateState', {
isFirst: false,
isLoading: false,
error: err.message
})
})
}
render() {
return (
<section className="jumbotron">
<h3 className="jumbotron-heading">Search Github Users</h3>
<div>
<input ref={
e => this.keyElement = e} type="text" placeholder="enter the name you search" /> <button onClick={
this.search}>Search</button>
</div>
</section>
);
}
}
6、List组件在即将销毁的时候使用
PubSub.unsubscribe进行取消订阅
//组件即将被卸载
componentWillUnmount() {


    //取消订阅
    PubSub.unsubscribe(this.token);
}
兄弟组件之间传值成功,Pubsub-js适用于任何组件!!!
源码地址:https://gitee.com/daiwanghao/react-family-bucket.git
以上就是Github搜索用户案例(包括Axios和代理技术,以及Pubsub实现兄弟组件通信,内含源码)内容,请关注《React 全家桶》专栏。
我会将自己平时项目中常见的问题以及笔试面试的知识在CSDN与大家分享,一起进步,加油。