前言
B站讲解视频
我的研究生毕业论文方向就是时空行为检测,所以,slowfast和ava是我重点搞的,我的博客主页也有很多这些相关内容。
终于,到了标注数据这一块了,为了更简单的标注数据,我要做的这部分的数据包含大量的人,每张图片有30到40个人,如果要手动框人,再做行为标注,那是非常大的工作量,为了减小工作量,先使用faster rcnn把人的坐标算出来,然后倒入via中,实现算法的自动框人。
1 准备
1.1 detectron2安装及faster rcnn运行
1.1.1 detectron2官方网站
1.1.2 安装步骤
安装:
pip install -U torch torchvision cython
pip install -U 'git+https://github.com/facebookresearch/fvcore.git' 'git+https://github.com/cocodataset/cocoapi.git#subdirectory=PythonAPI'
git clone https://github.com/facebookresearch/detectron2 detectron2_repo
pip install -e detectron2_repo
1.1.3 Faster RCNN目标检测
在终端输入:
python3 demo.py --config-file ../configs/COCO-Detection/faster_rcnn_R_50_FPN_3x.yaml \
  --input ../img/1.jpg \
  --output ../img/1_1.jpg \
  --opts MODEL.WEIGHTS detectron2://COCO-Detection/faster_rcnn_R_50_FPN_3x/137849458/model_final_280758.pkl
1.1.4 参考
【Faster RCNN & detectron2】detectron2实现Faster RCNN目标检测
1.2 via的安装及使用
安装很简单,下载下来后,点开via.html就可以了
下载及使用指南:via官网
我下载的是2.0的版本,如下

2 faster rcnn 算法导出人类候选框为via格式
2.1 新建python脚本
在目录/detectron2_repo/demo/下新建一个python脚本,名字为:myvia.py

将下面的代码复制到myvia.py中
#Copyright (c) Facebook, Inc. and its affiliates.
import argparse
import glob
import multiprocessing as mp
import os
import time
import cv2
import tqdm
import os

from detectron2.config import get_cfg
from detectron2.data.detection_utils import read_image
from detectron2.utils.logger import setup_logger

from predictor import VisualizationDemo

import csv
import pandas as pd  #导入pandas包
import re

# constants
WINDOW_NAME = "COCO detections"


def setup_cfg(args):
    # load config from file and command-line arguments
    cfg = get_cfg()
    # To use demo for Panoptic-DeepLab, please uncomment the following two lines.
    # from detectron2.projects.panoptic_deeplab import add_panoptic_deeplab_config  # noqa
    # add_panoptic_deeplab_config(cfg)
    cfg.merge_from_file(args.config_file)
    cfg.merge_from_list(args.opts)
    # Set score_threshold for builtin models
    cfg.MODEL.RETINANET.SCORE_THRESH_TEST = args.confidence_threshold
    cfg.MODEL.ROI_HEADS.SCORE_THRESH_TEST = args.confidence_threshold
    cfg.MODEL.PANOPTIC_FPN.COMBINE.INSTANCES_CONFIDENCE_THRESH = args.confidence_threshold
    cfg.freeze()
    return cfg


def get_parser():
    parser = argparse.ArgumentParser(description="Detectron2 demo for builtin configs")
    parser.add_argument(
        "--config-file",
        default="configs/quick_schedules/mask_rcnn_R_50_FPN_inference_acc_test.yaml",
        metavar="FILE",
        help="path to config file",
    )
    parser.add_argument("--webcam", action="store_true", help="Take inputs from webcam.")
    parser.add_argument("--video-input", help="Path to video file.")
    parser.add_argument(
        "--input",
        nargs="+",
        help="A list of space separated input images; "
        "or a single glob pattern such as 'directory/*.jpg'",
    )
    parser.add_argument(
        "--output",
        help="A file or directory to save output visualizations. "
        "If not given, will show output in an OpenCV window.",
    )

    parser.add_argument(
        "--confidence-threshold",
        type=float,
        default=0.5,
        help="Minimum score for instance predictions to be shown",
    )
    parser.add_argument(
        "--opts",
        help="Modify config options using the command-line 'KEY VALUE' pairs",
        default=[],
        nargs=argparse.REMAINDER,
    )
    return parser


if __name__ == "__main__":
    mp.set_start_method("spawn", force=True)
    args = get_parser().parse_args()
    setup_logger(name="fvcore")
    logger = setup_logger()
    logger.info("Arguments: " + str(args))


    #图片的输入和输出文件夹
    imgOriginalPath = './img/original/'
    imgDetectionPath= './img/detection'

    # 读取文件下的图片名字
    for i,j,k in os.walk(imgOriginalPath):
        # k 存储了图片的名字
        #imgInputPaths用于存储图片完整地址
        imgInputPaths = k
        countI=0
        for namek in k:
            #循环将图片的完整地址加入imgInputPaths中
            imgInputPath = imgOriginalPath + namek
            imgInputPaths[countI]=imgInputPath
            countI = countI + 1
        break

    #修改args里输入图片的里路径
    args.input = imgInputPaths

    #修改args里输出图片的路径
    args.output = imgDetectionPath

    cfg = setup_cfg(args)
    demo = VisualizationDemo(cfg)

    #创建csv
    csvFile = open("./img/detection.csv", "w+",encoding="gbk")
    #创建写的对象
    CSVwriter = csv.writer(csvFile)
    #先写入columns_name
    #写入列的名称
    CSVwriter.writerow(["filename","file_size","file_attributes","region_count","region_id","region_shape_attributes","region_attributes"])
    #写入多行用CSVwriter
    #写入多行
    #CSVwriter.writerows([[1,a,b],[2,c,d],[3,d,e]])
    #csvFile.close()
    #https://blog.csdn.net/xz1308579340/article/details/81106310?utm_medium=distribute.pc_relevant.none-task-blog-2%7Edefault%7EBlogCommendFromMachineLearnPai2%7Edefault-3.control&dist_request_id=&depth_1-utm_source=distribute.pc_relevant.none-task-blog-2%7Edefault%7EBlogCommendFromMachineLearnPai2%7Edefault-3.control

    if args.input:
        if len(args.input) == 1:
            args.input = glob.glob(os.path.expanduser(args.input[0]))
            assert args.input, "The input path(s) was not found"
        for path in tqdm.tqdm(args.input, disable=not args.output):
            # use PIL, to be consistent with evaluation
            img = read_image(path, format="BGR")
            start_time = time.time()
            predictions,visualized_output = demo.run_on_image(img)

            #只要检测结果是人的目标结果
            mask = predictions["instances"].pred_classes == 0
            pred_boxes = predictions["instances"].pred_boxes.tensor[mask]

            #在路径中正则匹配图片的名称
            ImgNameT = re.findall(r'[^\\/:*?"<>|\r\n]+$', path)
            ImgName = ImgNameT[0]


            #获取图片大小(字节)
            ImgSize = os.path.getsize(path)

            #下面的为空(属性不管)
            img_file_attributes="{"+"}"

            #每张图片检测出多少人
            img_region_count = len(pred_boxes)

            #region_id表示在这张图中,这是第几个人,从0开始数
            region_id = 0

            #region_attributes 为空
            img_region_attributes = "{"+"}"

            #循环图中检测出的人的坐标,然后做修改,以适应via
            for i in pred_boxes:

                #将i中的数据类型转化为可以用的数据类型(list)
                iList = i.cpu().numpy().tolist()

                #数据取整,并将坐标数据放入到
                img_region_shape_attributes = {

    "\"name\"" : "\"rect\"" , "\"x\"" : int(iList[0]) , "\"y\"" : int(iList[1]) ,"\"width\"" : int(iList[2]-iList[0]) , "\"height\"" : int(iList[3]-iList[1]) }

                #将信息写入csv中
                CSVwriter.writerow([ImgName,ImgSize,'"{}"',img_region_count,region_id,str(img_region_shape_attributes),'"{}"'])

                region_id = region_id + 1

            logger.info(
                "{}: {} in {:.2f}s".format(
                    path,
                    "detected {} instances".format(len(predictions["instances"]))
                    if "instances" in predictions
                    else "finished",
                    time.time() - start_time,
                )
            )

            if args.output:
                if os.path.isdir(args.output):
                    assert os.path.isdir(args.output), args.output
                    out_filename = os.path.join(args.output, os.path.basename(path))
                else:
                    assert len(args.input) == 1, "Please specify a directory with args.output"
                    out_filename = args.output
                visualized_output.save(out_filename)
            else:
                cv2.namedWindow(WINDOW_NAME, cv2.WINDOW_NORMAL)
                cv2.imshow(WINDOW_NAME, visualized_output.get_image()[:, :, ::-1])
                if cv2.waitKey(0) == 27:
                    break  # esc to quit

    #关闭csv
    csvFile.close()
2.2 相关文件
2.2.1 img
在detectron2_repo/目录下新建img文件,这个文件用来存储输入和输出图片

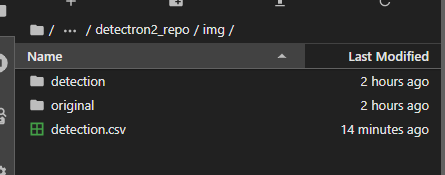
2.2.2 original、detection、detection.csv
在img文件夹下创建original、detection、detection.csv
original用于存放输入的图片
detection用于存放检测后的图片
detection.csv是faster rcnn算法计算出来的人的坐标数据,然后转换为via可是别的csv文档
2.3 图片上传
在original文件夹中上传图片,注意顺序,这个顺序要和后面via图片顺序一致

2.4 运行
准备好上面的后,在终端进入/detectron2_repo的目录,输入下面的命令:
python3 ./demo/myvia.py --config-file configs/COCO-Detection/faster_rcnn_R_50_FPN_3x.yaml --opts MODEL.WEIGHTS detectron2://COCO-Detection/faster_rcnn_R_50_FPN_3x/137849458/model_final_280758.pkl


2.5 查看detection.csv
接下来查看csv文件,结果如下:

3 via自动标注
3.1 进入via
首先进入到via的界面
下图是从从官网下载的2.0版本的via,点开via.html

下图是进入via后的样子

3.2 导入图片
点击下图显示的 Add Files

选择多个图片

导入图片后的样子

3.4 修改detection.csv
使用notpad++(其它编译器也可以)打开detection.csv,如下图

使用替换功能,把全文的单引号全部删除(我使用替换功能,把 ’ 替换为 空),如下图所示

3.3 导入detection.csv
在Annotation中选择 Import Annotations (from csv),在这里把detection.csv添加

导入csv后,就应该出现如下结果:


这些人就被自动框出来了。