在资讯展示类app中,我们或多或少不能避免搜索这个功能模块,本文在常见的搜索功能基础上增加了热门标签,清除输入框等丰富用户体验的功能。
我们看下效果。
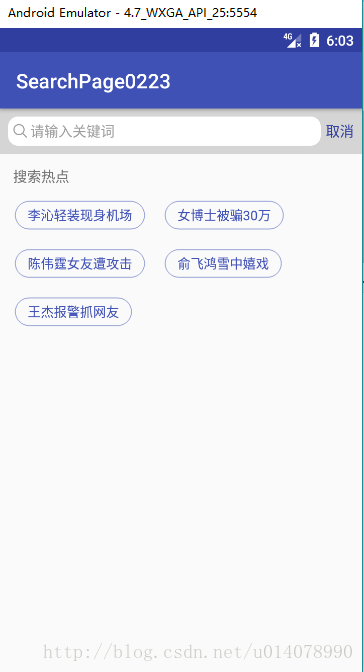
初始界面:

点击任意一个热门标签的效果:
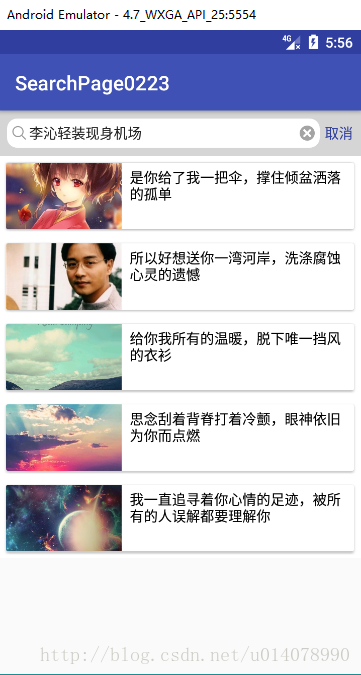
点击文本输入框清除按钮的效果:
下面详细讲下实现步骤:
1.搭建布局之前,我们先写两个自定义view,一个是带清空按钮的文本输入框ClearEditTextView,一个是标签流布局LableLayoutView。
ClearEditTextView.java
新建一个ClearEditTextView的java文件,让它继承EditText。
public class ClearEditTextView extends EditText生成三个构造函数
public ClearEditTextView(Context context) {
    this(context, null);
}

public ClearEditTextView(Context context, AttributeSet attrs) {
    this(context, attrs, android.R.attr.editTextStyle);
}

public ClearEditTextView(Context context, AttributeSet attrs, int defStyleAttr) {
    super(context, attrs, defStyleAttr);
    init();//初始化
}
先定义一个控制EditText右边的文本清除按钮的隐藏显示的方法setClearIcon方法,带boolean类型的参数。
private void setClearIcon(boolean isShow){
    //当isShow为true时候,就取我们定义的mClearDrawable值即清除按钮,反之就取null。
    Drawable drawable= isShow? mClearDrawable: null;
    setCompoundDrawables(getCompoundDrawables()[0], getCompoundDrawables()[1], drawable, getCompoundDrawables()[3]);
}mClearDrawable= getResources().getDrawable(R.mipmap.search_clear_pressed);
mClearDrawable.setBounds(0, 0, mClearDrawable.getIntrinsicWidth(), mClearDrawable.getIntrinsicHeight));默认设置删除按钮隐藏
setClearIcon(false);写一个listener监听EditText焦点变化,以根据输入text的长度控制删除按钮的显示和隐藏。
setOnFocusChangeListener(this);一个监听文本内容变化的listener
addTextChangeListener(this);接下来让主类实现onFocusChangeListener这个接口,生成onFoucsChange方法。在这个方法里,
public void onFocusChange(View view, boolean hasFocus){
    if(hasFocus){
        setClearIcon(getText.length> 0)
    }else{
        setClearIcon()
    }
}
方法,我们在onTextChanged方法里设置当文本输入框里的文本畅读大于0时,就显示删除按钮。
public void onTextChanged(CharSequence s, int start, int before, int count){
    super.onTextChanged(s, start, before, count);
    setClearIcon(s.length()> 0);
}
这里这个自定义EditText我们就定义完了,下来是其完整代码。
package com.fantasychong.searchpage0223;

import android.annotation.SuppressLint;
import android.content.Context;
import android.graphics.drawable.Drawable;
import android.text.Editable;
import android.text.TextWatcher;
import android.util.AttributeSet;
import android.view.MotionEvent;
import android.view.View;
import android.widget.EditText;
/**
 * Created by lenovo on 2018/2/23.
 */
@SuppressLint("AppCompatCustomView")
public class ClearEditTextView extends EditText implements View.OnFocusChangeListener, TextWatcher {
    public Drawable mClearDrawable;
    public ClearEditTextView(Context context) {
        this(context, null);
    }
    public ClearEditTextView(Context context, AttributeSet attrs) {
        this(context, attrs, android.R.attr.editTextStyle);
    }
    public ClearEditTextView(Context context, AttributeSet attrs, int defStyleAttr) {
        super(context, attrs, defStyleAttr);
        init();//初始化
    }
    private void init() {
        mClearDrawable= getResources().getDrawable(R.mipmap.search_clear_pressed);
        //设置删除按钮的边界
        mClearDrawable.setBounds(0, 0, mClearDrawable.getIntrinsicWidth(), mClearDrawable.getIntrinsicHeight());
        //默认隐藏删除按钮
        setClearIcon(false);
        //监听EditText焦点变化,以根据text长度控制删除按钮的显示和隐藏
        setOnFocusChangeListener(this);
        //监听文本内容变化
        addTextChangedListener(this);
    }
    /**
     * 控制EditText右边的文本清除按钮的隐藏和显示
     */
    private void setClearIcon(boolean isShow) {
        //当isShow为true时取mClearDrawable的值,为false时取null
        Drawable drawable= isShow? mClearDrawable: null;
        setCompoundDrawables(getCompoundDrawables()[0], getCompoundDrawables()[1], drawable, getCompoundDrawables()[3]);
    }
    /**
     * 获取焦点并且文本长度大于0时候显示清除按钮(右边的叉号)
     * @param v
     * @param hasFocus
     */
    @Override
    public void onFocusChange(View v, boolean hasFocus) {
        if (hasFocus){
            setClearIcon(getText().length()> 0);
        }else{
            setClearIcon(false);
        }
    }
    @Override
    public void beforeTextChanged(CharSequence s, int start, int count, int after) {
    }
    /**
     * 文本内容变化时候回调
     * 当文本长度大于0时显示删除按钮,否则隐藏
     * @param s
     * @param start
     * @param before
     * @param count
     */
    @Override
    public void onTextChanged(CharSequence s, int start, int before, int count) {
        super.onTextChanged(s, start, before, count);
        setClearIcon(s.length()> 0);
    }
    @Override
    public void afterTextChanged(Editable s) {
    }
}
2.标签流LabelLayoutView的自定义view文件LableLayoutView.java
package com.fantasychong.searchpage0223;

import android.content.Context;
import android.util.AttributeSet;
import android.view.View;
import android.view.ViewGroup;
import java.util.ArrayList;
import java.util.List;

/**
 * Created by lenovo on 2018/1/16.
 */

public class LabelLayoutView extends ViewGroup {


    // 存储所有子View
    private List<List<View>> mAllChildViews = new ArrayList<>();
    // 每一行的高度
    private List<Integer> mLineHeight = new ArrayList<>();

    public LabelLayoutView(Context context) {
        this(context, null);
    }

    public LabelLayoutView(Context context, AttributeSet attrs) {
        this(context, attrs, 0);
    }

    public LabelLayoutView(Context context, AttributeSet attrs, int defStyleAttr) {
        super(context, attrs, defStyleAttr);
    }

    @Override
    protected void onMeasure(int widthMeasureSpec, int heightMeasureSpec) {
        //父控件传进来的宽度和高度以及对应的测量模式
        int sizeWidth= MeasureSpec.getSize(widthMeasureSpec);
        int modeWidth= MeasureSpec.getMode(widthMeasureSpec);
        int sizeHeight= MeasureSpec.getSize(heightMeasureSpec);
        int modeHeight= MeasureSpec.getMode(heightMeasureSpec);
        //如果当前ViewGroup的宽高为wrap_content的情况
        int width= 0;
        int height= 0;
        //记录每一行的宽度和高度
        int lineWidth= 0;
        int lineHeight= 0;
        //获取子view的个数
        int childCount= getChildCount();
        for (int i= 0; i< childCount; i++){
            View child= getChildAt(i);
            //测量子view的宽和高
            measureChild(child, widthMeasureSpec, heightMeasureSpec);
            //得到LayoutParams
            MarginLayoutParams lp= (MarginLayoutParams) getLayoutParams();
            //子view占据的宽度
            int childWidth= child.getMeasuredWidth()+ lp.leftMargin+ lp.rightMargin;
            //子view占据的高度
            int childHeight= child.getMeasuredHeight()+ lp.topMargin+ lp.bottomMargin;
            //换行时候
            if (lineWidth+ childWidth> sizeWidth){
                //对比得到最大的宽度
                width= Math.max(width, lineWidth);
                //重置lineWidth
                lineWidth= childWidth;
                //记录行高
                height+= lineHeight;
                lineHeight= childHeight;
            }else {
                //不换行时候
                //叠加行宽
                lineWidth+= childWidth;
                //得到最大行高
                lineHeight= Math.max(lineHeight, childHeight);
            }
            //处理最后一个子view的情况
            if (i== childCount- 1){
                width= Math.max(width, lineWidth);
                height+= lineHeight;
            }
        }
        setMeasuredDimension(modeWidth== MeasureSpec.EXACTLY? sizeWidth: width,
                modeHeight== MeasureSpec.EXACTLY? sizeHeight: height);
        super.onMeasure(widthMeasureSpec, heightMeasureSpec);
    }

    @Override
    protected void onLayout(boolean changed, int l, int t, int r, int b) {
        mAllChildViews.clear();
        mLineHeight.clear();
        // 获取当前ViewGroup的宽度
        int width = getWidth();
        int lineWidth = 0;
        int lineHeight = 0;
        // 记录当前行的view
        List<View> lineViews = new ArrayList<View>();
        int childCount = getChildCount();
        for(int i = 0;i < childCount; i ++){
            View child = getChildAt(i);
            MarginLayoutParams lp = (MarginLayoutParams) child.getLayoutParams();
            int childWidth = child.getMeasuredWidth();
            int childHeight = child.getMeasuredHeight();
            // 如果需要换行
            if(childWidth + lineWidth + lp.leftMargin + lp.rightMargin > width){
                // 记录LineHeight
                mLineHeight.add(lineHeight);
                // 记录当前行的Views
                mAllChildViews.add(lineViews);
                // 重置行的宽高
                lineWidth = 0;
                lineHeight = childHeight + lp.topMargin + lp.bottomMargin;
                // 重置view的集合
                lineViews = new ArrayList();
            }
            lineWidth += childWidth + lp.leftMargin + lp.rightMargin;
            lineHeight = Math.max(lineHeight, childHeight + lp.topMargin + lp.bottomMargin);
            lineViews.add(child);
        }
        // 处理最后一行
        mLineHeight.add(lineHeight);
        mAllChildViews.add(lineViews);
        // 设置子View的位置
        int left = 0;
        int top = 0;
        // 获取行数
        int lineCount = mAllChildViews.size();
        for(int i = 0; i < lineCount; i ++){
            // 当前行的views和高度
            lineViews = mAllChildViews.get(i);
            lineHeight = mLineHeight.get(i);
            for(int j = 0; j < lineViews.size(); j ++){
                View child = lineViews.get(j);
                // 判断是否显示
                if(child.getVisibility() == View.GONE){
                    continue;
                }
                MarginLayoutParams lp = (MarginLayoutParams) child.getLayoutParams();
                int cLeft = left + lp.leftMargin;
                int cTop = top + lp.topMargin;
                int cRight = cLeft + child.getMeasuredWidth();
                int cBottom = cTop + child.getMeasuredHeight();
                // 进行子View进行布局
                child.layout(cLeft, cTop, cRight, cBottom);
                left += child.getMeasuredWidth() + lp.leftMargin + lp.rightMargin;
            }
            left = 0;
            top += lineHeight;
        }
    }

    /**
     * 与当前ViewGroup对应的LayoutParams
     */
    @Override
    public LayoutParams generateLayoutParams(AttributeSet attrs) {
        return new MarginLayoutParams(getContext(), attrs);
    }
}
3.接下来我们开始搭建主界面,主界面主要由顶部的输入框,下方的recyclerview和标签流布局LableLayout
这是xml文件,没什么难度,直接调取前面的自定义view就可以了
<?xml version="1.0" encoding="utf-8"?>
<LinearLayout xmlns:android="http://schemas.android.com/apk/res/android"
    xmlns:app="http://schemas.android.com/apk/res-auto"
    xmlns:tools="http://schemas.android.com/tools"
    android:layout_width="match_parent"
    android:layout_height="match_parent"
    android:orientation="vertical"
    tools:context="com.fantasychong.searchpage0223.MainActivity">

    <LinearLayout
        android:id="@+id/main_ll"
        android:layout_width="match_parent"
        android:layout_height="45dp"
        android:padding="8dp"
        android:background="#26000000"
        android:orientation="horizontal">

        <com.fantasychong.searchpage0223.ClearEditTextView
            android:id="@+id/main_et"
            android:layout_width="0dp"
            android:layout_height="match_parent"
            android:layout_weight="1"
            android:hint="请输入关键词"
            android:padding="5dp"
            android:lines="1"
            android:singleLine="true"
            android:imeOptions="actionSearch"
            android:textSize="14sp"
            android:drawablePadding="3dp"
            android:drawableLeft="@mipmap/edittext_image"
            android:background="@drawable/edit_shape" />

        <TextView
            android:id="@+id/main_back"
            android:layout_width="wrap_content"
            android:layout_height="wrap_content"
            android:text="取消"
            android:layout_marginLeft="5dp"
            android:layout_gravity="center_vertical"
            android:textColor="@color/colorPrimaryDark"
            android:textSize="14sp"
            />
    </LinearLayout>

    <FrameLayout
        android:layout_width="match_parent"
        android:layout_height="match_parent">

        <android.support.v7.widget.RecyclerView
            android:id="@+id/main_rv"
            android:layout_width="match_parent"
            android:layout_height="match_parent"/>
        <LinearLayout
            android:id="@+id/main_labelll"
            android:layout_width="match_parent"
            android:layout_height="match_parent"
            android:orientation="vertical">
            <TextView
                android:layout_width="wrap_content"
                android:layout_height="wrap_content"
                android:text="搜索热点"
                android:paddingLeft="13dp"
                android:paddingTop="13dp"
                />
            <com.fantasychong.searchpage0223.LabelLayoutView
                android:id="@+id/main_label"
                android:layout_width="match_parent"
                android:layout_height="wrap_content"/>
        </LinearLayout>
    </FrameLayout>
</LinearLayout>
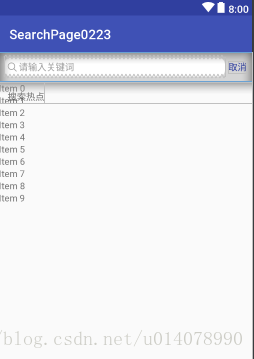
绘制完毕后预览布局是这样的
4.布局定义完毕后,我们就可以编辑主活动MainActivity了
进行完毕一些常规的控件定义后,我们先实现文本输入框右边新增的删除按钮的点击清除文本框的功能,因为EditText
没有直接的onClick监听,所以我们需要用onTouch来模拟点击功能。
给ClearEditTextView对象先设置onTouchListener触摸监听。
et.setOnTouchListener(new View.OnTouchListener() {
            @Override
            public boolean onTouch(View v, MotionEvent event) {
                if (et.getCompoundDrawables()[2]!= null){
                    //当抬起时
                    if (event.getAction()== MotionEvent.ACTION_UP){
                        //当点击位置的X坐标大于EditText宽度减去右间距减去清除图标的宽度并且小于EditText宽度减去右间距之间的区域,即清除图标的位置
                        boolean xTouchable= event.getX()> (et.getWidth()- et.getPaddingRight()- et.mClearDrawable.getIntrinsicWidth())
                                &&(event.getX()< (et.getWidth()- et.getPaddingRight()));
                        boolean yTouchable= event.getY()> (et.getHeight()- et.getPaddingBottom()- et.mClearDrawable.getIntrinsicHeight())
                                &&(event.getY()< (et.getHeight()+ et.mClearDrawable.getIntrinsicHeight())/ 2);
                        //清除文本
                        if (xTouchable&& yTouchable){
                            et.setText("");
                            if (searchList.size()!= 0) {
                                searchList.clear();
                                searchAdapter.notifyDataSetChanged();
                                labelll.setVisibility(View.VISIBLE);
                            }
                        }
                    }
                }
                return false;
            }
        });
仔细分析这段代码还是挺好理解的,我们设置了触摸监听仅仅限于右边的清除按钮的大小范围才会触发清空列表,清空文本输入框的功能。
接下来设置当clearEditText获取焦点可输入文本时,键盘会出现搜索按钮或者文字。点击搜索后下方会出现我们预先写好的列表,根据实际开发需求,这里一般都是获取的到的网络数据,并且将热门标签隐藏。
et.setOnEditorActionListener(new TextView.OnEditorActionListener() {
            @Override
            public boolean onEditorAction(TextView v, int actionId, KeyEvent event) {
                if (actionId== EditorInfo.IME_ACTION_SEARCH){
                    if ("".equals(et.getText().toString())){
                        Toast.makeText(getApplicationContext(), "请输入搜索内容", Toast.LENGTH_SHORT).show();
                    }else {
                        ((InputMethodManager)et.getContext().getSystemService(Context.INPUT_METHOD_SERVICE))
                                .hideSoftInputFromWindow(getCurrentFocus().getWindowToken(), InputMethodManager.HIDE_NOT_ALWAYS);
                        searchList.clear();
                        initData();
                        labelll.setVisibility(View.GONE);
                        LinearLayoutManager manager= new LinearLayoutManager(getApplicationContext());
                        rv.setLayoutManager(manager);
                        searchAdapter= new SearchAdapter(searchList);
                        rv.setAdapter(searchAdapter);
                    }
                    return true;
                }
                return false;
            }
        });
接下来设置热门标签流的属性
这里我们每个标签我们使用了superTextView的开源库,可以方便地设置标签的弧度,背景颜色,文字颜色等,而不用再去设置复杂的背景XML文件。
 private void initLabel() {
        ViewGroup.MarginLayoutParams layoutParams= new ViewGroup.MarginLayoutParams(ViewGroup.LayoutParams.WRAP_CONTENT, ViewGroup.LayoutParams.WRAP_CONTENT);
        layoutParams.setMargins(30, 30, 10, 10);
        for (int i= 0; i< labelList.length; i++){
            SuperTextView textView= new SuperTextView(this);
            textView.setTag(i);
            textView.setTextSize(13);
            textView.setText(labelList[i]);
            textView.setCorner(40);
            textView.setStrokeWidth(1);
            textView.setStrokeColor(getResources().getColor(R.color.colorPrimary));
            textView.setPadding(25,10, 25, 10);
            textView.setTextColor(getResources().getColor(R.color.colorPrimary));
            label.addView(textView, layoutParams);
            final int finalI = i;
            textView.setOnClickListener(new View.OnClickListener() {
                @Override
                public void onClick(View v) {
                    ll.setFocusable(true);
                    ll.setFocusableInTouchMode(true);
                    ll.requestFocus();
                    et.getText().clear();
                    et.setText(labelList[finalI]);
                    ((InputMethodManager)et.getContext().getSystemService(Context.INPUT_METHOD_SERVICE))
                            .hideSoftInputFromWindow(getCurrentFocus().getWindowToken(), InputMethodManager.HIDE_NOT_ALWAYS);
                    searchList.clear();
                    initData();
                    labelll.setVisibility(View.GONE);
                    LinearLayoutManager manager= new LinearLayoutManager(getApplicationContext());
                    rv.setLayoutManager(manager);
                    searchAdapter= new SearchAdapter(searchList);
                    rv.setAdapter(searchAdapter);
                }
            });
        }
    }
这里值得一提的是每个子标签的onClick点击事件,和上方的输入文本搜索一样,这里也是点击后,清空原先的数据list,并将标签上的文字自动输入到文本输入框中,然后把新的数据重新加到list中交给recyclerview来显示了。
至此全部都完成了,欢迎下载体验~
下载链接:点击打开链接