import numpy as np
import pandas as pd
import xlrd, xlwt
import xlsxwriter
path='./' #current directory
Generating Workbooks (.xls)
a major drawback of xlwt is that it can only write spreadsheet files compatible with Microsoft Excel 97/2000/XP/2003,
OpenOffice.org Calc, and Gnumeric — i.e., those with the suffix .xls.
#First, the Workbook object wb. Note that this is an in-memory version of the workbook only (so far)
wb = xlwt.Workbook()
wb
![]()
#The second step is to add one or multiple sheets to the Workbook object:
wb.add_sheet('first_sheet', cell_overwrite_ok = True)
![]()
#We now have one Worksheet object, which has index number 0
wb.get_active_sheet() #index number==0
![]()
#work with the sheet, define an alias
ws_1 = wb.get_sheet(0)
ws_1
![]()
#these two steps — instantiation and alias definition — can be combined into a single step:
ws_2 = wb.add_sheet('second_sheet') #instantiation and alias definition
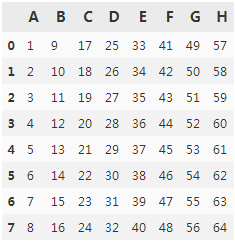
#Both Worksheet objects are still empty. Therefore, let us generate a NumPy ndarray object containing some numbers:
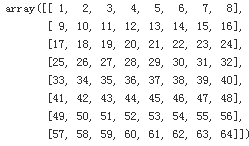
data = np.arange(1,65).reshape((8,8))
data
#Using the write method and providing row and column information (with zero-based
#indexing), data is easily written to a certain cell in a certain worksheet:
ws_1.write(0,0,100)
#write 100 in cell "A1"
print(data[0,0])
![]()
print(data.shape[0])
print(data.shape[1])
![]()
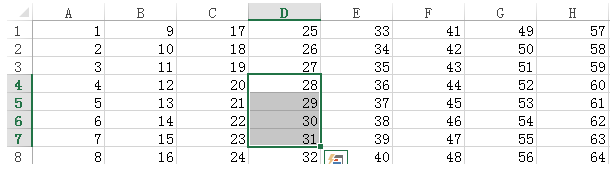
#This way, the sample data can be written “in bulk” to the two Worksheet objects:
for r in range(data.shape[0]):
for c in range(data.shape[1]):
ws_1.write( r,c,str(data[r,c]) )
ws_2.write( r,c,str(data[c,r]) )
wb.save(path+'workbook.xls') #workbook's Name = workbook.xls
![]()


Generating Workbooks (.xslx)
wb = xlsxwriter.Workbook(path + 'workbook.xlsx')
#Second, the Worksheet objects:
ws_1 = wb.add_worksheet('first_sheet')
ws_2 = wb.add_worksheet('second_sheet')
#Third, we write data to the Worksheet objects:
for r in range(data.shape[0]): # data.shape[0] : rows
for c in range(data.shape[1]): # data.shape[1] : cols
ws_1.write(r, c, data[r,c])
ws_2.write(r, c, data[c,r])
#Fourth, we close the Workbook file object:
wb.close()
![]()


path=%pwd #获取当前工作目录路径
path
![]()
%cd #回到根目录
![]()
%pwd #获取当前工作目录路径
![]()
import os
os.chdir(path) #改变当前目录
os.getcwd() #获取当前工作目录路径
![]()
os.listdir(path) #列出文件夹下所有的目录与文件
![]()
#xlsxwriter has many more options to generate Workbook objects, for example with
#charts. Consider the following code
wb = xlsxwriter.Workbook(path +'chart.xlsx')
ws = wb.add_worksheet() #Sheet1
#write cumsum of random values in first column
values = np.random.standard_normal(15).cumsum()
values

ws.write_column('A1', values) #in the current worksheet
![]()
#create a new chart object
chart = wb.add_chart({'type': 'line'})
#add a series to the chart
chart.add_series({'values': '=Sheet1!$A$1:$A$15',
'marker':{'type':'diamond'},
})
#series with markers (here:diamond)
#insert the chart
ws.insert_chart('C1', chart)
wb.close()
![]()

Reading from Workbooks
The sister library xlrd is responsible for reading data from spreadsheet files (i.e., workbooks):
book = xlrd.open_workbook(path + '\workbook.xlsx')
book
![]()
#Once a workbook is opened, the sheet_names method provides the names of all
#Worksheet objects in this particular Workbook object:
book.sheet_names()
![]()
#Worksheets can be accessed via their names or index values:
sheet1 = book.sheet_by_name('first_sheet')
sheet2 = book.sheet_by_index(1)
sheet1
![]()
sheet2.name
![]()
#Important attributes of a Worksheet object are ncols and nrows, indicating the number of
#columns and rows, respectively, that contain data:
sheet1.ncols, sheet1.nrows
![]()
#Single cells — i.e. Cell objects — are accessed via the cell method, providing the
#numbers for both the row and the column (again, numbering is zero-based). The value
#attribute then gives the data stored in this particular cell:
c1 = sheet1.cell(0,0)
c1.value
![]()
#The attribute ctype gives the cell type:
c1.ctype
![]()

#Similarly, you can access whole rows by providing the number of the row to the row method:
sheet2.row(3)

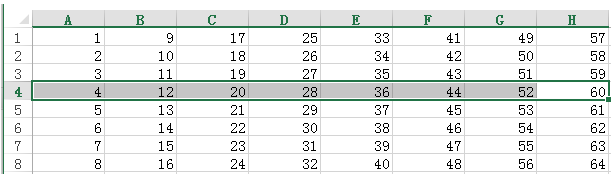
sheet2.col(3)

#row
sheet2.row_values(1,start_colx=1, end_colx=3)
![]()
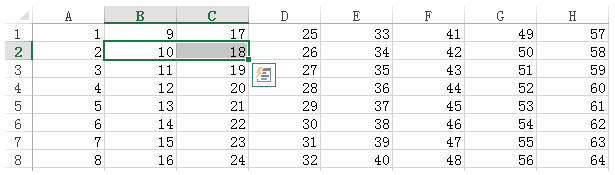
sheet2.col(3)


#column
sheet2.col_values(3, start_rowx = 3, end_rowx=7)
![]()
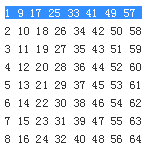
for r in range(sheet1.nrows):
for c in range(sheet1.ncols):
print('%i' % sheet1.cell(r,c).value, end=' ')
print()


for c in range(sheet1.ncols):
for r in range(sheet1.nrows):
print('%i' % sheet1.cell(r,c).value, end=' ')
print()
Using OpenPyxl
https://openpyxl.readthedocs.io/en/stable/
There is yet another library to generate and read Excel spreadsheet files in .xlsx format
with Python: OpenPyxl. This library allows us to both create spreadsheet files and read
from them. In addition, while basic usage is similar to the other libraries, the interface is in
some cases a bit more Pythonic and might therefore be worth taking a look at. Import the
library as follows:
import openpyxl as oxl
wb = oxl.Workbook() #First, generate a Workbook object:
ws = wb.create_sheet(index=0, title='oxl_sheet') #Second, create a Worksheet object:
#Both Worksheet objects are still empty. Therefore, let us generate a NumPy ndarray object containing some numbers:
data = np.arange(1,65).reshape((8,8))
data
print(data)
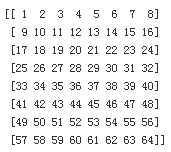
data[1,1]
![]()
for r in range(data.shape[0]): #Third, write the data to the worksheet:
for c in range(data.shape[1]):
ws.cell(row=r+1, column=c+1).value =data[r,c]

wb.save(path + '\oxl_book.xlsx') #Fourth, close the file object:
wb = oxl.load_workbook(path + '\oxl_book.xlsx') #With OpenPyxl, you can also read workbooks:
ws = wb.get_active_sheet()
cell = ws['B4'] #single cells are easily accessed via their cell names:
cell.column
![]()
cell.row
![]()
cell.value
![]()
ws['B1': 'b4'] #access cell ranges as in Excel

for cell in ws['b1':'b4']:
print(cell[0].value)
![]()
for row in ws['B1':'C4']:
for cell in row:
print(cell.value, end=' ')
print()
![]()

Using pandas for Reading and Writing
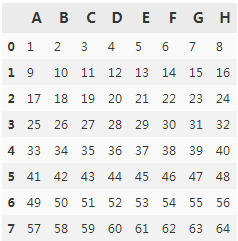
Let us use these approaches to read the data written with the xlwt library. We need a
DataFrame object for each sheet. With header=None, pandas does not interpret the first
data row as the header for the data set:
![]()
df1 = pd.read_excel(path + '\workbook.xlsx', 'first_sheet', header = None)
df2 = pd.read_excel(path + '\workbook.xlsx', 'second_sheet', header = None)
df1

df2

To recover the column names/values of the spreadsheet file, let us generate a list with
capital letters as column names for the DataFrame objects:
import string
columns=[]
for c in range(65,65+data.shape[0]): #data.shape[0]=8
columns.append( chr(c) )
print(columns)
![]()
df1.columns=columns #We pass this list as the new column names to the two objects:
df2.columns=columns
df1
df2
#Similarly, pandas allows us to write the data to Excel spreadsheet files:
df1.to_excel(path + '/new_book_1.xlsx', 'mysheet') #create pd.ExcelWriter object then write data into excel
#Note that when writing DataFrame objects to spreadsheet files pandas adds both column
names and index values,

#write dataframe into different worksheets in the same workbook
writer=pd.ExcelWriter(path + '/new_book_1.xlsx')
df1.to_excel(writer, 'mysheet')
df1.to_excel(writer, 'mysheet2', index=False, header=False)

#pandas-generated Excel workbooks can be read as before with the xlrd library
wbn = xlrd.open_workbook(path + '/new_book_1.xlsx')
wbn.sheet_names()
![]()
To write multiple DataFrame objects to a single spreadsheet file, one needs an ExcelWriter object
wbw = pd.ExcelWriter(path + '/new_book_2.xlsx')
df1.to_excel(wbw, 'first_sheet')
df2.to_excel(wbw, 'second_sheet')
wbw.save()

wbn = xlrd.open_workbook(path+'/new_book_2.xlsx')
wbn.sheet_names()
![]()
wbw = pd.ExcelWriter(path + '/new_book_3.xlsx') #two dataframe to one(same) sheet
df1.to_excel(wbw,'first')
df2.to_excel(wbw, 'first',startcol=10) #startrow=0
wbw.save()

data = np.random.rand(20,100000) #rows=20, cols=100000
data.nbytes
![]()
df = pd.DataFrame(data) #convert a two-dimensional array to a dataframe
comparison (operation in data.npy is faster than data.xlsx)
![]()

#write
%time df.to_excel(path + '/data.xlsx', 'data_sheet')
![]()

%time np.save(path+'/data',data)
![]()
![]()
%time df = pd.read_excel(path + '/data.xlsx', 'data_sheet')
![]()
%time data=np.load(path+'/data.npy')
![]()

data, df=0.0, 0.0
data, df
![]()

Scripting Excel with Python
xlswings
At the time of this writing, a new contender in the Python-Excel integration world has emerged: xlwings. xlwings provides almost all the functionality for interacting with and scripting Excel spreadsheets with Python.
# pip install xlwings
import xlwings as xw

Connect to a Book
#Establish a connection to a workbook, and after running, the existing workbook xlsx will be open
wb = xw.Book(r'C:\Users\LlQ\pythonForFinance\cp12_ExcelIntegration\workbook.xlsx')

wb = xw.Book()# this will create a new workbook including a Sheet1
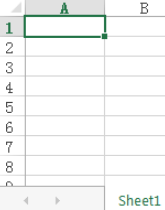
sht = wb.sheets['Sheet1'] #Instantiate a sheet object:
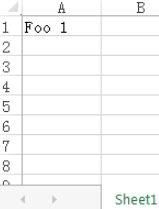
sht.range('A1').value = 'Foo 1'
sht.range('A1')
![]()
sht.range('A1').value
![]()
sht.range('A1').value = [['Foo 1', 'Foo 2', 'Foo 3'],
[ 10.0, 20.0, 30.0]
]
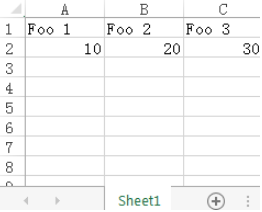
sht.range('A1').expand().value
![]()
type(sht.range('A1').expand().value) #list
![]()
import pandas as pd
df = pd.DataFrame([[1,2], [3,4]], columns=['a','b'])
df

sht.range('A1').value = df
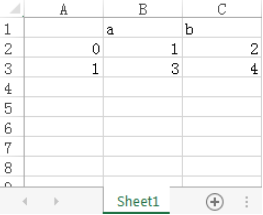
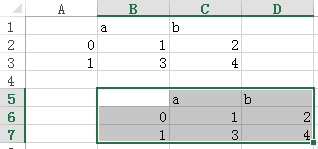
sht.range('B5').value=df
#start cell #converting to a specified data type
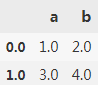
sht.range('A1').options(pd.DataFrame, expand='table').value
Matplotlib
import matplotlib.pyplot as plt
fig = plt.figure()
valueList = [1,2,3,4,5]
plt.plot(valueList)

sht.pictures.add(fig, name='MyPlot_list', update=True) #will add the picture to the A1 cell(start cell)

# Or #pic = sht.pictures('MyPlot_list')
pic = sht.pictures[0] # current pic
pic
![]()
pic = sht.pictures('MyPlot_list')
pic
![]()
pic.delete()
sht.pictures.add(fig, name='MyPlot_list', left=200, top=200,update=True) #will add the picture to the A1 cell(start cell)
![]()

Macros: Call Python from Excel
wb.save(r'C:\Users\LlQ\pythonForFinance\cp12_ExcelIntegration\xlswing_workbook.xlsx') # unique name
wb.close()
import xlwings
xlwings.__version__
![]()
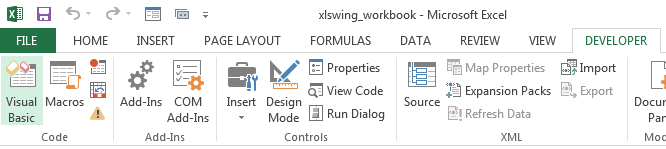

![]() #to load xlwings.xlam
#to load xlwings.xlam


#Then click code
##########################################
#note: the hello.py has existing
import xlwings as xw
def world():
wb = xw.Book.caller()
wb.sheets[0].range("A1").value = "Hello World!"
##########################################
Sub HelloWord()
RunPython ("import hello; hello.world()")
End Sub


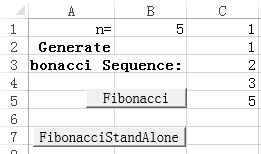
############################# fibonacci.py ##############################
import xlwings as xw
def fibonacci(n):
result = []
a, b =0,1
while len(result) < n:
result.append(b)
a, b = b, a+b
return result
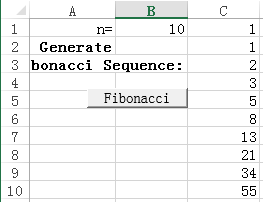
def xl_fibonacci():
# Create a reference to the calling Excel Workbook
sht = xw.Book.caller().sheets[0]
#Get the input from excel and turn into integer
n = sht.range('B1').options(numbers=int).value #cell: B1
#Call the main function
seq = fibonacci(n)
#First Clear output
sht.range('C1').expand('vertical').clear_contents()
#Return the output to Excel in column orientation #Second write the data to excel
sht.range('C1').options(transpose=True).value = seq
if __name__ == "__main__":
# Used for frozen executable
xl_fibonacci()
############################################################
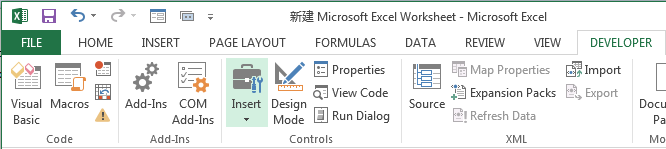
#Insert a button from under the form control

#change the button name ( Button5_click) to Fibonacci_Click Then click New


Sub Fibonacci_Click()
RunPython ("import fibonacci; fibonacci.xl_fibonacci()")
End Sub
#go back to excel then click save

Then open ![]() by double-click
by double-click
Next Enable content ![]()
#########################setup_fibonacci.py####################
#pip install cx-freeze in Anaconda Prompt window
#go to anaconda3/Scripts run python cxfreeze-postinstall
#run cxfeeeze -h for validation
from cx_Freeze import setup, Executable
#dict
build_exe_options = { 'packages' : ['win32com', 'xlwings'],
'excludes' : ['scipy', 'numpy', 'email', 'xml', 'pandas', 'Tkinter', 'Tkconstants', 'pydoc', 'tcl',
'tk', 'matplotlib', 'PIL', 'nose', 'setuptools', 'xlrd', 'xlwt', 'PyQt4', 'markdown',
'IPython', 'docutils'],
#'include_files': [],
'optimize' : 2
}
setup( name='fibonnacci',
version='1.0',
description='test',
options={'build_exe':build_exe_options},
executables = [Executable('fibonacci.py', targetName='fibonacci.exe')
]
)
#use cmd and go to you folder where the fibonacci.py is existing in
#and type python setup_fibonacci.py build
![]()
#in the folder build

# Then Insert a button from under the form control

#
#change the Button5_Click to FibonacciStandalone_Click
#click New button
#Note the path where the fibonacci.exe is existing
Sub FibonacciStandalone_Click()
RunFrozenPython ("C:\Users\LlQ\pythonForFinance\cp12_ExcelIntegration\build\exe.win-amd64-3.6\" + "fibonacci.exe")
End Sub

#change the n value(10) to 5
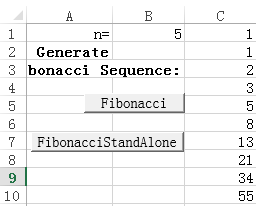
#Then click FibonacciStandAlone