一、简介
我们在 (六)配置中心(Git 版与动态刷新) 中讲到,如果需要客户端获取到最新的配置信息需要执行 refresh,我们可以利用 Webhook 的机制每次提交代码发送请求来刷新客户端,当客户端越来越多的时候,需要每个客户端都执行一遍,这种方案就不太适合了。使用 Spring Cloud Bus 可以完美解决这一问题。
Spring Cloud Bus
Spring Cloud Bus 通过轻量消息代理连接各个分布的节点。这会用在广播状态的变化(例如配置变化)或者其他的消息指令。Spring Bus 的一个核心思想是通过分布式的启动器对 Spring Boot 应用进行扩展,也可以用来建立一个多个应用之间的通信频道。目前唯一实现的方式是用 Amqp 消息代理作为通道,同样特性的设置(有些取决于通道的设置)在更多通道的文档中。
Spring Cloud Bus 被国内很多都翻译为消息总线,也挺形象的。大家可以将它理解为管理和传播所有分布式项目中的消息既可,其实本质是利用了 MQ 的广播机制在分布式的系统中传播消息,目前常用的有 Kafka 和 RabbitMQ。利用 Bus 的机制可以做很多的事情,其中配置中心客户端刷新就是典型的应用场景之一,我们用一张图来描述 Bus 在配置中心使用的机制。

二、实战
需要先下载安装rabbit。
我们选择上一篇文章 (七)配置中心(服务化与高可用) 版本的示例代码来改造,MQ 我们使用 RabbitMQ 来做示例。

服务端
在 pom.xml 里添加,这 4 个是必须的
<dependency>
    <groupId>org.springframework.cloud</groupId>
    <artifactId>spring-cloud-config-server</artifactId>
</dependency>
<dependency>
    <groupId>org.springframework.cloud</groupId>
    <artifactId>spring-cloud-starter-netflix-eureka-client</artifactId>
</dependency>
<dependency>
    <groupId>org.springframework.cloud</groupId>
    <artifactId>spring-cloud-bus</artifactId>
</dependency>
<dependency>
    <groupId>org.springframework.cloud</groupId>
    <artifactId>spring-cloud-stream-binder-rabbit</artifactId>
</dependency>
application.yml 内容如下
spring:
  application:
    name: config-server
  cloud:
    config:
      server:
        git:
          uri: https://github.com/liazhan/test-cloud # 配置git仓库的地址
          search-paths: config-repo # git仓库地址下的相对地址,可以配置多个,用,分割。
    bus:
      enabled: true
      trace:
        enabled: true
  rabbitmq:
      host: localhost
      port: 5672
      username: guest
      password: guest
server:
  port: 12000
eureka:
  client:
    service-url:
      defaultZone: http://localhost:7000/eureka/
management:
  endpoints:
    web:
      exposure:
        include: bus-refresh
启动类加 @EnableConfigServer 注解
package com.example.configservergit;

import org.springframework.boot.SpringApplication;
import org.springframework.boot.autoconfigure.SpringBootApplication;
import org.springframework.cloud.config.server.EnableConfigServer;

@EnableConfigServer
@SpringBootApplication
public class ConfigServerGitApplication {

    public static void main(String[] args) {
        SpringApplication.run(ConfigServerGitApplication.class, args);
    }

}
客户端
在 pom.xml 里添加以下依赖,前 5 个是必须的,最后一个 webflux 你可以用 web 来代替
        <dependency>
            <groupId>org.springframework.cloud</groupId>
            <artifactId>spring-cloud-starter-config</artifactId>
        </dependency>
        <dependency>
            <groupId>org.springframework.cloud</groupId>
            <artifactId>spring-cloud-starter-netflix-eureka-client</artifactId>
        </dependency>
        <dependency>
            <groupId>org.springframework.cloud</groupId>
            <artifactId>spring-cloud-bus</artifactId>
        </dependency>
        <dependency>
            <groupId>org.springframework.cloud</groupId>
            <artifactId>spring-cloud-stream-binder-rabbit</artifactId>
        </dependency>
        <dependency>
            <groupId>org.springframework.boot</groupId>
            <artifactId>spring-boot-starter-actuator</artifactId>
        </dependency>
        <dependency>
            <groupId>org.springframework.boot</groupId>
            <artifactId>spring-boot-starter-webflux</artifactId>
        </dependency>
这里容易漏掉 spring-boot-starter-actuator,如果缺了这个,当对服务端执行 /actuator/bus-refresh 的时候,客户端接收不到信息,Console 里只会显示以下信息(我就是在这儿被困了好久……)
2018-04-19 18:50:05.711 INFO 39762 --- [vOu-GI8c8mJtQ-1] o.s.a.r.c.CachingConnectionFactory : Attempting to connect to: [localhost:5672]
2018-04-19 18:50:05.739 INFO 39762 --- [vOu-GI8c8mJtQ-1] o.s.a.r.c.CachingConnectionFactory : Created new connection: rabbitConnectionFactory.publisher#2bc15b3b:0/SimpleConnection@14eb0d5e [delegate=amqp://[email protected]:5672/, localPort= 60107]
2018-04-19 18:50:05.749 INFO 39762 --- [vOu-GI8c8mJtQ-1] o.s.amqp.rabbit.core.RabbitAdmin : Auto-declaring a non-durable, auto-delete, or exclusive Queue (springCloudBus.anonymous.bOoVqQuSQvOu-GI8c8mJtQ) durable:false, auto-delete:true, exclusive:true. It will be redeclared if the broker stops and is restarted while the connection factory is alive, but all messages will be lost.
application.yml如下
spring:
  application:
    name: config-git
  cloud:
    bus:
      trace:
        enabled: true
      enabled: true
server:
  port: 13000
bootstrap.yml如下
spring:
  cloud:
    config:
      name: config-client # 对应 {application} 部分
      profile: dev # 对应 {profile} 部分
      label: master # 对应 {label} 部分,即 Git 的分支。如果配置中心使用的是本地存储,则该参数无用
      discovery:
        enabled: true
        service-id: config-server
  rabbitmq:
    host: localhost
    port: 5672
    username: guest
    password: guest
eureka:
  client:
    service-url:
      defaultZone: http://localhost:7000/eureka/
controller如下
package com.example.configclient.controller;

import org.springframework.beans.factory.annotation.Value;
import org.springframework.cloud.context.config.annotation.RefreshScope;
import org.springframework.web.bind.annotation.GetMapping;
import org.springframework.web.bind.annotation.RestController;
import reactor.core.publisher.Mono;

@RestController
@RefreshScope
public class HelloController {

    @Value("${neo.hello:error}")
    private String profile;

    @GetMapping("/info")
    public Mono<String> hello(){
        return Mono.justOrEmpty(profile);
    }
}
@RefreshScope 必须加,否则客户端会受到服务端的更新消息,但是更新不了,因为不知道更新哪里的。
至于启动主类,用默认生成的不用改,就不贴了。
三、测试
我们配置文件没有跟rabbit有关的配置,springboot会默认配置本地的rabbit。
分别启动 eureka、config-server 和两个 config-client(13000,13001)。
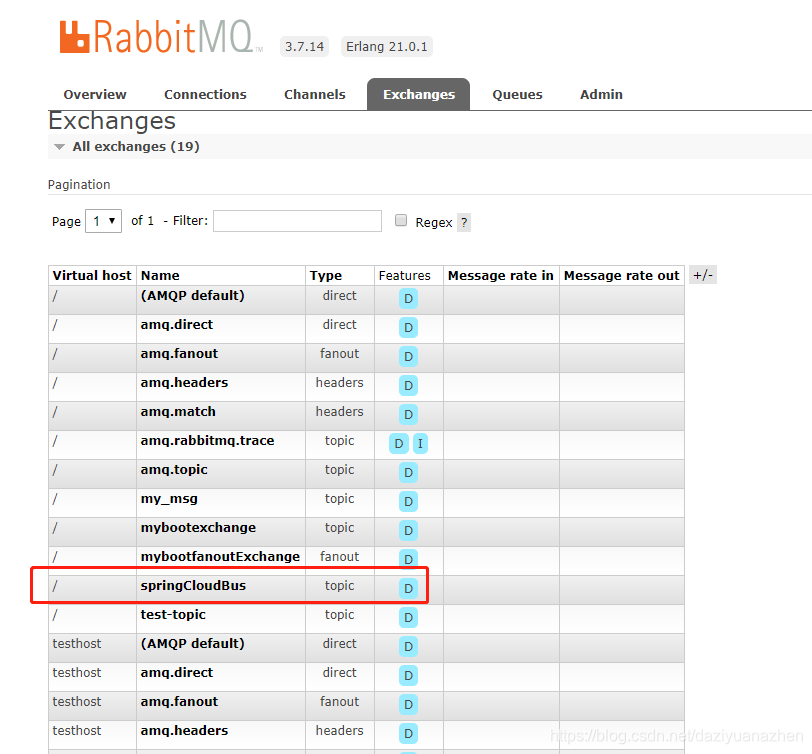
启动后,RabbitMQ 中会自动创建一个 topic 类型的 Exchange 和两个以 springCloudBus.anonymous. 开头的匿名 Queue
我们打开http://localhost:15672,可以看到如下图
我们访问 http://localhost:13000/info 和 http://localhost:13001/info 返回内容的都是 dev。
将 Git 中的配置信息由 dev 改为 dev bus,并执行
POST http://localhost:12000/actuator/bus-refresh/
如果报405错误的话,可以将配置文件里暴露的配置改一下,不知道是什么原因。。。。改成"*"就可以了
management:
  endpoints:
    web:
      exposure:
        include: "*"
再次访问 http://localhost:13000/info 和 http://localhost:13001/info 这时返回内容就是修改之后的 dev bus 了,说明成功了。
值得一提的是,只要开启 Spring Cloud Bus 后,不管是对 config-server 还是 config-client 执行 /actuator/bus-refresh 都是可以全部更新配置的。
四、局部刷新
某些场景下(例如灰度发布),我们可能只想刷新部分微服务的配置,此时可通过 /actuator/bus-refresh/{destination} 端点的 destination 参数来定位要刷新的应用程序。
例如:/actuator/bus-refresh/customers:8000,这样消息总线上的微服务实例就会根据 destination 参数的值来判断是否需要要刷新。其中,customers:8000 指的是各个微服务的 ApplicationContext ID。
destination 参数也可以用来定位特定的微服务。例如:/actuator/bus-refresh/customers:**,这样就可以触发 customers 微服务所有实例的配置刷新。
五、跟踪总线事件
一些场景下,我们可能希望知道 Spring Cloud Bus 事件传播的细节。此时,我们可以跟踪总线事件(RemoteApplicationEvent 的子类都是总线事件)。
跟踪总线事件非常简单,只需设置 spring.cloud.bus.trace.enabled=true,这样在 /actuator/bus-refresh 端点被请求后,访问 /actuator/httptrace端点就应该可获得 类似如下的结果 :
{
  "timestamp": 1495851419032,
  "info": {
    "signal": "spring.cloud.bus.ack",
    "type": "RefreshRemoteApplicationEvent",
    "id": "c4d374b7-58ea-4928-a312-31984def293b",
    "origin": "stores:8002",
    "destination": "*:**"
  }
  },
  {
  "timestamp": 1495851419033,
  "info": {
    "signal": "spring.cloud.bus.sent",
    "type": "RefreshRemoteApplicationEvent",
    "id": "c4d374b7-58ea-4928-a312-31984def293b",
    "origin": "spring-cloud-config-client:8001",
    "destination": "*:**"
  }
  },
  {
  "timestamp": 1495851422175,
  "info": {
    "signal": "spring.cloud.bus.ack",
    "type": "RefreshRemoteApplicationEvent",
    "id": "c4d374b7-58ea-4928-a312-31984def293b",
    "origin": "customers:8001",
    "destination": "*:**"
  }
}
这个日志显示了 spring-cloud-config-client:8001 发出了 RefreshRemoteApplicationEvent 事件,广播给所有的服务,被 customers:8001 和 stores:8002 接受到了。想要对接受到的消息自定义自己的处理方式的话,可以添加 @EventListener 注解的 AckRemoteApplicationEvent 和 SentApplicationEvent 类型到你自己的应用中。或者到 TraceRepository 类中,直接处理数据。
这样,我们就可清晰地知道事件的传播细节。
但是。。。
我在测试的时候,发现是如下结果:
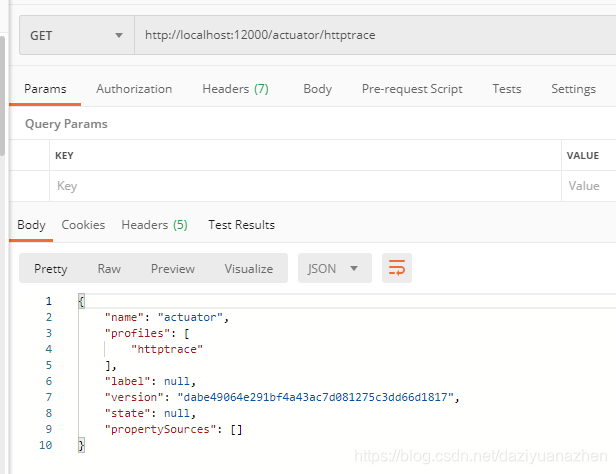
没有什么信息。。。
学习借鉴自https://windmt.com/2018/04/19/spring-cloud-9-config-eureka-bus/
