目标:开发一个spingboot的web项目,项目地址:点我
1. CRUD员工列表
1.1 实验要求
RestfulCRUD:CRUD满足Rest风格,即在请求路径中使用==/{variable}==占位符的方式。
URI: /资源名称/资源标识,HTTP请求方式区分对资源CRUD操作。
| 普通CRUD(uri来区分操作) | RestfulCRUD | |
|---|---|---|
| 查询 | getEmp | emp—GET |
| 添加 | addEmp?xxx | emp—POST |
| 修改 | updateEmp?id=xxx&xxx | emp/{id}—PUT |
| 删除 | deleteEmp?id=xxx | emp/{id}—DELETE |
1.2 实验的请求架构
| 实验功能 | 请求URI | 请求方式 |
|---|---|---|
| 查询所有员工 | emps | GET |
| 查询某个员工 (来到修改页面) | emp/{id} | GET |
| 来到添加页面 | emp | GET |
| 添加员工 | emp | POST |
| 来到修改页面(查出员工进行信息回显) | emp/{id} | GET |
| 修改员工 | emp | PUT |
| 删除员工 | emp/{di} | DELETE |
1.3 跳转到员工列表
目标:点击侧边栏的列表按钮,跳转到templates/emp/list.html
修改dashboard.html
创建EmployeeController控制类
@Controller
public class EmployeeController {

    @Autowired
    EmployeeDao employeeDao;

    @GetMapping("/emps")
    public String list(Model model){

        Collection<Employee> employees = employeeDao.getAll();

        //放在请求域中
        model.addAttribute("emps", employees);

        //thymeleaf默认会拼串,拼成classpath:/templates/xxx.html
        return "emp/list";
    }
}
但是跳转到list页面后,list页面的topbar和sidebar还需要根据dashboard页面的方式重新配置。可以采用thymeleaf公共页面元素抽取
2. thymeleaf公共页面元素抽取
list页面和dashboard页面中sidebar和topbar都是重复的,可以将这种重复的页面布局设置成模板片段的方式。那个页面需要这个布局,引入就行了。
2.1 抽取公共片段
在thymeleaf中,使用th:fragement属性定义重复片段,如
<html xmlns:th="http://www.thymeleaf.org">
<body>
<div th:fragment="copy">
© 2011 The Good Thymes Virtual Grocery
</div>
</body>
</html>
2.2 引入公共片段
引入公共片段的方式有三种
th:insert="~{templatename::selector}":将公共片段整个插入到声明引入的元素中th:replace="~{templatename::selector}":将声明引入的元素替换为公共片段th:include="~{templatename::selector}":将被引入的片段的内容包含进这个标签中
备注:
-
~{templatename::selector}:模板名::选择器,可以根据元素的id进行引入 -
~{templatename::selector}也可以替换为~{templatename::fragmentname}的方式,根据截取的片段的名称进行引入 -
如果使用th:insert等属性进行引入,可以不用写
~{} -
行内写法可以加上:
[[~{}]]、[(~{})]
这三种引入方式的区别如下所示:
<footer th:fragment="copy">
© 2011 The Good Thymes Virtual Grocery
</footer>
引入方式
<div th:insert="footer :: copy"></div>
<div th:replace="footer :: copy"></div>
<div th:include="footer :: copy"></div>
效果
<div>
<footer>
© 2011 The Good Thymes Virtual Grocery
</footer>
</div>
<footer>
© 2011 The Good Thymes Virtual Grocery
</footer>
<div>
© 2011 The Good Thymes Virtual Grocery
</div>
2.3 实例
-
在dashboard中,利用chrome浏览器的审查元素功能,可得知topbar为一个nav标签,在该标签总中加入
th:fragment="topbar"
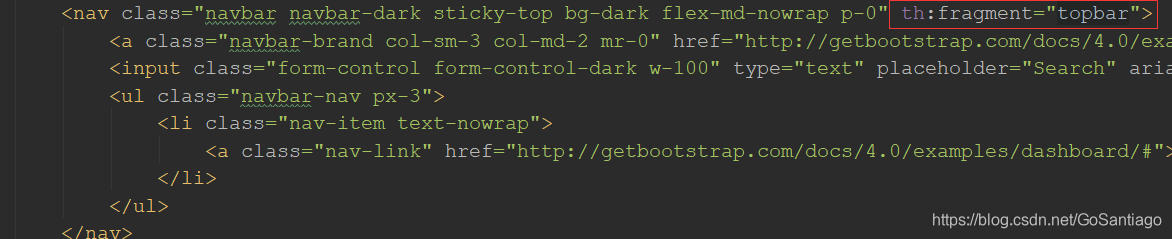
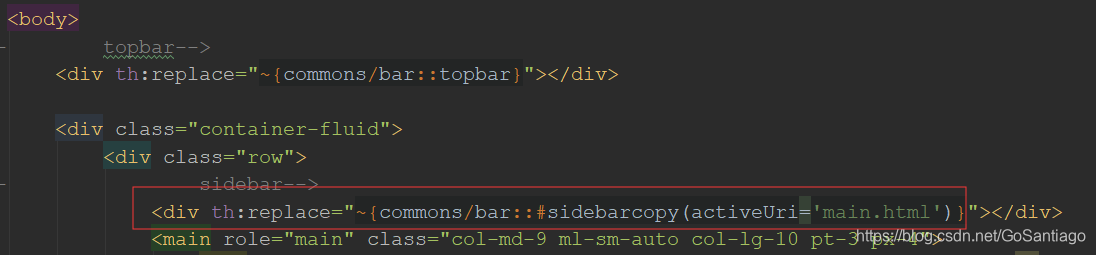
在list页面中,使用片段名的方式引入topbar<div th:replace="~{dashboard::topbar}"></div> -
在dashboard中,将sidebar所在标签中添加id值,list页面根据id值引入sidebar
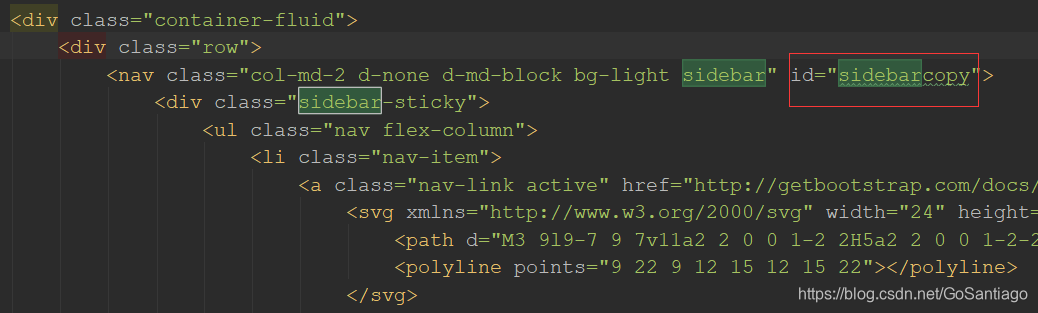
在list页面中,将sidebar所在的nav标签全部删掉,替换成如下代码<div th:replace="~{dashboard::#sidebarcopy}"></div>注意 :id的名字中不能带有
_或-等其他字符。我本来给id起的名字为sidebar-copy,结果死活运行不成功。把横线去掉之后就好了
运行项目,替换成功
2.4 引入片段时传入参数
2.3中的实例有一个bug,就是显示list页面的时候,侧边栏的“员工管理”不高亮,反而首页标签高亮

为了解决这个问题,可以在引入片段的时候传入参数,切换不同页面时,页面样式也根据参数改变。
th:fragement属性可以约束参数,如下规定了两个参数,p标签把这两个参数显示出来
<div th:fragment="frag (onevar,twovar)">
	<p th:text="${onevar} + ' - ' + ${twovar}">...</p>
</div>
可以使用th:insert或th:replace传入参数,传入参数的方式有两种,第一种方式传入参数的顺序要与th:fragement中的对应,第二种不做要求。
<div th:replace="::frag (${value1},${value2})">...</div>
<div th:replace="::frag (onevar=${value1},twovar=${value2})">...</div>
如果th:fragement属性中不写参数,如下
<div th:fragment="frag">
	...
</div>
依旧可以使用第二种方式传递参数
<div th:replace="::frag (onevar=${value1},twovar=${value2})">
步骤一
为了方便问题的解决,我把重复使用的topbar和sidebar片段单独剪切出来到一个commons/bar.html页面中。
在bar.html中,在“Dashboard”所在标签中,规定如果传入的参数是main.html,则该标签的class属性选择高亮。则在dashboard页面中,引入topbar的时候,传入参数main.html
th:class="${activeUri=='main.html'?'nav-link active':'nav-link'}"

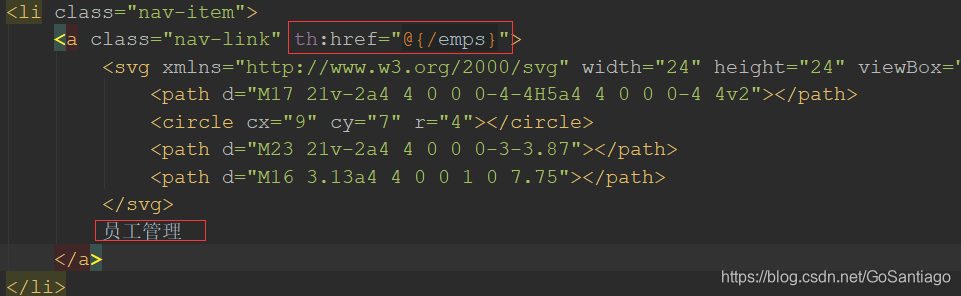
在”员工管理“标签中,规定如果传入的参数是emps,则该标签的class属性选择高亮。则在list页面中,引入sidebar的时候,传入参数emps
th:class="${activeUri=='emps'?'nav-link active':'nav-link'}">

步骤二
在dashboard页面,引入sidebar的时候,传入参数main.html
在list页面,引入sidebar的时候,传入参数emps

这样就大功告成了

3. 列表内容填充
根据实体类Employee的属性,修改list页面中的列表值
public class Employee {

	private Integer id;
    private String lastName;

    private String email;
    //1 male, 0 female
    private Integer gender;
    private Department department;
    private Date birth;
list页面的值是根据EmployeeController中放在请求域中的emps
@Controller
public class EmployeeController {

    @Autowired
    EmployeeDao employeeDao;

    @GetMapping("/emps")
    public String list(Model model){

        Collection<Employee> employees = employeeDao.getAll();

        //放在请求域中
        model.addAttribute("emps", employees);

        //thymeleaf默认会拼串,拼成classpath:/templates/xxx.html
        return "emp/list";
    }
}
list页面
<table class="table table-striped table-sm">
    <thead>
        <tr>
            <th>id</th>
            <th>lastName</th>
            <th>email</th>
            <th>gender</th>
            <th>department</th>
            <th>birth</th>
        </tr>
    </thead>
    <tbody>
        <tr th:each="emp:${emps}">
            <td th:text="${emp.id}"></td>
            <td>[[${emp.lastName}]]</td>
            <td th:text="${emp.email}"></td>
            <td th:text="${emp.gender}==0?'female':'male'"></td>
            <td th:text="${emp.department.departmentName}"></td>
            <td th:text="${emp.birth}"></td>
        </tr>
    </tbody>
</table>
运行成功

但是感觉这个生日不是很人性化,只需要写年月日就行了,我们可以对这个日期进行格式化。
<td th:text="${#dates.format(emp.birth, 'yyyy-MM-dd')}"></td>
更改完之后

给列表添加几个操作按钮
将section title所在位置换成添加员工的按钮
<h2><button class="btn btn-sm btn-success">员工添加</button> </h2>
在生日后面,添加两个按钮:编辑和删除
<td>
    <button class="btn btn-sm btn-primary">编辑</button>
    <button class="btn btn-sm btn-danger">删除</button>
</td>
更改完之后,页面如下所示
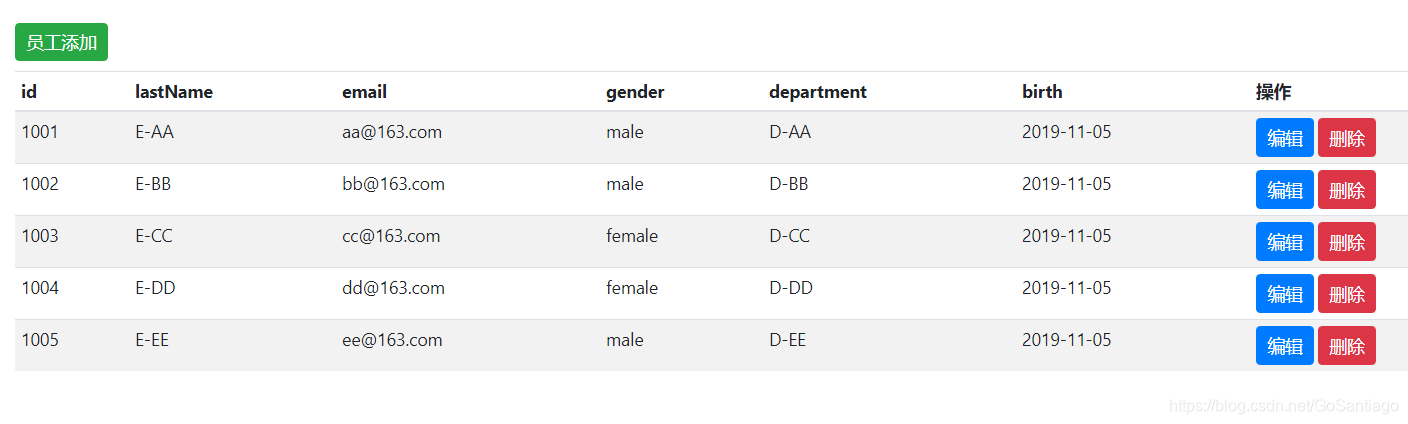
下一章的内容围绕这几个按钮进行。
