本文采用axios 进行数据请求.
1.数据请求主要步骤
a.安装axios
cd bbs
npm install axios --save
npm run dev
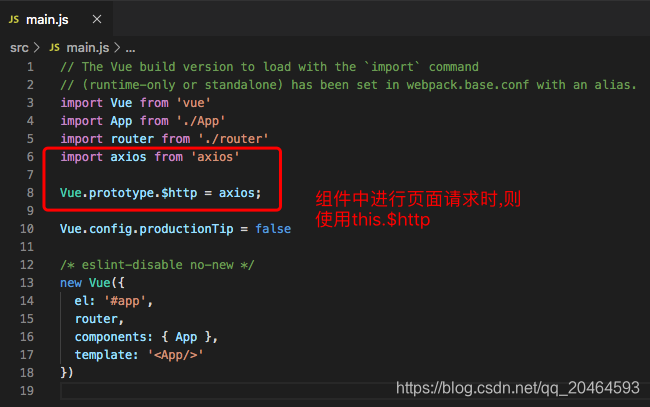
b.使用axios
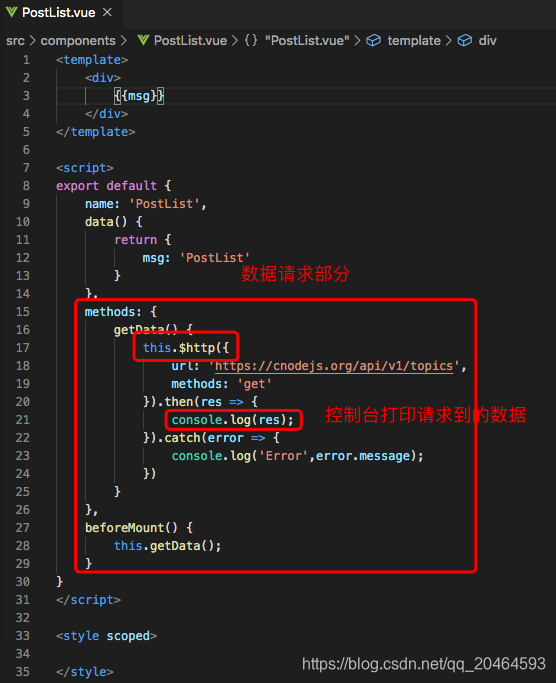
c.组件中请求数据
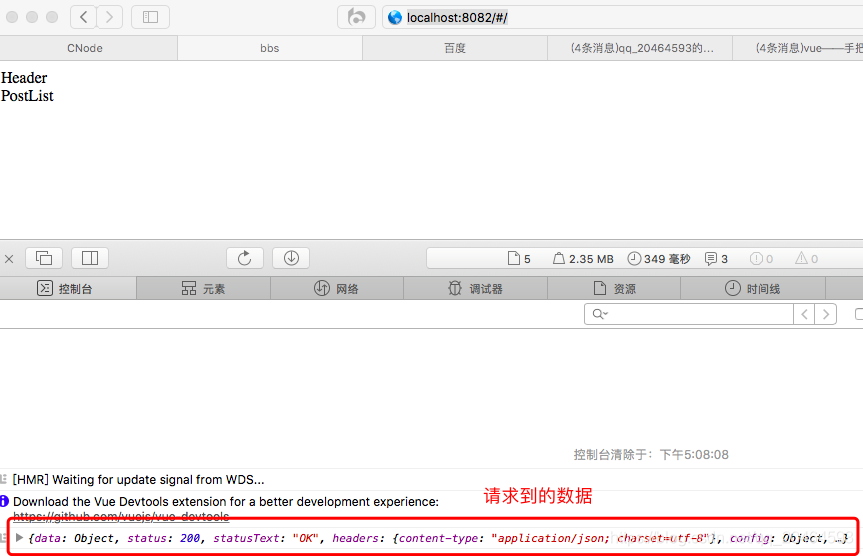
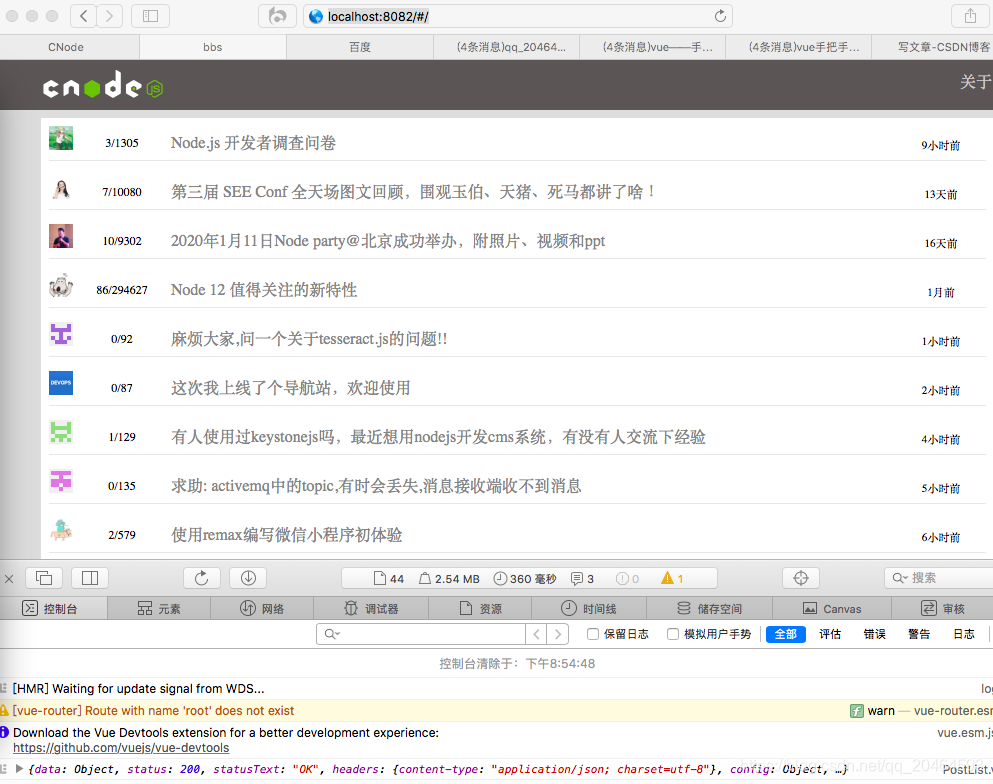
访问http://localhost:8082/#/,调出控制台,将在控制台打印出请求到的数据,页面显示如下:
d.将请求到的数据放置页面
基本页面框架如下,并采用{{}}呈放请求到的数据字段,以显示取得的数据
PostList.vue
<template>
    <div class="posts">
        <ul>
            <li v-for="post in posts">
                <router-link to="">
                    <img :src="post.author.avatar_url" :title="post.author.loginname"/>
                </router-link>
                <span>
                    {{ post.reply_count }}/{{ post.visit_count }}
                </span>
                <router-link to="">
                    {{ post.title }}
                </router-link>
                <span class="last_reply">

                </span>
            </li>
        </ul>
    </div>
</template>

<script>
export default {
    name: 'PostList',
    data() {
        return {
            posts: {}//定义一变量
        }
    },
    methods: {
        getData() {
            this.$http({
                url: 'https://cnodejs.org/api/v1/topics',
                methods: 'get'
            }).then(res => {
                console.log(res);
                this.posts = res.data.data;//将请求数据放入变量中
            }).catch(error => {
                console.log('Error',error.message);
            })
        }
    },
    beforeMount() {
        this.getData();
    }
}
</script>

<style scoped>

</style>
在data中定义变量posts,并通过this.posts = res.data.data,将请求的数据赋值给posts.
因为页面是以列表的形式呈现,每一个li部分都只是数据不同,于是采用v-for="post in posts"来遍历数据.
页面中采用{{}},如{{ post.title }}形式在页面中显示数据.如果是属性,则在属性加冒号,如:src=“post.author.avatar_url”,在页面中显示数据.
2.添加loading
在正常使用过程中,进入页面遇到网络卡顿并不能立刻取得数据,在这里添加简易的loading,提高页面可视化效果.即让页面在请求数据时显示loading,请求成功后显示取得的数据.
通过使用v-if和v-else,将要显示的页面放置v-if=“loading”,隐藏的页面放置v-else.data中设置loading的初始值为false,在页面开始进入时设置this.loading = true,数据请求成功后设置this.loading = false.
加上部分对取得数据的处理和样式,当前PostList.vue代码如下:
<template>
    <div class="PostList">
        <div class="loading" v-if="loading">
            Loading...
        </div>
        <div class="posts" v-else>
            <ul>
                <li v-for="post in posts">
                    <router-link to="">
                        <img :src="post.author.avatar_url" :title="post.author.loginname"/>
                    </router-link>
                    <span>
                        {{ post.reply_count }}/{{ post.visit_count }}
                    </span>
                    <router-link to="">
                        {{ post.title }}
                    </router-link>
                    <span class="last_reply">
                        {{ post.last_reply_at | formatDate}}
                    </span>
                </li>
            </ul>
        </div>
    </div>
</template>

<script>
export default {
    name: 'PostList',
    data() {
        return {
            posts: {},//定义一变量
            loading: false//初始值
        }
    },
    //对日期的处理
    filters: {
        timeStyle(createTime) {
            return String(createTime).match(/.{10}/)[0];
        }
    },
    methods: {
        getData() {
            this.$http({
                url: 'https://cnodejs.org/api/v1/topics',
                methods: 'get'
            }).then(res => {
                console.log(res);
                this.posts = res.data.data;//将请求数据放入变量中
                this.loading = false;//请求到数据时不再显示loading
            }).catch(error => {
                console.log('Error',error.message);
            })
        }
    },
    beforeMount() {
        this.getData();
        this.loading = true;//进入页面时显示loading
    }
}
</script>

<style scoped>
	.PostList .posts {
		background-color: white;
		padding: 0.5rem;
		margin: 0.5rem 3rem;
	}
	.PostList .posts li {
		list-style: none;
		margin-bottom: 14px;
		border-bottom: 1px solid #E7E7E7;
		line-height: 30px;
	}
	.PostList .posts ul li img {
		width: 1.5rem;
		height: 1.5rem;
	}
	.PostList .posts li span {
		display: inline-block;
		text-align: center;
		width: 70px;
		font-size: 12px;
		margin: 0 10px;
	}
	.PostList .posts a {
		text-decoration: none;
		color: inherit;
	    -o-text-overflow: ellipsis;
	    white-space: nowrap;
	    display: inline-block;
	    vertical-align: middle;
	    overflow: hidden;
	    text-overflow: ellipsis;
	    max-width: 70%;
	}
	.PostList .posts a:visited {
		color:#858585;
	}
	.PostList .posts .last_reply {
		float: right;
   		font-size: 0.7rem;
   	    margin-top: 0.3rem;
	}
</style>
数据中{{ post.last_reply_at | formatDate}}中formatDate对获取的日期进行了处理.
script中,
//对日期的处理
    filters: {
        timeStyle(createTime) {
            return String(createTime).match(/.{10}/)[0];
        }
    },
还有main.js中,
// The Vue build version to load with the `import` command
// (runtime-only or standalone) has been set in webpack.base.conf with an alias.
import Vue from 'vue'
import App from './App'
import router from './router'
import axios from 'axios'

Vue.prototype.$http = axios;

Vue.config.productionTip = false

/* eslint-disable no-new */
new Vue({
  el: '#app',
  router,
  components: { App },
  template: '<App/>'
})
//PostList.vue对日期的处理
Vue.filter('formatDate', function(str) {
  if (!str) return ''
  var date = new Date(str)
  var time = new Date().getTime() - date.getTime() //现在的时间-传入的时间 = 相差的时间(单位 = 毫秒)
  if (time < 0) {
      return ''
  } else if ((time / 1000 < 30)) {
      return '刚刚'
  } else if (time / 1000 < 60) {
      return parseInt((time / 1000)) + '秒前'
  } else if ((time / 60000) < 60) {
      return parseInt((time / 60000)) + '分钟前'
  } else if ((time / 3600000) < 24) {
      return parseInt(time / 3600000) + '小时前'
  } else if ((time / 86400000) < 31) {
      return parseInt(time / 86400000) + '天前'
  } else if ((time / 2592000000) < 12) {
      return parseInt(time / 2592000000) + '月前'
  } else {
      return parseInt(time / 31536000000) + '年前'
  }
}
)
因为其他组件还未开发完整,后面再补充页面的路由部分.
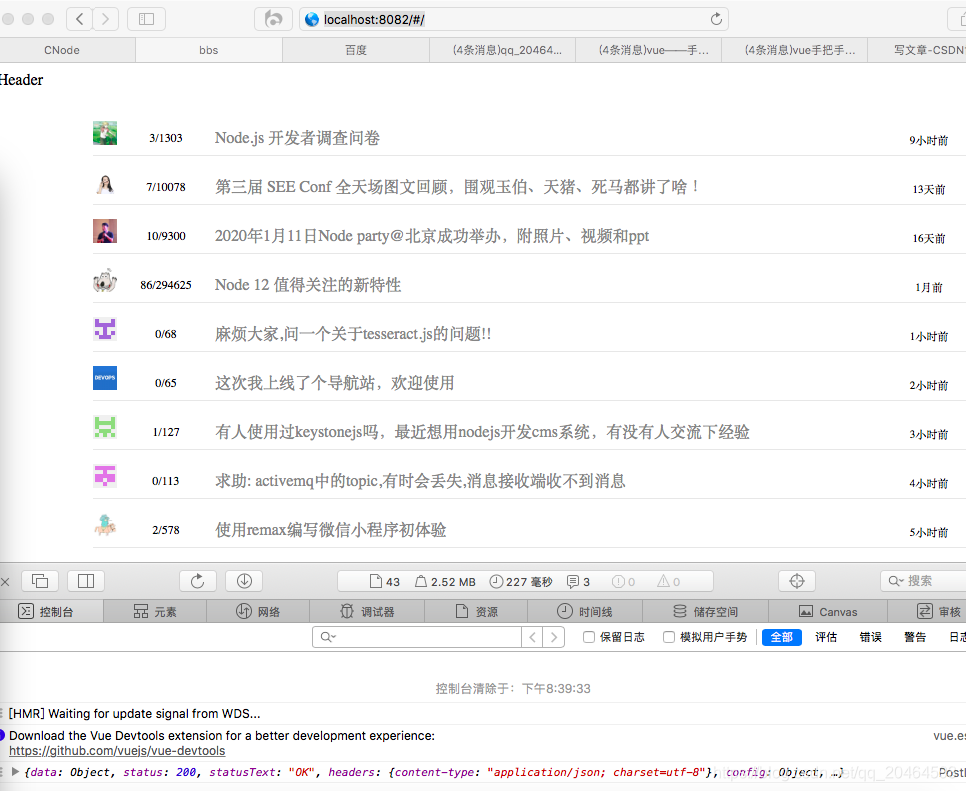
访问http://localhost:8082/#/,当前显示页面如下:
3.开发Header组件.
因为Header不需要进行数据请求,就直接贴出Header.vue代码:
<template>
  <div class="Header">
  	<router-link :to="{name:'PostList'}">
  		<img src="../assets/cnodejs_light.svg"/>
  	</router-link>
  	<span><a href="#">关于</a></span>
  </div>
</template>

<script>
export default {
  name: 'Header',
  data () {
    return {
    }
  }
}
</script>

<!-- Add "scoped" attribute to limit CSS to this component only -->
<style scoped>
	.Header {
		background:#5a5555 ;
		height: 50px;
	}
	a {
		text-decoration: none;
		color: #cbc9c9;
	}
	img {
		max-width: 120px;
		margin-left: 50px;
		margin-top: 10px;
	}
	 span {
		float: right;
		margin-right: 50px;
		margin-top: 10px;
	}
</style>
Header左边logo放置在assets,后面整理完会上传完整代码到github上.
此时会发现页面存在白色缝隙,可以到App.vue进行样式的设置:
<style>
body,div,span,a,p,ul,li {
	margin: 0;
	padding: 0;
}
</style>
访问http://localhost:8082/#/,当前页面如下:
4.开发剩余组件
接下来,开发还有Article、SideBar和UserInfo组件,在这里使用相同的api作为数据请求接口,测试取得数据,熟练数据请求部分.
Article.vue
<template>
    <div>
        {{msg}}
    </div>
</template>

<script>
export default {
    name: 'Article',
    data() {
        return {
            msg: 'Article'
        }
    },
    methods: {
        getData() {
            this.$http({
                url: 'https://cnodejs.org/api/v1/topics',
                methods: 'get'
            }).then(res =>{
                console.log(res);
            }).catch(error => {
                console.log('Error',error.message);
            })
        }
    },
    beforeMount() {
        this.getData();
    }
}
</script>

<style scoped>

</style>
SideBar.vue
<template>
    <div>
        {{msg}}
    </div>
</template>

<script>
export default {
    name: 'SideBar',
    data() {
        return {
            msg: 'SideBar'
        }
    },
    methods: {
        getData() {
            this.$http({
                url: 'https://cnodejs.org/api/v1/topics',
                methods: 'get'
            }).then(res =>{
                console.log(res);
            }).catch(error => {
                console.log('Error',error.message);
            })
        }
    },
    beforeMount() {
        this.getData();
    }
}
</script>

<style scoped>

</style>
UserInfo.vue
<template>
    <div>
        {{msg}}
    </div>
</template>

<script>
export default {
    name: 'UserInfo',
    data() {
        return {
            msg: 'UserInfo'
        }
    },
    methods: {
        getData() {
            this.$http({
                url: 'https://cnodejs.org/api/v1/topics',
                methods: 'get'
            }).then(res =>{
                console.log(res);
            }).catch(error => {
                console.log('Error',error.message);
            })
        }
    },
    beforeMount() {
        this.getData();
    }
}
</script>

<style scoped>

</style>
最后分别测试
http://localhost:8082/#/article
http://localhost:8082/#/sidebar
http://localhost:8082/#/userinfo
是否都成功在控制台打印出取得的数据~
数据请求内容到此,接下来将讲解路由,把开发的部分组件进行链接.
