简单的例子
这是一个显示一个小窗口的简单例子。我们可以做许多这样的窗口。我们可以调整它的窗口尺寸,最大化或最小化这个窗口。这些需求需要码很多代码。但一些人已经写好了这些功能实现。因为这些需求在很多应用中重复出现了,在这里我们不需要重新写这些代码。PyQt5是一个高级工具套件,为我们封装了很多复杂功能的实现代码,我们可以更加简单的通过函数去实现这些功能。如果我们是在一个低级工具套件中写代码的话,下面例子的代码很有可能需要数百行来实现。

 1 #!/usr/bin/python3
 2 # -*- coding: utf-8 -*-
 3
 4 """
 5 ZetCode PyQt5 教程
 6 在这个例子中, 我们用PyQt5创建了一个简单的窗口。
 7
 8 作者: Jan Bodnar
 9 网站: zetcode.com
10 最后一次编辑: January 2015
11 """
12
13 import sys
14 from PyQt5.QtWidgets import QApplication, QWidget
15
16
17 if __name__ == '__main__':
18
19     app = QApplication(sys.argv)
20
21     w = QWidget()
22     w.resize(250, 150)
23     w.move(300, 300)
24     w.setWindowTitle('Simple')
25     w.show()
26
27     sys.exit(app.exec_())
上面的代码示例会在屏幕上显示一个小窗口。
|
1
2
|
import
sys
from
PyQt5.QtWidgets
import
QApplication, QWidget
|
这里我们进行了一些必要模块的导入。最基础的widget组件位于PyQt5.QtWidget模块中
|
1
|
app
=
QApplication(sys.argv)
|
所有的PyQt5应用必须创建一个应用(Application)对象。sys.argv参数是一个来自命令行的参数列表。Python脚本可以在shell中运行。这是我们用来控制我们应用启动的一种方法。
|
1
|
w
=
QWidget()
|
Qwidget组件是PyQt5中所有用户界面类的基础类。我们给QWidget提供了默认的构造方法。默认构造方法没有父类。没有父类的widget组件将被作为窗口使用。
|
1
|
w.resize(
250
,
150
)
|
resize()方法调整了widget组件的大小。它现在是250px宽,150px高。
|
1
|
w.move(
300
,
300
)
|
move()方法移动widget组件到一个位置,这个位置是屏幕上x=300,y=300的坐标。
|
1
|
w.setWindowTitle(
'Simple'
)
|
这里我们设置了我们窗口的标题。这个标题显示在标题栏中。
|
1
|
w.show()
|
show()方法在屏幕上显示出widget。一个widget对象在这里第一次被在内存中创建,并且之后在屏幕上显示。
|
1
|
sys.exit(app.exec_())
|
最后,应用进入主循环。在这个地方,事件处理开始执行。主循环用于接收来自窗口触发的事件,并且转发他们到widget应用上处理。如果我们调用exit()方法或主widget组件被销毁,主循环将退出。sys.exit()方法确保一个不留垃圾的退出。系统环境将会被通知应用是怎样被结束的。
exec_()方法有一个下划线。因为exec是Python保留关键字。因此,用exec_()来代替。
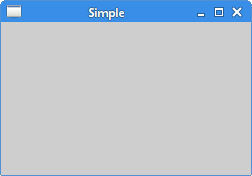 Figure: Simple
一个简单的应用图标
应用图标是一个常常显示在标题栏左上方角落的小图片。在下面的例子里,我们将展示我们如何在PyQt5中显示应用图标。我们也将介绍一些新方法的使用。
|
1
2
3
4
5
6
7
8
9
10
11
12
13
14
15
16
17
18
19
20
21
22
23
24
25
26
27
28
29
30
31
32
33
34
35
36
37
38
39
40
41
|
#!/usr/bin/python3
# -*- coding: utf-8 -*-
"""
ZetCode PyQt5 tutorial
This example shows an icon
in the titlebar of the window.
author: Jan Bodnar
website: zetcode.com
last edited: January 2015
"""
import
sys
from
PyQt5.QtWidgets
import
QApplication, QWidget
from
PyQt5.QtGui
import
QIcon
class
Example(QWidget):
def
__init__(
self
):
super
().__init__()
self
.initUI()
def
initUI(
self
):
self
.setGeometry(
300
,
300
,
300
,
220
)
self
.setWindowTitle(
'Icon'
)
self
.setWindowIcon(QIcon(
'web.png'
))
self
.show()
if
__name__
=
=
'__main__'
:
app
=
QApplication(sys.argv)
ex
=
Example()
sys.exit(app.exec_())
|
上述的例子使用传统的面向过程的代码风格。Python编程语言提供面向过程和面向对象的代码风格。PyQt5编程意味着就是面向对象的编程。
|
1
2
3
4
5
|
class
Example(QWidget):
def
__init__(
self
):
super
().__init__()
...
|
在面向对象编程中有三个重要的东西,分别是类,数据和方法。这里我们创建了一个新类叫做Example。Example类继承自QWidget类。这意味着我们调用了两个构造方法:第一个是Example类的构造方法,第二个是被继承类的构造方法。super()方法返回了Example类的父类对象,并且我们调用了父类的构造方法。__init__()方法是Python语言中的构造方法。
|
1
|
self
.initUI()
|
GUI的创建授予initUI()方法完成。
|
1
2
3
|
self
.setGeometry(
300
,
300
,
300
,
220
)
self
.setWindowTitle(
'Icon'
)
self
.setWindowIcon(QIcon(
'web.png'
))
|
三个方法都继承自QWidgets类。setGeometry()做了两件事:将窗口在屏幕上显示,并设置了它的尺寸。setGeometry()方法的前两个参数定位了窗口的x轴和y轴位置。第三个参数是定义窗口的宽度,第四个参数是定义窗口的高度。事实上,这是将resize()和move()方法融合在一个方法内。为了做好这个例子,我们创建了一个QIcon对象。QIcon对象接收一个我们要显示的图片路径作为参数。
|
1
2
3
4
5
|
if
__name__
=
=
'__main__'
:
app
=
QApplication(sys.argv)
ex
=
Example()
sys.exit(app.exec_())
|
应用和example对象被创建。主循环被启动。
![]() Figure: Icon
Figure: Icon
显示一个提示文本
我们可以给我们的任何widget组件提供气泡帮助提示框。
|
1
2
3
4
5
6
7
8
9
10
11
12
13
14
15
16
17
18
19
20
21
22
23
24
25
26
27
28
29
30
31
32
33
34
35
36
37
38
39
40
41
42
43
44
45
46
47
48
49
|
#!/usr/bin/python3
# -*- coding: utf-8 -*-
"""
ZetCode PyQt5 tutorial
This example shows a tooltip on
a window and a button.
author: Jan Bodnar
website: zetcode.com
last edited: January 2015
"""
import
sys
from
PyQt5.QtWidgets
import
(QWidget, QToolTip,
QPushButton, QApplication)
from
PyQt5.QtGui
import
QFont
class
Example(QWidget):
def
__init__(
self
):
super
().__init__()
self
.initUI()
def
initUI(
self
):
QToolTip.setFont(QFont(
'SansSerif'
,
10
))
self
.setToolTip(
'This is a <b>QWidget</b> widget'
)
btn
=
QPushButton(
'Button'
,
self
)
btn.setToolTip(
'This is a <b>QPushButton</b> widget'
)
btn.resize(btn.sizeHint())
btn.move(
50
,
50
)
self
.setGeometry(
300
,
300
,
300
,
200
)
self
.setWindowTitle(
'Tooltips'
)
self
.show()
if
__name__
=
=
'__main__'
:
app
=
QApplication(sys.argv)
ex
=
Example()
sys.exit(app.exec_())
|
在这个例子中,我们为两个PyQt5组件显示了提示框。
|
1
|
QToolTip.setFont(QFont(
'SansSerif'
,
10
))
|
这个静态方法设置了用于提示框的字体。我们使用10px大小的SansSerif字体。
|
1
|
self
.setToolTip(
'This is a <b>QWidget</b> widget'
)
|
为了创建提示框,我们调用了setTooltip()方法。我们可以在提示框中使用富文本格式。
|
1
2
|
btn
=
QPushButton(
'Button'
,
self
)
btn.setToolTip(
'This is a <b>QPushButton</b> widget'
)
|
我们创建了一个按钮组件并且为它设置一个提示框。
|
1
2
|
btn.resize(btn.sizeHint())
btn.move(
50
,
50
)
|
这里改变了按钮的大小,并移动了在窗口上的位置。setHint()方法给了按钮一个推荐的大小。
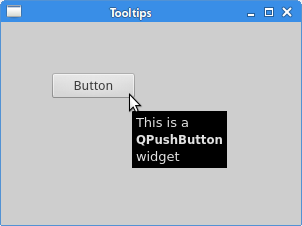 Figure: Tooltips
关闭窗口
明显的关闭窗口的方法是点击标题栏的X标记。在下面的例子中,我们将展示怎么通过程序来关闭我们的窗口。我们将简单的触及信号和槽机制。
|
1
|
QPushButton(string text, QWidget parent
=
None
)
|
text参数是将显示在按钮中的内容。parent参数是一个用来放置我们按钮的组件。在我们的例子中将会是QWidget组件。一个应用的组件是分层结构的。在这个分层内,大多数组件都有父类。没有父类的组件是顶级窗口。
|
1
2
3
4
5
6
7
8
9
10
11
12
13
14
15
16
17
18
19
20
21
22
23
24
25
26
27
28
29
30
31
32
33
34
35
36
37
38
39
40
41
42
43
44
45
|
#!/usr/bin/python3
# -*- coding: utf-8 -*-
"""
ZetCode PyQt5 tutorial
This program creates a quit
button. When we press the button,
the application terminates.
author: Jan Bodnar
website: zetcode.com
last edited: January 2015
"""
import
sys
from
PyQt5.QtWidgets
import
QWidget, QPushButton, QApplication
from
PyQt5.QtCore
import
QCoreApplication
class
Example(QWidget):
def
__init__(
self
):
super
().__init__()
self
.initUI()
def
initUI(
self
):
qbtn
=
QPushButton(
'Quit'
,
self
)
qbtn.clicked.connect(QCoreApplication.instance().quit)
qbtn.resize(qbtn.sizeHint())
qbtn.move(
50
,
50
)
self
.setGeometry(
300
,
300
,
250
,
150
)
self
.setWindowTitle(
'Quit button'
)
self
.show()
if
__name__
=
=
'__main__'
:
app
=
QApplication(sys.argv)
ex
=
Example()
sys.exit(app.exec_())
|
在这个例子中,我们创建一个退出按钮,一旦按下按钮,应用将会结束。
|
1
|
from
PyQt5.QtCore
import
QCoreApplication
|
我们需要一个来自QtCore的对象模块。
|
1
|
qbtn
=
QPushButton(
'Quit'
,
self
)
|
我们创建了一个按钮。按钮是一个QPushButton类的实例。构造方法的第一个参数是显示在button上的标签文本。第二个参数是父组件。父组件是Example组件,它继承了QWiget类。
|
1
|
qbtn.clicked.connect(QCoreApplication.instance().quit)
|
在PyQt5中,事件处理系统由信号&槽机制建立。如果我们点击了按钮,信号clicked被发送。槽可以是Qt内置的槽或Python 的一个方法调用。QCoreApplication类包含了主事件循环;它处理和转发所有事件。instance()方法给我们返回一个实例化对象。注意QCoreAppli类由QApplication创建。点击信号连接到quit()方法,将结束应用。事件通信在两个对象之间进行:发送者和接受者。发送者是按钮,接受者是应用对象。
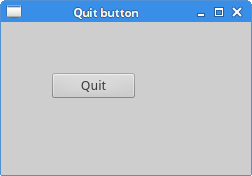 Figure: Quit button
Message Box
默认的,如果我们点击了标题栏上的x按钮,QWidget会被关闭。又是我们希望修改这个默认动作。举个例子,如果我们有个文件在编辑器内打开,并且我们对这个文件做了一些修改。 我们显示一个message box来确认这个动作。
|
1
2
3
4
5
6
7
8
9
10
11
12
13
14
15
16
17
18
19
20
21
22
23
24
25
26
27
28
29
30
31
32
33
34
35
36
37
38
39
40
41
42
43
44
45
46
47
48
49
50
51
|
#!/usr/bin/python3
# -*- coding: utf-8 -*-
"""
ZetCode PyQt5 tutorial
This program shows a confirmation
message box when we click on the close
button of the application window.
author: Jan Bodnar
website: zetcode.com
last edited: January 2015
"""
import
sys
from
PyQt5.QtWidgets
import
QWidget, QMessageBox, QApplication
class
Example(QWidget):
def
__init__(
self
):
super
().__init__()
self
.initUI()
def
initUI(
self
):
self
.setGeometry(
300
,
300
,
250
,
150
)
self
.setWindowTitle(
'Message box'
)
self
.show()
def
closeEvent(
self
, event):
reply
=
QMessageBox.question(
self
,
'Message'
,
"Are you sure to quit?"
, QMessageBox.Yes |
QMessageBox.No, QMessageBox.No)
if
reply
=
=
QMessageBox.Yes:
event.accept()
else
:
event.ignore()
if
__name__
=
=
'__main__'
:
app
=
QApplication(sys.argv)
ex
=
Example()
sys.exit(app.exec_())
|
如果我们关闭一个QWidget,QCloseEvent类事件将被生成。要修改组件动作我们需要重新实现closeEvent()事件处理方法。
|
1
2
3
|
reply
=
QMessageBox.question(
self
,
'Message'
,
"Are you sure to quit?"
, QMessageBox.Yes |
QMessageBox.No, QMessageBox.No)
|
我们现实一个带两个按钮的message box:YES和No按钮。代码中第一个字符串的内容被显示在标题栏上。第二个字符串是对话框上显示的文本。第三个参数指定了显示在对话框上的按钮集合。最后一个参数是默认选中的按钮。这个按钮一开始就获得焦点。返回值被储存在reply变量中。
|
1
2
3
4
|
if
reply
=
=
QtGui.QMessageBox.Yes:
event.accept()
else
:
event.ignore()
|
在这里我们测试一下返回值。代码逻辑是如果我们点击Yes按钮,我们接收到的事件关闭事件,这将导致了组件的关闭和应用的结束。否则不是点击Yes按钮的话我们将忽略将关闭事件。
 Figure: Message box
屏幕上的居中窗口
下面的脚本展示我们如何把窗口居中显示到桌面窗口。
|
1
2
3
4
5
6
7
8
9
10
11
12
13
14
15
16
17
18
19
20
21
22
23
24
25
26
27
28
29
30
31
32
33
34
35
36
37
38
39
40
41
42
43
44
45
46
47
48
|
#!/usr/bin/python3
# -*- coding: utf-8 -*-
"""
ZetCode PyQt5 tutorial
This program centers a window
on the screen.
author: Jan Bodnar
website: zetcode.com
last edited: January 2015
"""
import
sys
from
PyQt5.QtWidgets
import
QWidget, QDesktopWidget, QApplication
class
Example(QWidget):
def
__init__(
self
):
super
().__init__()
self
.initUI()
def
initUI(
self
):
self
.resize(
250
,
150
)
self
.center()
self
.setWindowTitle(
'Center'
)
self
.show()
def
center(
self
):
qr
=
self
.frameGeometry()
cp
=
QDesktopWidget().availableGeometry().center()
qr.moveCenter(cp)
self
.move(qr.topLeft())
if
__name__
=
=
'__main__'
:
app
=
QApplication(sys.argv)
ex
=
Example()
sys.exit(app.exec_())
|
QtGui.QDesktopWidget类提供了我们桌面窗口的信息,包含了屏幕尺寸。
|
1
|
self
.center()
|
将窗口居中放置的代码在自定义的center()方法中。
|
1
|
qr
=
self
.frameGeometry()
|
我们获得主窗口的一个矩形特定几何图形。这包含了窗口的框架。
|
1
|
cp
=
QDesktopWidget().availableGeometry().center()
|
我们算出相对于显示器的绝对值。并且从这个绝对值中,我们获得了屏幕中心点。
|
1
|
qr.moveCenter(cp)
|
我们的矩形已经设置好了它的宽和高。现在我们把矩形的中心设置到屏幕的中间去。矩形的大小并不会改变。
|
1
|
self
.move(qr.topLeft())
|