介绍
这里主要演示在Centos系统已经安装了tomcat并设置好环境变量,如何自定义一个jsp网页。用来进行后面的Nginx动静分离的一个网页测试。
tomcat安装:Centos7 yum安装tomcat
系统环境
[root@ecs-19cb ~]# cat /etc/redhat-release
CentOS Linux release 7.2.1511 (Core)
[root@ecs-19cb ~]# ip add
1: lo: <LOOPBACK,UP,LOWER_UP> mtu 65536 qdisc noqueue state UNKNOWN
    link/loopback 00:00:00:00:00:00 brd 00:00:00:00:00:00
    inet 127.0.0.1/8 scope host lo
       valid_lft forever preferred_lft forever
    inet6 ::1/128 scope host
       valid_lft forever preferred_lft forever
2: eth0: <BROADCAST,MULTICAST,UP,LOWER_UP> mtu 1500 qdisc pfifo_fast state UP qlen 1000
    link/ether fa:16:3e:0d:49:d3 brd ff:ff:ff:ff:ff:ff
    inet 192.168.2.9/24 brd 192.168.2.255 scope global dynamic eth0
       valid_lft 83583sec preferred_lft 83583sec
    inet6 fe80::f816:3eff:fe0d:49d3/64 scope link
       valid_lft forever preferred_lft forever
一、添加网页
1、默认安装路径
[root@ecs-19cb ~]# ll
total 9276
drwxr-xr-x  10 root root    4096 Feb  3 16:13 apache-tomcat-9.0.4
-rw-r--r--   1 root root 9471519 Jan 19 04:03 apache-tomcat-9.0.4.tar.gz
[root@ecs-19cb ~]# pwd
/root
2、切换到 /root/apache-tomcat-9.0.4/webapps创建一个测试目录:test
[root@ecs-19cb ~]# cd apache-tomcat-9.0.4/
[root@ecs-19cb apache-tomcat-9.0.4]# ll
total 116
drwxr-x--- 2 root root  4096 Feb  3 13:59 bin
drwx------ 3 root root  4096 Feb  3 22:41 conf
drwxr-x--- 2 root root  4096 Feb  3 13:59 lib
-rw-r----- 1 root root 57092 Jan 19 03:44 LICENSE
drwxr-x--- 2 root root  4096 Feb  3 14:21 logs
-rw-r----- 1 root root  1804 Jan 19 03:44 NOTICE
-rw-r----- 1 root root  6779 Jan 19 03:44 RELEASE-NOTES
-rw-r----- 1 root root 16246 Jan 19 03:44 RUNNING.txt
drwxr-x--- 2 root root  4096 Feb  3 13:59 temp
drwxr-x--- 8 root root  4096 Feb  3 23:37 webapps
drwxr-x--- 3 root root  4096 Feb  3 14:21 work
[root@ecs-19cb apache-tomcat-9.0.4]# cd webapps/
3、创建一个test测试目录
[root@ecs-19cb webapps]# pwd
/root/apache-tomcat-9.0.4/webapps
[root@ecs-19cb webapps]# mkdir test
扫描二维码关注公众号,回复:
1022818 查看本文章

4、在test目录下创建一个测试页面index.jsp
[root@ecs-19cb test]# vim index.jsp
<%@ page language="java" contentType="text/html; charset=GB18030" pageEncoding="GB18030" %>
<HTML>
<head>
<meta http-equiv="Content-Type" content="text/html; charset=GB18030">
<titel>Tomcat-test</titel>
</head>
        <body>
                <h1>IP: 192.168.2.9</h1>
                <img src="/test/img/tomcat.jpg" alt="tomcat" />
        </body>
</html>
5、在test目录下再创建一个img图片目录存放图片
[root@ecs-19cb test]# mkdir img
[root@ecs-19cb test]# ll
drwxr-xr-x 2 root root 4096 Feb  3 23:35 img
-rw-r--r-- 1 root root  313 Feb  3 23:36 index.jsp
6、把index.jsp网页中用到的图片上传到这个指定位置
[root@ecs-19cb test]# cd img/
[root@ecs-19cb img]# ll
total 8
-rw-r--r-- 1 root root 5647 Feb  3 23:33 tomcat.jpg
[root@ecs-19cb img]# pwd
/root/apache-tomcat-9.0.4/webapps/test/img
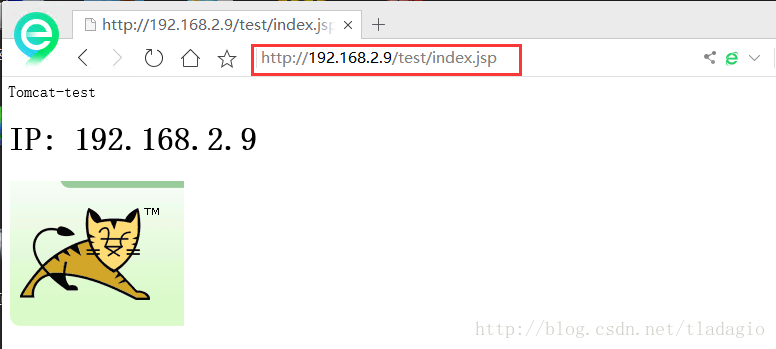
7、在浏览器打开验证:http://192.168.2.9:8080/test/index.jsp

二、修改默认端口
1、tomcat Web服务器默认安装的端口号是8080,如果需要更改为80,就切换到安装目录:/root/apache-tomcat-9.0.4/conf下修改server.xml文件
[root@ecs-19cb ~]# cd apache-tomcat-9.0.4/
[root@ecs-19cb apache-tomcat-9.0.4]# ll
total 116
drwxr-x--- 2 root root  4096 Feb  3 13:59 bin
drwx------ 3 root root  4096 Feb  4 00:03 conf
drwxr-x--- 2 root root  4096 Feb  3 13:59 lib
-rw-r----- 1 root root 57092 Jan 19 03:44 LICENSE
drwxr-x--- 2 root root  4096 Feb  4 00:05 logs
-rw-r----- 1 root root  1804 Jan 19 03:44 NOTICE
-rw-r----- 1 root root  6779 Jan 19 03:44 RELEASE-NOTES
-rw-r----- 1 root root 16246 Jan 19 03:44 RUNNING.txt
drwxr-x--- 2 root root  4096 Feb  3 13:59 temp
drwxr-x--- 8 root root  4096 Feb  3 23:53 webapps
drwxr-x--- 3 root root  4096 Feb  3 14:21 work
[root@ecs-19cb apache-tomcat-9.0.4]# cd conf/
[root@ecs-19cb conf]# ll
total 232
drwxr-x--- 3 root root   4096 Feb  3 14:21 Catalina
-rw------- 1 root root  13531 Jan 19 03:44 catalina.policy
-rw------- 1 root root   7202 Jan 19 03:44 catalina.properties
-rw------- 1 root root   1400 Jan 19 03:44 context.xml
-rw------- 1 root root   1149 Jan 19 03:44 jaspic-providers.xml
-rw------- 1 root root   2313 Jan 19 03:44 jaspic-providers.xsd
-rw------- 1 root root   3850 Jan 19 03:44 logging.properties
-rw------- 1 root root   7509 Feb  4 00:03 server.xml
-rw------- 1 root root   2164 Jan 19 03:44 tomcat-users.xml
-rw------- 1 root root   2633 Jan 19 03:44 tomcat-users.xsd
-rw------- 1 root root 170202 Jan 19 03:44 web.xml
[root@ecs-19cb conf]# pwd
/root/apache-tomcat-9.0.4/conf
2、修改server.xml默认的8080端口修改为80
[root@ecs-19cb conf]# vim server.xml
<Connector port="80" protocol="HTTP/1.1"

3、在tomcat安装目录下的bin目录里面先关闭tomcat,然后再启动服务
[root@ecs-19cb bin]# ./shutdown.sh
Using CATALINA_BASE:   /root/apache-tomcat-9.0.4
Using CATALINA_HOME:   /root/apache-tomcat-9.0.4
Using CATALINA_TMPDIR: /root/apache-tomcat-9.0.4/temp
Using JRE_HOME:        /usr
Using CLASSPATH:       /root/apache-tomcat-9.0.4/bin/bootstrap.jar:/root/apache-tomcat-9.0.4/bin/tomcat-juli.jar
[root@ecs-19cb bin]# ./startup.sh
Using CATALINA_BASE:   /root/apache-tomcat-9.0.4
Using CATALINA_HOME:   /root/apache-tomcat-9.0.4
Using CATALINA_TMPDIR: /root/apache-tomcat-9.0.4/temp
Using JRE_HOME:        /usr
Using CLASSPATH:       /root/apache-tomcat-9.0.4/bin/bootstrap.jar:/root/apache-tomcat-9.0.4/bin/tomcat-juli.jar
Tomcat started.
[root@ecs-19cb bin]# pwd
/root/apache-tomcat-9.0.4/bin