安装顺序
- 1 libfastcommon
- 2 fdfs_tracker
- 依赖:Gcc、libevent、perl
- 3 fdfs_storage
- 4 FastDFS-nginx-module
- 5 nginx
依赖:pcre-devel、zlib-devel
安装资源
链接: https://pan.baidu.com/s/1tdszpFddyPBC_EbfzkAk6Q 提取码: enhi
功能文件目录
Opt/fastdfs 数据存储目录
Usr/local/fdfs 启动文件目录
Etc/fdfs 配置文件目录
Usr/bin/fdfs_trackerd 启动配置
Etc/init.d/fdfs_trackerd 启动服务脚本
一、FastDFS–tracker安装
1、FastDFS安装环境
>FastDFS是C语言开发,建议在linux上运行
```cmd
	rpm -qa|grep -i gcc    检查是否安装gcc
	如果未安装 :  yum install gcc-c++ -y       -y :  表示自动安装,无需确定
```
如果没有perl库,需要使用yum install perl* 命令安装一下
yum -y install zlib zlib-devel pcre pcre-devel gcc gcc-c++ openssl openssl-devel libevent libevent-devel perl unzip net-tools wget
2、安装libfastcommon
-
2.1、 将 libfastcommonV1.0.7.tar.gz 解压到 /usr/local目录下
[root@236 local]# tar -zxvf libfastcommonV1.0.7.tar.gz -
2.2、编译
[root@236 libfastcommonV1.0.7 ]# ./make.sh如果出现编译perl 不识别 运行下面这段命令 依赖缺失
# yum -y install zlib zlib-devel pcre pcre-devel gcc gcc-c++ openssl openssl-devel libevent libevent-devel perl unzip net-tools wget -
2.3、安装
[root@236 libfastcommonV1.0.7 ]# ./make.sh install -
2.4、拷贝配置文件
# cp /usr/lib64/libfastcommon.so /usr/lib/
原因:libfastcommon安装好后会自动将库文件拷贝至/usr/lib64下,由于FastDFS程序引用usr/lib目录所以需要将/usr/lib64下的库文件拷贝至/usr/lib下。
3、安装tracker
-
3.1、 将 FastDFS_v5.05.tar.gz 解压到 /usr/local目录下
[root@236 ~]# tar -zxvf /appstemp/fastdfs/FastDFS_v5.05.tar.gz -C /usr/local/ -
3.2、编译
[root@236 FastDFS]# ./make.sh -
3.3、安装
[root@236 FastDFS]# ./make.sh install -
3.4、拷贝配置文件
[root@236 FastDFS]# cp conf/* /etc/fdfs/ -
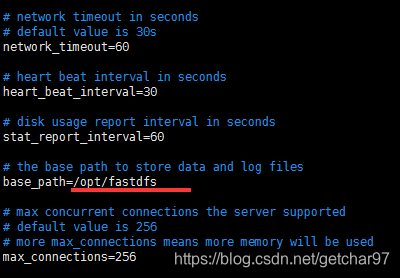
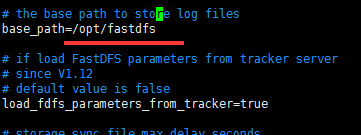
3.4、修改配置文件
[root@236 FastDFS]# vi /etc/fdfs/tracker.conf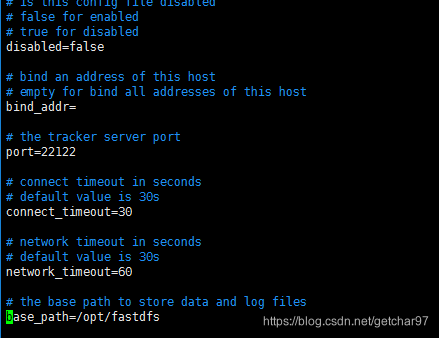
4、配置启动项(添加服务,开机自启)
-
4.1、新建启动脚本目录
mkdir /usr/local/fdfs -
4.2、拷贝安装目录下stop.sh 和restart.sh 到/usr/local/fdfs/
[root@236 fdfs]# cp /usr/local/FastDFS/stop.sh ./ [root@236 fdfs]# cp /usr/local/FastDFS/restart.sh ./ -
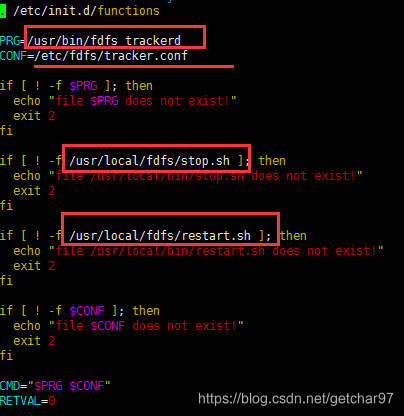
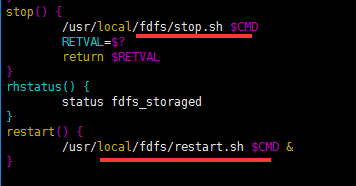
4.2、修改启动脚本
[root@236 fdfs]# vim /etc/init.d/fdfs_trackerd
-
4.3、添加服务
[root@236 init.d]# chkconfig --add fdfs_trackerd // 注册服务 [root@236 init.d]# chkconfig --list // 检查是否开机自启 -
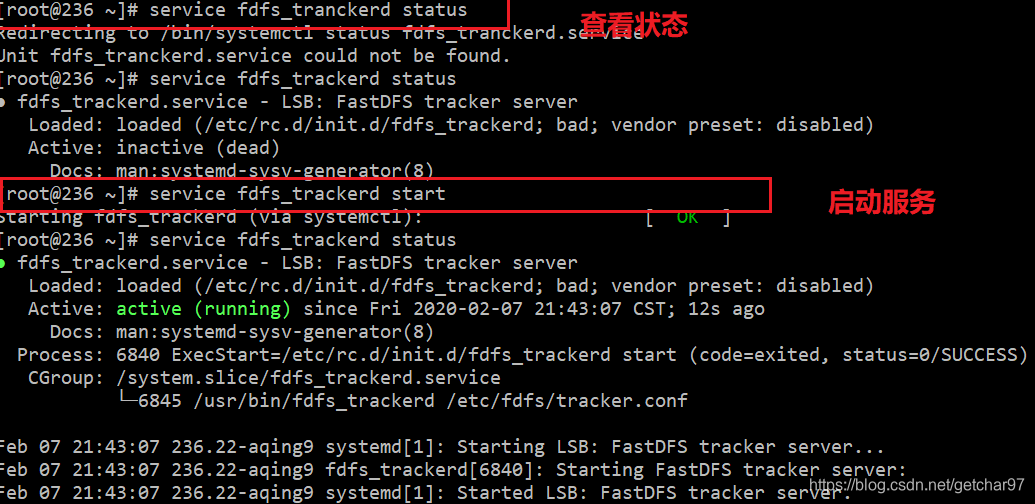
4.5、启动服务
5、FastDFS—storage配置
-
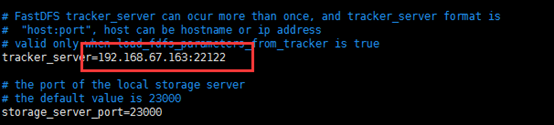
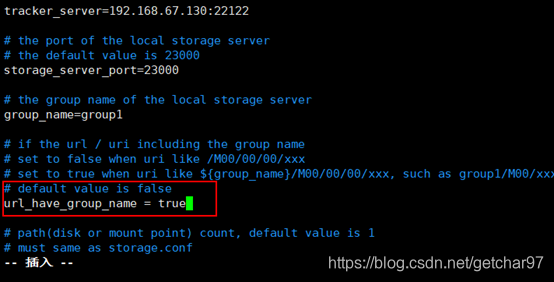
5.1、修改配置文件
[root@236 ~]# vi /etc/fdfs/storage.conf
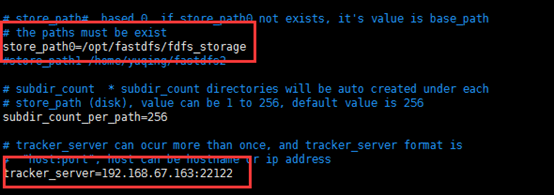
ip 为本机地址
-
5.1、创建fdfs_storage文件夹
[root@236 ~]# mkdir /opt/fastdfs/fdfs_storage -
5.2、修改启动脚本
[root@236 ~]# vi /etc/init.d/fdfs_storaged

-
5.3、添加服务
[root@236 init.d]# chkconfig --add fdfs_storaged // 注册服务 [root@236 init.d]# chkconfig --list // 检查是否开机自启 -
5.4、启动服务

6、上传图片测试
-
6.1、修改/etc/fdfs/client.conf
[root@localhost ~]# vim /etc/fdfs/client.conf

-
6.2、测试:
[root@236 fdfs]# /usr/bin/fdfs_test /etc/fdfs/client.conf upload /root/00002.png

http://114.116.236.22/group1/M00/00/00/wKgAm14-IRWAHZQOAABX00GDk94296_big.png
二、整合nginx
1、安装nginx整合插件fastdfs-nginx-module
-
1.1、 将 fastdfs-nginx-module_v1.16.tar.gz解压到 /usr/local目录下
[root@236 ~]# tar -zxvf /appstemp/fastdfs/fastdfs-nginx-module_v1.16.tar.gz -C /usr/local/ -
1.1、编辑配置文件:修改config文件将/usr/local/路径改为/usr/

-
1.1、将FastDFS-nginx-module/src下的mod_fastdfs.conf拷贝至/etc/fdfs/下
[root@236 src]# cp mod_fastdfs.conf /etc/fdfs/- 并修改mod_fastdfs.conf的内容:
[root@236 fdfs]# vi mod_fastdfs.conf

-
将libfdfsclient.so拷贝至/usr/lib下
[root@236 fdfs]# cp /usr/lib64/libfdfsclient.so /usr/lib/
2、nginx安装
-
2.1、创建nginx/client目录
[root@236 fdfs]# mkdir -p /var/temp/nginx/client -
2.2、配置
[root@236 local]# cd nginx-1.12.2/

[root@236 nginx-1.12.2]# ./configure \
 --prefix=/usr/local/nginx \
 --pid-path=/var/run/nginx/nginx.pid \
 --lock-path=/var/lock/nginx.lock \
 --error-log-path=/var/log/nginx/error.log \
 --http-log-path=/var/log/nginx/access.log \
 --with-http_gzip_static_module \
 --http-client-body-temp-path=/var/temp/nginx/client \
 --http-proxy-temp-path=/var/temp/nginx/proxy \
 --http-fastcgi-temp-path=/var/temp/nginx/fastcgi \
 --http-uwsgi-temp-path=/var/temp/nginx/uwsgi \
 --http-scgi-temp-path=/var/temp/nginx/scgi \
 --add-module=/usr/local/fastdfs-nginx-module/src
配置成功页面

-
2.3、编译、安装
#检查yum库 :
[root@236 local]# yum -y install pcre-devel zlib-devel
#编译
[root@236 nginx-1.12.2]# make
#安装
[root@236 nginx-1.12.2]#  make install
安装成功会生成此目录 /user/local/nginx
-
2.3、编辑nginx配置文件
vim /usr/local/nginx/conf/nginx.conf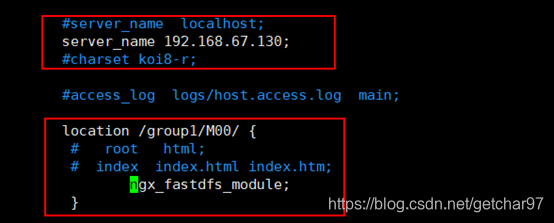
-
2.4、启动nginx
[root@236 nginx]# sbin/nginx出现 ngx_http_fastdfs_set pid=20505 表示成功
-
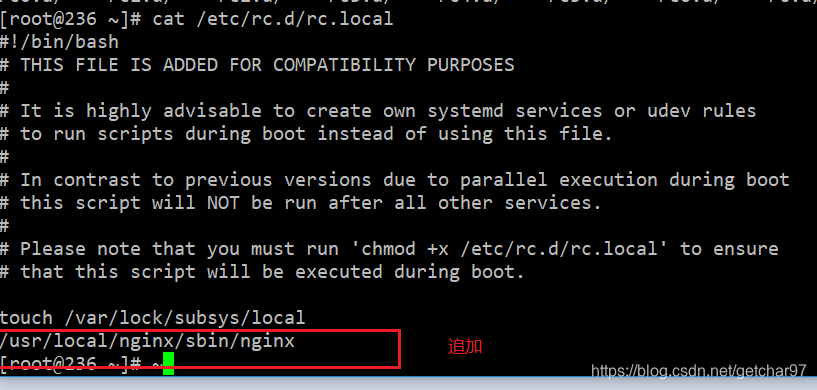
2.5、设置开机启动
[root@236 nginx]# vi /etc/rc.d/rc.local