(文件上传二)SpringBoot+JQ文件上传
1、在做web项目的过程中,主要是写接口和wap、web或者是app工程师进行交互,我们交互的主要内容是数据的交互,说白一点,大致类似于字符串的交换。
2、个人中心或者后端管理功能难免会有一些个文件上传的功能,这里的话就不是简简单单的字符串交互的问题了。但是对于计算机来说,不管是什么,都是0或者1的二进制数据。
3、以图片上传为例我们结合SpringBoot和JQ进行文件上传。
bootDemo下载地址 :https://pan.baidu.com/s/1bPNjjy1K0NbeyKgMKITDtg 密码:2j6n
主要代码如下:
html部分:
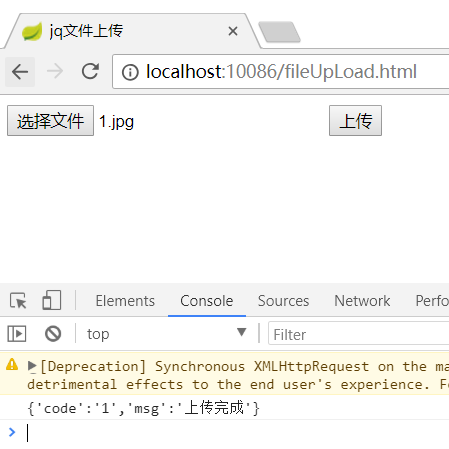
		<!DOCTYPE html>
		<html>
			<head>
				<meta charset="UTF-8">
				<title>jq文件上传</title>
			</head>
			<body>
				<div id="fileDiv">
					<input type="file" id="myFile" name="file"/>
					<button id="upLoadBtn">上传</button>
				</div>
			</body>
			<script type="text/javascript" src="jquery2.0.0.min.js" ></script>
			<script type="text/javascript" src="fileUpLoad.js"></script>
		</html>
JS部分:
			var imgUpLoadUrl = "/img/upload.do";

			$(function(){
				$("#upLoadBtn").click(function(){
					if(checkImg()){
						upLoadImg();
					}
				});
			})

			//校验函数
			function checkImg(){
				//获取file对象
				var file = $("#myFile").val();
				if(!/.(gif|jpg|jpeg|png|GIF|JPG|bmp)$/.test(file)){
					layer.msg("图片类型必须是.gif,jpeg,jpg,png,bmp中的一种",{icon: 2,time: 2000});
					return false;
				}else{
					//大小校验
					if(($("#myFile")[0].files[0].size.toFixed(2))>=(500*1024)){
						layer.msg("请上传小于500KB的图片",{icon: 2,time: 2000})
					    return false;
					}
				}
				return true;
			}

			//上传函数
			function upLoadImg(){
				var imgEle = $("#myFile")[0].files[0];
				var formdata = new FormData();
				formdata.append('file',imgEle);
				 $.ajax({
			    	 url:imgUpLoadUrl,
			    	 type:'post',
			         data:formdata,
			         cache: false,
			         processData: false,
			         contentType: false,
			         async: false
			     }).done(function(res) {
			    	 //自行处理
			     	console.log(res);
			     }).fail(function(res) {
			    	 //自行处理
			    	 console.log(res);
			     });;
			}
JAVA部分:
package com.file.upload.controller;

import java.io.File;
import java.io.FileOutputStream;
import java.io.IOException;
import java.io.InputStream;

import org.springframework.web.bind.annotation.PostMapping;
import org.springframework.web.bind.annotation.RequestMapping;
import org.springframework.web.bind.annotation.RestController;
import org.springframework.web.multipart.MultipartFile;

@RestController
@RequestMapping("/img")
public class ImgUpLoadCon {

	@PostMapping("/upload.do")
	public String uploadImg(MultipartFile file) {
		InputStream in = null;
		FileOutputStream fos = null;

		//设置每次读取文件时的大小
		byte[] bytes = new byte[2048];
		try {
			//获取文件的输入流 , 该类有个方法是直接将文件持久化的 , 但是在windows在可能会出现路径过长的问题
			in = file.getInputStream();
			int len = 0;

			//文件持久化路径 , 就是上传之后存放该文件的地址
			String filePathStr = "D:/data/";

			//这里获取的是文件名 , 一般实际项目中都是自己生成文件路径记录到数据库中 , 但不是所有 ,此处不用
			String fileName = file.getOriginalFilename();

			//对路径常见 File 对象进行操作
			File filePath = new File(filePathStr);

			//创建路径
			if(!filePath.exists()) {
				filePath.mkdirs();
			}

			//获取输出流 , 格式自己做适配 根据MiME
			fos = new FileOutputStream(filePathStr+"test.jpg");

			//将读取到的内容写入到指定文件中
			while((len=in.read(bytes))!=-1) {
				fos.write(bytes, 0, len);
			}

			//flush 输出流
			fos.flush();
		} catch (IOException e) {
			e.printStackTrace();
		}finally {
				try {
					//关闭输出流
					if(null!=fos) {
					fos.close();
					}
					//关闭输入流
					if(null!=in) {
						in.close();
					}
				} catch (IOException e) {
					e.printStackTrace();
				}
		}
		//反回数据 , 这里可以反回自定义类型 , 这个略过
		return "{'code':'1','msg':'上传完成'}";
	}

}
SpringBoot+JQ上传完成。