前言
近期因为工作上需要频繁在不同系统平台之间分享文件,故需要部署一个文件共享服务器,一开始考虑了采用FTP服务器,但是部署了之后总有莫名其妙的权限和文件损坏的问题,所以后来决定采用多服务的方式进行文件共享,包含http单下载服务,samba多功能服务,下面开始配置samba
1、安装服务
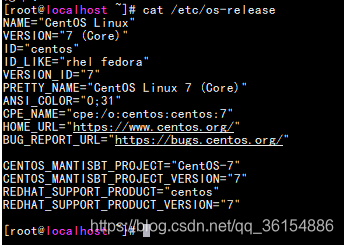
1、1、部署环境信息
1.2、配置源
1.3、开始安装
yum install samba -y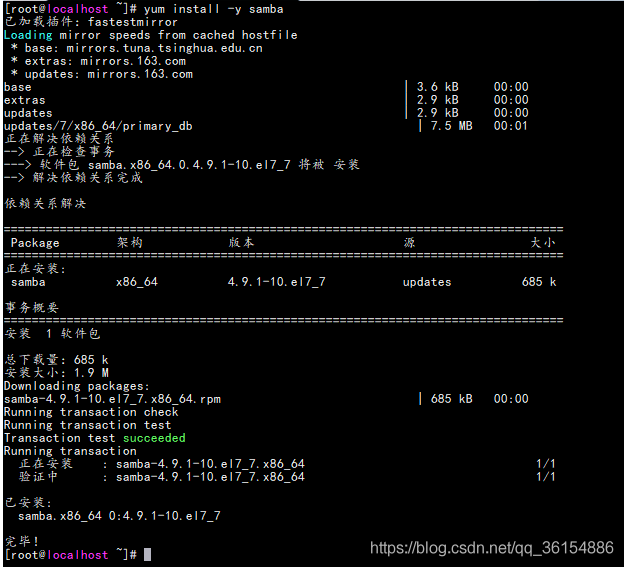
2、配置服务
2.1、配置匿名访问
2.1.1、看一下原配置文件
[root@localhost ~]# cat /etc/samba/smb.conf
# See smb.conf.example for a more detailed config file or
# read the smb.conf manpage.
# Run 'testparm' to verify the config is correct after
# you modified it.

[global]
        workgroup = SAMBA
        security = user
        passdb backend = tdbsam

        printing = cups
        printcap name = cups
        load printers = yes
        cups options = raw

[homes]
        comment = Home Directories
        valid users = %S, %D%w%S
        browseable = No
        read only = No
        inherit acls = Yes

[printers]
        comment = All Printers
        path = /var/tmp
        printable = Yes
        create mask = 0600
        browseable = No

[print$]
        comment = Printer Drivers
        path = /var/lib/samba/drivers
        write list = @printadmin root
        force group = @printadmin
        create mask = 0664
        directory mask = 0775
2.1.2、配置全局参数
使用vim命令进入配置文件进行编辑,找到全局配置
[global]
        workgroup = SAMBA
        security = user
        passdb backend = tdbsam

        printing = cups
        printcap name = cups
        load printers = yes
        cups options = raw
然后插入一段内容
map to guest = bad user效果如下
[global]
        workgroup = SAMBA
        security = user
        map to guest = bad user
        passdb backend = tdbsam

        printing = cups
        printcap name = cups
        load printers = yes
        cups options = raw
2.1.3、添加共享路径
在配置文件的最下面添加下的参数
[share]
        comment = this share dir
        path = /share
        writeable = yes
        browseable = yes
        guest ok = yes
- comment = this share dir ##对此共享配置信息的描述(可自定义)
- path = /share #共享路径(可自定义)
添加完成之后就可以保存了,保存之后内容如下
[global]
        workgroup = SAMBA
        security = user
        map to guest = bad user
        passdb backend = tdbsam

        printing = cups
        printcap name = cups
        load printers = yes
        cups options = raw

[homes]
        comment = Home Directories
        valid users = %S, %D%w%S
        browseable = No
        read only = No
        inherit acls = Yes

[printers]
        comment = All Printers
        path = /var/tmp
        printable = Yes
        create mask = 0600
        browseable = No

[print$]
        comment = Printer Drivers
        path = /var/lib/samba/drivers
        write list = @printadmin root
        force group = @printadmin
        create mask = 0664
        directory mask = 0775
[share]
        comment = this share dir
        path = /share
        writeable = yes
        browseable = yes
        guest ok = yes
2.1.4、配置权限
从上面的配置中可得知,此时的共享路径是
/share/所以现在要新建此路径,并配置相关权限(请依次执行一下指令)
mkdir -p /sharechown nobody:nobody /share/chmod -R 777 /share/sed -i 's/SELINUX=.*/SELINUX=disabled/g' /etc/sysconfig/selinuxsed -i 's/SELINUX=.*/SELINUX=disabled/g' /etc/selinux/configsystemctl stop firewalldsetenforce 02.1.5、启动服务
systemctl restart smb nmb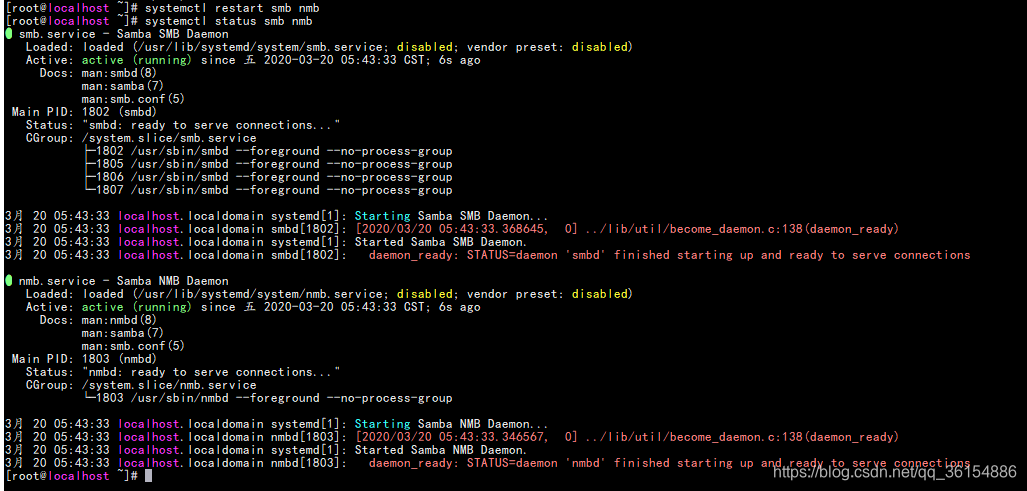
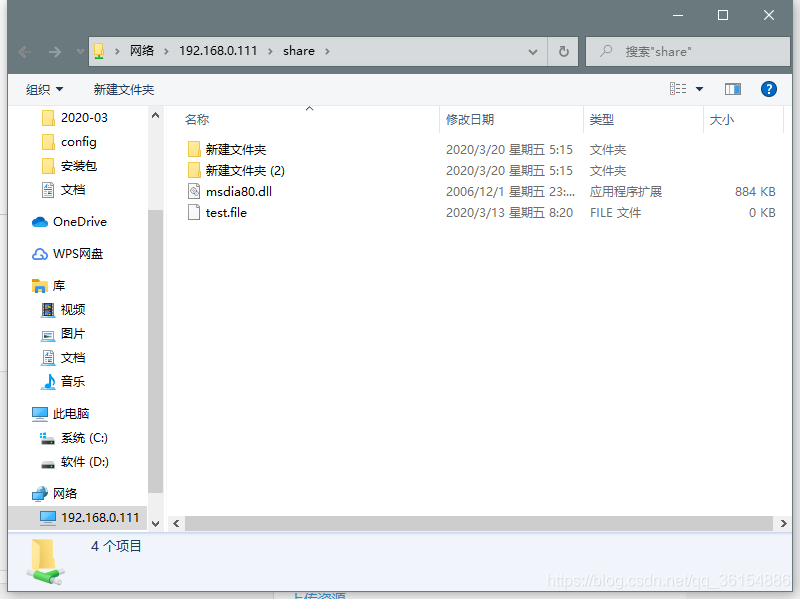
2.1.6、验证
按win+R运行指令
\\192.168.0.111 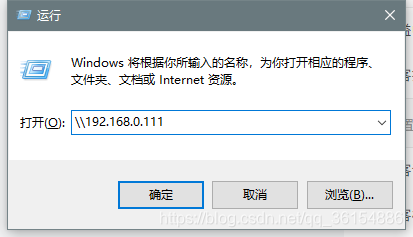
回车,此时已成功进入共享
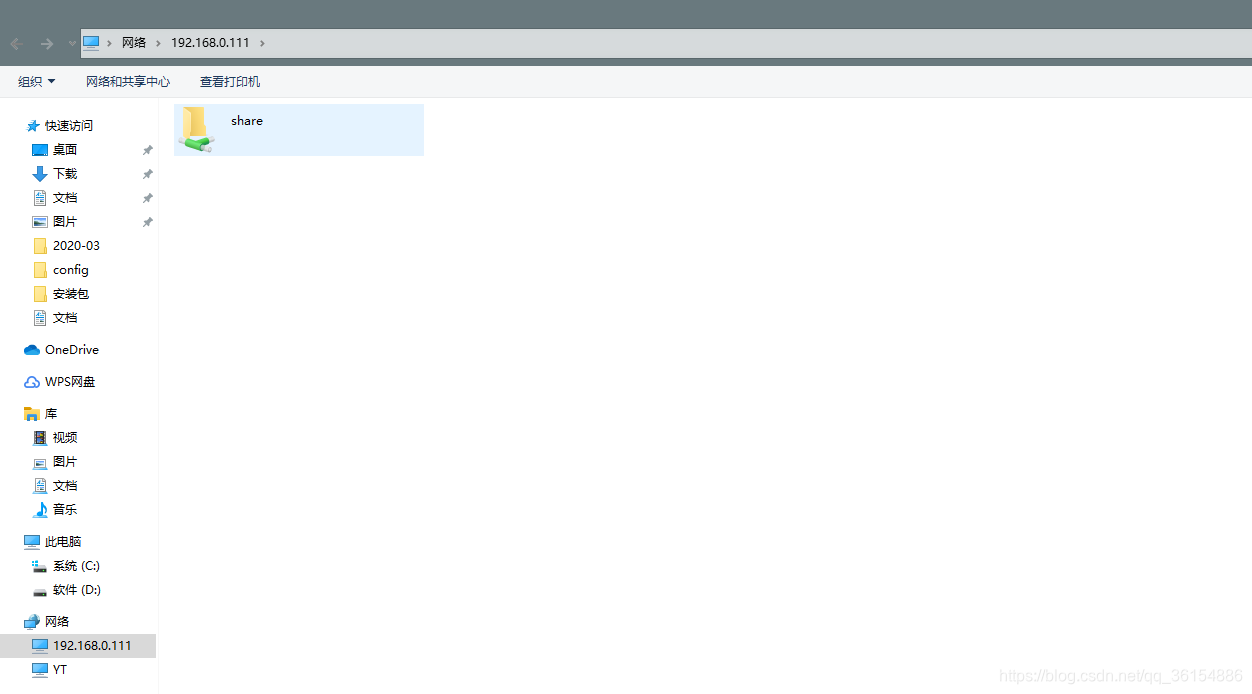
然后尝试上传文件,成功