一、编写公共的样式
- 首先写一套可以用来进行换肤的样式
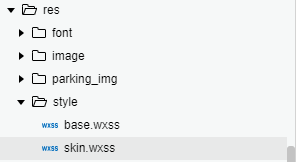
/* pages/member/skin/skin.wxss */
/* 天空蓝 */
.blue-box {
  background: #5ba1e7 !important;
}

.extra-blue {
  color: #85bdf3 !important;
}

.blue-item {
  color: #a2cbf3 !important;
}
.blue-border{
  border:1rpx solid  #85bdf3 !important;
}
.blue{
  border-bottom:3px solid #a2cbf3 !important;
}
.blue-three{
  background: #A2CBF3 !important;
}
/*优雅粉*/

.pink-box {
  background: #fc7297 !important;
}

.extra-pink {
  color: #fe95b1 !important;
}

.pink-item {
  color: #feb1c6 !important;
}
.pink-border{
  border:1rpx solid  #feb1c6 !important;
}
.pink{
  border-bottom:3px solid #feb1c6 !important;
}
.pink-three{
  background: #FEB1C6 !important;
}
/*活力橙*/

.orgin-box {
  background: #ff9000 !important;
}

.extra-orgin {
  color: #ffac40 !important;
}

.orgin-item {
  color: #ffc273 !important;
}
.orgin-border{
  border:1rpx solid  #ffc273 !important;
}
.orgin{
  border-bottom:3px solid #ffc273 !important;
}
.orgin-three{
  background: #FFC273 !important;
}
二、根据具体需求进行皮肤色的变换
- 我所在的项目目前是通过后台的参数来对主题色的更改,实现换肤功能。
- 所以需要在请求接口的时候对皮肤色的初始化进行判断及存储
  getData: function() {
    let that = this;
    http.requestLoading('api/services/app/CRMMemberService/GetMyInfo', {}, '').then(res => {
      if (res.data.Result.Code === 0) {
        let skin = ""
        if (res.data.Result.Data.SkinColor == 0) {
          skin = "orgin";
          this.setData({
            skinStyle: "orgin"
          })
        } else if (res.data.Result.Data.SkinColor == 1) {
          skin = "blue"
          this.setData({
            skinStyle: "blue"
          })
        } else {
          skin = "pink"
          this.setData({
            skinStyle: "pink"
          })
        }
        //保存到本地
        wx.setStorageSync('skin', skin)
      }
    })
  },
- 在需要进行换肤的页面进行引用即可
js页面代码如下:
data: {
    skinStyle: ''
  },
  onShow: function() {
    let skin = wx.getStorageSync("skin");
    this.setData({
      skinStyle: skin
    })
  },
wxml页面代码:
<view class="bind_yzm {{skinStyle}}-item {{skinStyle}}-border" bindtap="send" wx:if="{{!unbind}}">
         {{btnText}}
 </view>
- 如果需要手动的设置皮肤色,则可以通过如下方式实现。
首先定义相关的选择按钮:
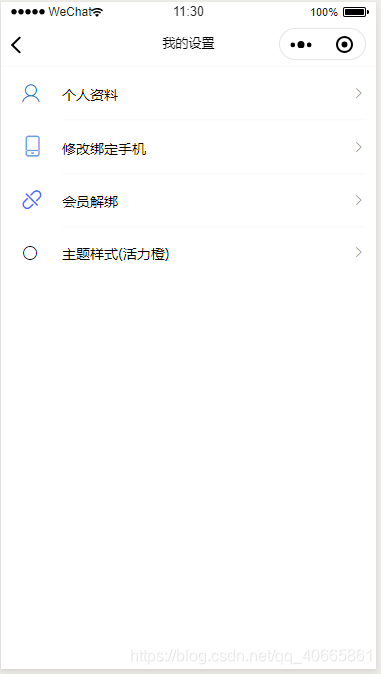

代码实现 :
<view class="setting_ms">
    <view class="setting_ms_l">
      <text class="iconfont iconyuanxingweixuanzhong {{skinStyle}}-item"></text>
    </view>
    <view class="setting_ms_r">
      <picker bindchange="bindPickerChange" value="{{index}}" range="{{array}}">
        <view class="picker">
          <text class="setting_ms_r_zl">主题样式({{array[index]}})</text>
          <text class="iconfont iconxiangshang-copy"></text>
        </view>
      </picker>
    </view>
  </view>
wxss样式:
.setting_ms {
  width: 750rpx;
  height: 107rpx;
}

.setting_ms_l {
  display: inline-block;
  line-height: 107rpx;
  width: 40rpx;
  height: 100%;
  margin-left: 42rpx;
  margin-right: 40rpx;
}

.setting_ms_r {
  display: inline-block;
  line-height: 107rpx;
  width: 607rpx;
  height: 100%;
  border-bottom: 1rpx solid rgba(228, 228, 228, 0.48);
}

.setting_ms:nth-last-child(1) .setting_ms_r {
  border-bottom: 1rpx solid transparent;
}

.iconzhanghao {
  font-size: 36rpx;
  color: rgba(5, 121, 203, 1);
}

.setting_ms_r_zl {
  font-size: 28rpx;
}
js逻辑实现:
 data: {
    skinStyle: "",
    array: ["活力橙", "天空蓝", "优雅粉"],
    index: 0
  },
  bindPickerChange(e) {
    var that = this
    that.setData({
      index: e.detail.value
    })
    //设置全局变量
    let skin = "";
    if (e.detail.value == 2) {
      // app.globalData.skin = "pink"
      skin = "pink"
    } else if (e.detail.value == 0) {
      // app.globalData.skin = "orgin"
      skin = "orgin"
    } else {
      // app.globalData.skin = "blue"
      skin = "blue"
    }
    that.setData({
      skinStyle: skin
    })
    //保存到本地
    wx.setStorageSync('skin', skin)
  },
- 为了方便可以存储到全局中,只需把我上面注释的代码放出来即可
app.js中代码
globalData: {
    skin: ''
  },
  getSkin: function() {
    var that = this
    that.globalData.skin = wx.getStorageSync("skin")
  },
页面引用:
app.getSkin();
