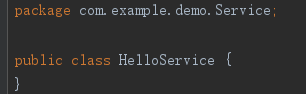
第一步:在项目主文件夹下创建配置类文件,然后创建一个Service文件,里面包含了我们需要的组件,比如我们添加HelloService文件,则在其中创建该类,创建该组件类完目前不需要进行操作
 一般我们都是在xml配置文件中通过标签添加容器,在springboot中我们在resource目录下创建一个spring配置的xml文件,如图所示:
 ,
,
然后在其中添加以下标签,定义id和路径为组件的位置
<bean id="HelloService" class="com.example.demo.Service.HelloService"></bean>
然后在主程序中添加这样的注解@ImportResource(locations = {"classpath:beans.xml"}),这样就可以添加组件了。
然后在测试文件中添加以下代码:
@Test
public void testHelloService(){
    boolean helloService = ioc.containsBean("helloService");
    System.out.println(helloService);
}
然后点击该测试程序,在输出栏中可以查看该组件是否存在。
而在springboot中最好是使用配置类的方式给容器添加组件:
在主文件夹中创建一个配置类,使用@Configuration注解,指定当前类是一个配置类,这样就可以替代上面的配置文件。
将该方法的返回值添加到容器中,容器中这个组件默认的名称就是这个方法名
public class AppConfig {
    @Bean
    public HelloService helloService(){
        System.out.println("配置类@Bean容器中添加组件");
        return new HelloService();
    }
}
然后可以在主程序中可以注释掉之前导入的beans.xml配置文件的代码了
直接点击测试程序中Test的启动按钮,在输出栏可以看到:

