接着上一篇,利用帧缓存来创建精灵。
尤其是做帧动画,就更得需要这种方法来创建精灵。比如下面的骨骼动画:

帧缓存的工作步骤是:先把所有的精灵都做成在一个文件里,这个文件叫Sprite Sheets,是.plist文件,然后将这个文件加载到SpriteFrameCache里面。调用的时候,直接从这个Cache里面读取你想显示的精灵。
为什么要用Sprite Sheets?原因:
1. 节省时间。如果你一个一个的文件加载,电脑岂不是累死。
2. 分开加载的话,每个图片在内存里的位置都是分开的,不便于程序快速引用
3. 在纹理的形式,图片相互转换的话程序消耗更高
4. 精灵不能够得到优化。比如优化成多边形的精灵,可以节省内存。
那么,利用Sprite Sheets你可以让程序跑的飞快,而且用起来非常方便。那我们开始吧~
我们目标就是做一个骨骼动画,所有的资源在这里。
第一步,做成Sprite Sheets
我们当然得需要工具,那么官网推荐的工具是texturePacker,下载。安装完了后,启动界面如下:

然后,把cityscene文件夹拖进来。注意右边需要几个设定的地方。

点击缩放变体,在里面选cocos2d-x HDR/HD/SD,点击应用,关闭设定窗口。

点击发布精灵表,选个地方保存。

如果出现这个错误,是你没有加上占位符{v}

在数据文件里这样写:.../res/{v}/cityscene.plist。再发布精灵表,成功了。

你会发现在res下,生成了3个文件夹,里面都会有cityscene.plist。这个是针对3个不同分辨率的。
屏幕高度h<512, 用SD;513 < h < 1024,用HD;h > 1024,用HDR。

打开一个plist看一下,其实就是xml格式的内容。

第二步:导入plist到SpriteFrameCache
SpriteFrameCache::getInstance()->addSpriteFramesWithFile("cityscene.plist");
之后,我们先加载背景图片:
// HelloWorldScene.cpp
bool HelloWorld::init()
{
    if (!Scene::init()){ return false; }

    auto visibleSize = Director::getInstance()->getVisibleSize();
    auto origin = Director::getInstance()->getVisibleOrigin();

    SpriteFrameCache::getInstance()->addSpriteFramesWithFile("cityscene.plist");
    // background
    auto background = Sprite::createWithSpriteFrameName("background.png");
    background->setPosition(origin.x + visibleSize.width / 2, origin.y + visibleSize.height / 2);
    this->addChild(background);
    return true;
}
// AppDelegate.cpp
static cocos2d::Size designResolutionSize = cocos2d::Size(1024, 768); // <-- Modify
auto frameSize = glview->getFrameSize();
std::vector<std::string> searchPaths; // <-- Add
// if the frame's height is larger than the height of medium size.
if (frameSize.height > mediumResolutionSize.height)
{
searchPaths.push_back("res/HDR"); // <-- Add
director->setContentScaleFactor(MIN(largeResolutionSize.height/designResolutionSize.height, largeResolutionSize.width/designResolutionSize.width));
}
// if the frame's height is larger than the height of small size.
else if (frameSize.height > smallResolutionSize.height)
{
searchPaths.push_back("res/HD"); // <-- Add
director->setContentScaleFactor(MIN(mediumResolutionSize.height/designResolutionSize.height, mediumResolutionSize.width/designResolutionSize.width));
}
// if the frame's height is smaller than the height of medium size.
else
{
searchPaths.push_back("res/SD"); // <-- Add
director->setContentScaleFactor(MIN(smallResolutionSize.height/designResolutionSize.height, smallResolutionSize.width/designResolutionSize.width));
}
FileUtils::getInstance()->setSearchPaths(searchPaths); // <-- Add
register_all_packages();
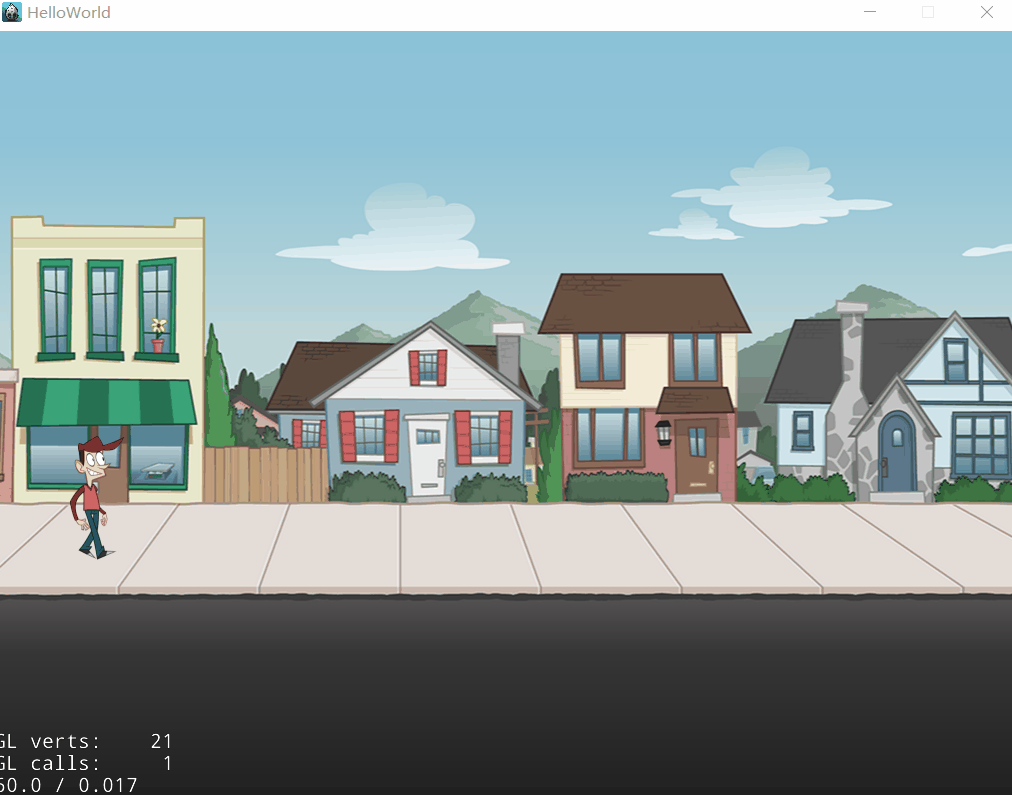
第三步:加载精灵:这是一个原地走路的动画。
// HelloWorldScene.h Add
private:
    cocos2d::Vector<cocos2d::SpriteFrame*> getAnimation(const char* format, int count);

// HelloWorldScene.cpp
// After this->addChild(background), Add the following code
    auto frames = getAnimation("capguy/walk/%04d.png", 8);
    auto sprite = Sprite::createWithSpriteFrame(frames.front());
    background->addChild(sprite);
    sprite->setPosition(100, 300);

    auto animation = Animation::createWithSpriteFrames(frames, 1.0f / 8);
    sprite->runAction(RepeatForever::create(Animate::create(animation)));

// Create New Function
Vector<SpriteFrame*> HelloWorld::getAnimation(const char* format, int count)
{
    auto spritecache = SpriteFrameCache::getInstance();
    Vector<SpriteFrame*> animFrames;
    char str[100];
    for (int i = 1; i <= count; i++)
    {
        sprintf(str, format, i);
        animFrames.pushBack(spritecache->getSpriteFrameByName(str));
    }
    return animFrames;
}
我们可以再加上移动的效果:
// HelloWorldScene.cpp
// After sprite->runAction(RepeatForever::create(Animate::create(animation))), Add following code
    auto movement = MoveTo::create(5, Vec2(1024, 300));
    auto resetPosition = MoveTo::create(0, Vec2(-75, 300));
    auto sequence = Sequence::create(movement, resetPosition, NULL);
    sprite->runAction(RepeatForever::create(sequence));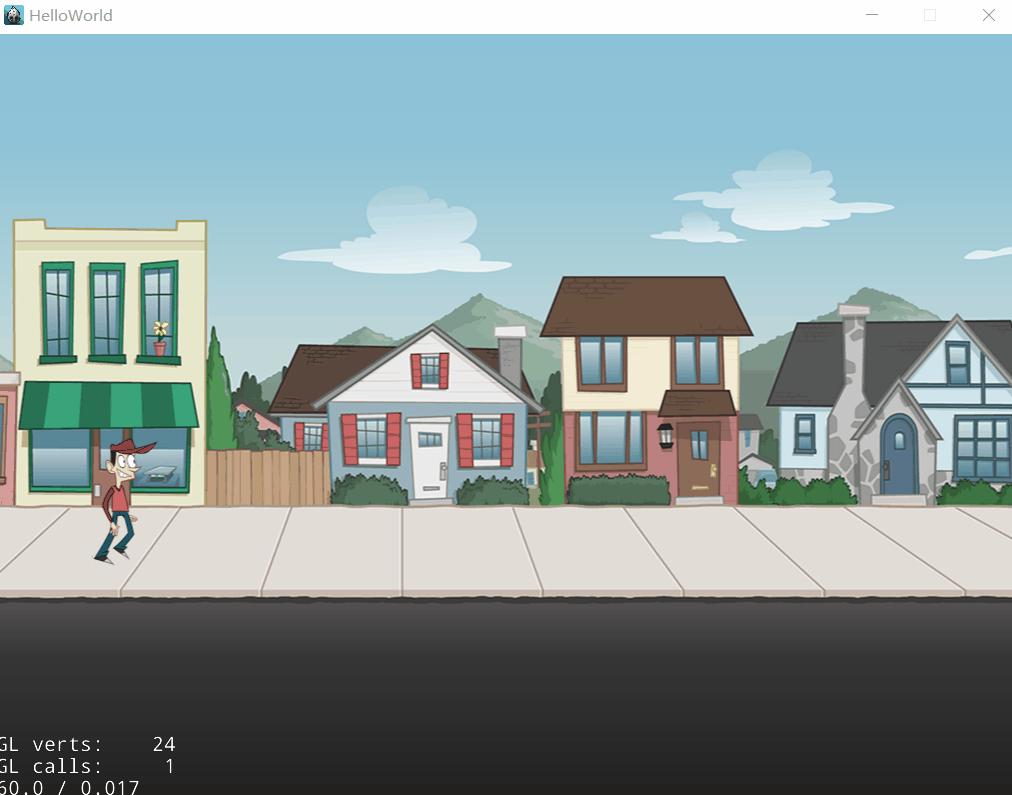
以上。
