1、使用Mechanize库上网:
Mechanize库的Browser类允许我们对浏览器中的任何内容进行操作。
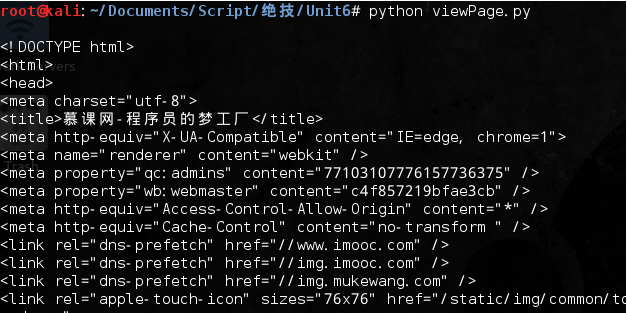
#!/usr/bin/python
#coding=utf-8
import mechanize

def viewPage(url):
    browser = mechanize.Browser()
    page = browser.open(url)
    source_code = page.read()
    print source_code

viewPage('http://www.imooc.com/')
运行结果:
匿名性——使用代理服务器、User-Agent和cookie:
书上是从http://www.hidemyass.com/中获取的一个代理IP,且在http://ip.ntfsc.noaa.gov/中显示的当前IP来测试代理IP是否可用。但是以上两个网址正常都访问不了,那就直接用国内访问得了的吧,具体的可参考《Python爬虫之基础篇》中的代理IP部分。
为了方便,直接上之前的脚本找找看哪些代理IP可用,有个注意的地方就是查看当前IP的网址变为http://2017.ip138.com/ic.asp,之前的那个现在是查看CDN节点IP的了。
agentIP.py的运行结果:
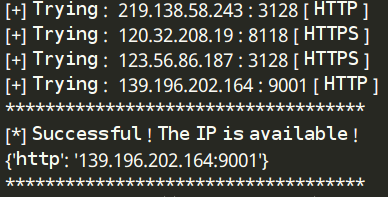
直接找显示可行的那个代理IP下来,编写使用Mechanize验证代理IP的脚本:
#!/usr/bin/python
#coding=utf-8
import mechanize

def testProxy(url, proxy):
    browser = mechanize.Browser()
    browser.set_proxies(proxy)
    page = browser.open(url)
    source_code = page.read()
    print source_code

url = 'http://2017.ip138.com/ic.asp'
hideMeProxy = {'http': '139.196.202.164:9001'}
testProxy(url, hideMeProxy)
运行结果:
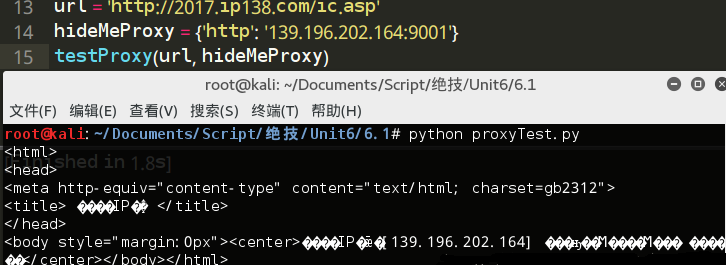
可用看到,页面显示的IP地址确实是代理的IP地址。
另外还要添加User-Agent的匿名,在http://www.useragentstring.com/pages/useragentstring.php中有很多版本的UA提供。另外,该页面http://whatismyuseragent.dotdoh.com提供将UA显示在页面的功能,但现在已经用不了了。还是写上书上的源代码:
#!/usr/bin/python
#coding=utf-8
import mechanize

def testUserAgent(url, userAgent):
    browser = mechanize.Browser()
    browser.addheaders = userAgent
    page = browser.open(url)
    source_code = page.read()
    print source_code

url = 'http://whatismyuseragent.dotdoh.com/'
userAgent = [('User-agent', 'Mozilla/5.0 (X11; U; Linux 2.4.2-2 i586; en-US; m18) Gecko/20010131 Netscape6/6.01')]
testUserAgent(url, userAgent)
下面是个人修改的部分,同样以页面返回的形式来验证UA:
先换个国内查看UA的网页吧:http://www.atool.org/useragent.php
刚打开时会出现如图等待的页面,过了5秒后才真正地跳转到返回UA的页面:


这个主要是防止一些静态爬虫以及拦截一些非浏览器特征的请求,这时Mechanize库就不能起作用了,这时就简单地编写动态爬虫绕过这个机制吧。
查看下源代码中的标签内容:

根据这个标签的特征,编写验证UA的动态爬虫,这里设置webdriver驱动UA有两种方式:
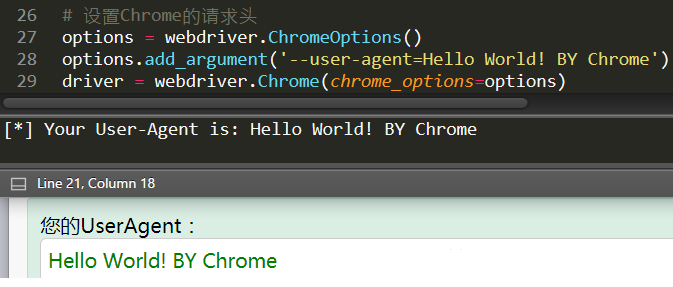
#!/usr/bin/python
#coding=utf-8
from selenium import webdriver
from selenium.webdriver.common.desired_capabilities import DesiredCapabilities
from bs4 import BeautifulSoup as BS
import time

url = 'http://www.atool.org/useragent.php'

# 设置PhantomJS的请求头
# dcap = dict(DesiredCapabilities.PHANTOMJS)
# dcap["phantomjs.page.settings.userAgent"] = ("Hello World! BY PhantomJS")
# driver = webdriver.PhantomJS(executable_path='E:\Python27\Scripts\phantomjs-2.1.1-windows\\bin\phantomjs.exe', desired_capabilities=dcap)

# 设置Chrome的请求头
options = webdriver.ChromeOptions()
options.add_argument('--user-agent=Hello World! BY Chrome')
driver = webdriver.Chrome(chrome_options=options)

driver.get(url)
time.sleep(5)
page_source = driver.page_source
soup = BS(page_source, 'lxml')
ua = soup.find_all(name='input', attrs={'id':'ua_code'})[0].get('value')
print "[*] Your User-Agent is: " + ua
看看Chrome驱动返回的数据:
接着和Cookielib库一起使用,使用一个能把各个不同的cookie保存到磁盘中的容器,该功能允许用户收到cookie后不必把它返回给网站,且可以查看其中的内容:
#!/usr/bin/python
#coding=utf-8
import mechanize
import cookielib

def printCookies(url):
    browser = mechanize.Browser()
    cookie_jar = cookielib.LWPCookieJar()
    browser.set_cookiejar(cookie_jar)
    page = browser.open(url)
    for cookie in cookie_jar:
        print cookie

url = 'http://www.imooc.com/'
printCookies(url)
运行结果:

把代码集成在Python类的AnonBrowser中:
现在把前面代码中的几个匿名操作的函数集成在一个新类anonBrowser中,该类继承了Mechanize库的Browser类并直接封装前面所有的函数,同时添加了__init__()函数、其中的参数使用户可以自定义添加代理列表和UA列表。
#!/usr/bin/python
#coding=utf-8
import mechanize
import cookielib
import random

class anonBrowser(mechanize.Browser):
    def __init__(self, proxies = [], user_agents = []):
        mechanize.Browser.__init__(self)
        self.set_handle_robots(False)
        # 可供用户使用的代理服务器列表
        self.proxies = proxies
        # user_agent列表
        self.user_agents = user_agents + ['Mozilla/4.0 ', 'FireFox/6.01','ExactSearch', 'Nokia7110/1.0']
        self.cookie_jar = cookielib.LWPCookieJar()
        self.set_cookiejar(self.cookie_jar)
        self.anonymize()

    # 清空cookie
    def clear_cookies(self):
        self.cookie_jar = cookielib.LWPCookieJar()
        self.set_cookiejar(self.cookie_jar)

    # 从user_agent列表中随机设置一个user_agent
    def change_user_agent(self):
        index = random.randrange(0, len(self.user_agents) )
        self.addheaders = [('User-agent',  ( self.user_agents[index] ))]

    # 从代理列表中随机设置一个代理
    def change_proxy(self):
        if self.proxies:
            index = random.randrange(0, len(self.proxies))
            self.set_proxies( {'http': self.proxies[index]} )

    # 调用上述三个函数改变UA、代理以及清空cookie以提高匿名性,其中sleep参数可让进程休眠以进一步提高匿名效果
    def anonymize(self, sleep = False):
        self.clear_cookies()
        self.change_user_agent()
        self.change_proxy()

        if sleep:
            time.sleep(60)
测试每次是否使用不同的cookie访问:
#!/usr/bin/python
#coding=utf-8
from anonBrowser import *

ab = anonBrowser(proxies=[], user_agents=[('User-agent','superSecretBroswer')])

for attempt in range(1, 5):
    # 每次访问都进行一次匿名操作
    ab.anonymize()
    print '[*] Fetching page'
    response = ab.open('http://www.kittenwar.com/')
    for cookie in ab.cookie_jar:
        print cookie
访问http://www.kittenwar.com/,可以看到每次都使用不同的cookie:

2、用anonBrowser抓取更多的Web页面:
用BeautifulSoup解析Href链接:
下面的脚本主要比较使用re模块和BeautifulSoup模块爬取页面数据的区别。
#!/usr/bin/python
#coding=utf-8
from anonBrowser import *
from BeautifulSoup import BeautifulSoup
import os
import optparse
import re

def printLinks(url):
    ab = anonBrowser()
    ab.anonymize()
    page = ab.open(url)
    html = page.read()
    # 使用re模块解析href链接
    try:
        print '[+] Printing Links From  Regex.'
        link_finder = re.compile('href="(.*?)"')
        links = link_finder.findall(html)
        for link in links:
            print link
    except:
        pass
    # 使用bs4模块解析href链接
    try:
        print '\n[+] Printing Links From BeautifulSoup.'
        soup = BeautifulSoup(html)
        links = soup.findAll(name='a')
        for link in links:
            if link.has_key('href'):
                print link['href']
    except:
        pass

def main():
    parser = optparse.OptionParser('[*]Usage: python linkParser.py -u <target url>')
    parser.add_option('-u', dest='tgtURL', type='string', help='specify target url')
    (options, args) = parser.parse_args()
    url = options.tgtURL

    if url == None:
        print parser.usage
        exit(0)
    else:
        printLinks(url)

if __name__ == '__main__':
    main()
运行结果:
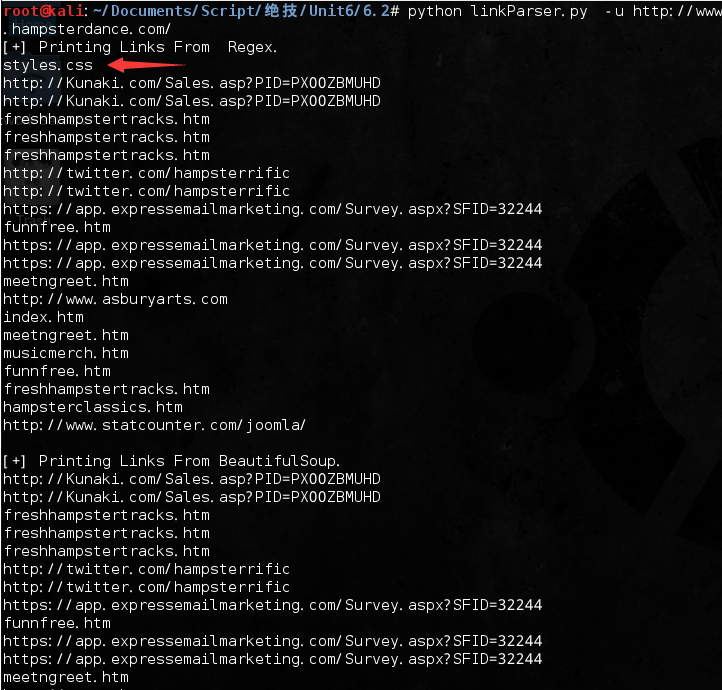
可以看到,re模块解析的结果是含有styles.css链接,而BeautifulSoup模块却会自己识别并忽略掉。
用BeautifulSoup映射图像:
主要用BS寻找img标签,然后使用browser对象下载图片并以二进制的形式保存到本地目录中。
#!/usr/bin/python
#coding=utf-8
from anonBrowser import *
from BeautifulSoup import BeautifulSoup
import os
import optparse

def mirrorImages(url, dir):
    ab = anonBrowser()
    ab.anonymize()
    html = ab.open(url)
    soup = BeautifulSoup(html)
    image_tags = soup.findAll('img')

    for image in image_tags:
        # lstrip() 方法用于截掉字符串左边的空格或指定字符
        filename = image['src'].lstrip('http://')
        filename = os.path.join(dir, filename.replace('/', '_'))
        print '[+] Saving ' + str(filename)
        data = ab.open(image['src']).read()
        # 回退
        ab.back()
        save = open(filename, 'wb')
        save.write(data)
        save.close()

def main():
    parser = optparse.OptionParser('[*]Usage: python imageMirror.py -u <target url> -d <destination directory>')
    parser.add_option('-u', dest='tgtURL', type='string', help='specify target url')
    parser.add_option('-d', dest='dir', type='string', help='specify destination directory')
    (options, args) = parser.parse_args()
    url = options.tgtURL
    dir = options.dir
    if url == None or dir == None:
        print parser.usage
        exit(0)
    else:
        try:
            mirrorImages(url, dir)
        except Exception, e:
            print '[-] Error Mirroring Images.'
            print '[-] ' + str(e)

if __name__ == '__main__':
    main()
运行结果:

3、研究、调查、发现:
用Python与谷歌API交互:
调用urllib库的quote_plus()函数进行URL编码,可以使查询内容的字符串中需要进行编码的内容进行相应的编码(如空格编码为+)。
书上的接口(http://ajax.googleapis.com/ajax/services/search/web?v=1.0&q=)已经过期了:

提示换新的接口Custom Search API,具体怎么使用可以网上搜一下,这里直接上API:
https://www.googleapis.com/customsearch/v1?key=你的key&cx=你的id&num=1&alt=json&q=
num表示返回结果的数量、这里因为只是测试就设置为1,alt指定返回的数据格式、这里为Json,q后面为查询的内容、其内容需要经过URL编码。
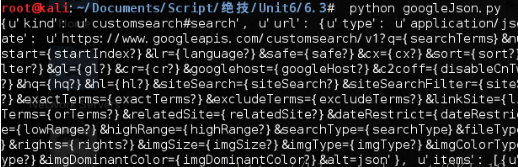
#!/usr/bin/python
#coding=utf-8
import urllib
from anonBrowser import *

def google(search_term):
    ab = anonBrowser()
    # URL编码
    search_term = urllib.quote_plus(search_term)
    response = ab.open('https://www.googleapis.com/customsearch/v1?key=你的key&cx=你的id&num=1&alt=json&q=' + search_term)
    print response.read()

google('Boundock Saint')
运行结果:

可以看到返回的是Json格式的数据。
接着就对Json格式的数据进行处理:
添加json库的load()函数对Json数据进行加载即可:
#!/usr/bin/python
#coding=utf-8
import urllib
from anonBrowser import *
import json

def google(search_term):
    ab = anonBrowser()
    # URL编码
    search_term = urllib.quote_plus(search_term)
    response = ab.open('https://www.googleapis.com/customsearch/v1?key=你的key&cx=你的id&num=1&alt=json&q=' + search_term)
    objects = json.load(response)
    print objects

google('Boundock Saint')
运行结果:
因为API不同,返回的Json数据的结构也略为不同,需要重新解析:
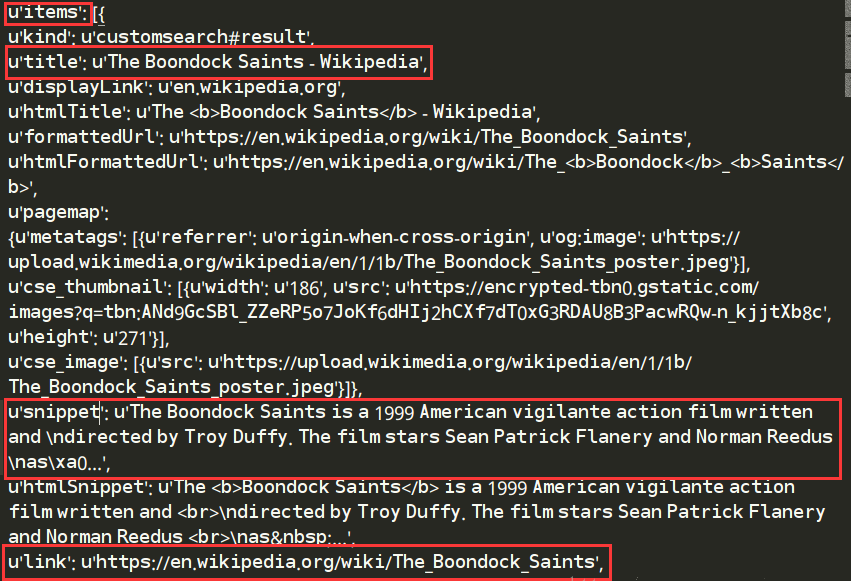
编写Google_Result类,用于保存Json数据解析下来的标题、页面链接以及一小段的简介:
#!/usr/bin/python
#coding=utf-8
import urllib
from anonBrowser import *
import json
import optparse

class Google_Result:
    def __init__(self,title,text,url):
        self.title = title
        self.text = text
        self.url = url

    def __repr__(self):
        return self.title

def google(search_term):
    ab = anonBrowser()
    # URL编码
    search_term = urllib.quote_plus(search_term)
    response = ab.open('https://www.googleapis.com/customsearch/v1?key=你的key&cx=你的id&num=1&alt=json&q=' + search_term)
    objects = json.load(response)
    results = []

    for result in objects['items']:
        url = result['link']
        title = result['title']
        text = result['snippet']
        print url
        print title
        print text
        new_gr = Google_Result(title, text, url)
        results.append(new_gr)
    return results

def main():
    parser = optparse.OptionParser('[*]Usage: python anonGoogle.py -k <keywords>')
    parser.add_option('-k', dest='keyword', type='string', help='specify google keyword')
    (options, args) = parser.parse_args()
    keyword = options.keyword

    if options.keyword == None:
        print parser.usage
        exit(0)
    else:
        results = google(keyword)
        print results

if __name__ == '__main__':
    main()
运行结果:

用Python解析Tweets个人主页:
和Google一样,Twitter也给开发者提供了API,相关文档在http://dev.twitter.com/docs。当然,这部分是需要FQ的,而且API地址也换了,对于返回Json格式的数据需要如Google Custom Search API一样进行另外分析,方法大同小异,可以自行测试一下,这里就只列出书上的代码,后面涉及Twitter的小节也一样。
#!/usr/bin/python
#coding=utf-8
import json
import urllib
from anonBrowser import *

class reconPerson:
    def __init__(self, first_name, last_name, job='', social_media={}):
        self.first_name = first_name
        self.last_name = last_name
        self.job = job
        self.social_media = social_media

    def __repr__(self):
        return self.first_name + ' ' + self.last_name + ' has job ' + self.job

    def get_social(self, media_name):
        if self.social_media.has_key(media_name):
            return self.social_media[media_name]
        return None

    def query_twitter(self, query):
        query = urllib.quote_plus(query)
        results = []
        browser = anonBrowser()
        response = browser.open('http://search.twitter.com/search.json?q=' + query)
        json_objects = json.load(response)
        for result in json_objects['results']:
            new_result = {}
            new_result['from_user'] = result['from_user_name']
            new_result['geo'] = result['geo']
            new_result['tweet'] = result['text']
            results.append(new_result)
        return results

ap = reconPerson('Boondock', 'Saint')
print ap.query_twitter('from:th3j35t3r since:2010-01-01 include:retweets')
从推文中提取地理位置信息:
#!/usr/bin/python
#coding=utf-8
import json
import urllib
import optparse
from anonBrowser import *

def get_tweets(handle):
    query = urllib.quote_plus('from:' + handle + ' since:2009-01-01 include:retweets')
    tweets = []
    browser = anonBrowser()
    browser.anonymize()
    response = browser.open('http://search.twitter.com/search.json?q='+ query)
    json_objects = json.load(response)
    for result in json_objects['results']:
        new_result = {}
        new_result['from_user'] = result['from_user_name']
        new_result['geo'] = result['geo']
        new_result['tweet'] = result['text']
        tweets.append(new_result)
    return tweets

def load_cities(cityFile):
    cities = []
    for line in open(cityFile).readlines():
        city=line.strip('\n').strip('\r').lower()
        cities.append(city)
    return cities

def twitter_locate(tweets,cities):
    locations = []
    locCnt = 0
    cityCnt = 0
    tweetsText = ""

    for tweet in tweets:
        if tweet['geo'] != None:
            locations.append(tweet['geo'])
        locCnt += 1

    tweetsText += tweet['tweet'].lower()

    for city in cities:
        if city in tweetsText:
            locations.append(city)
            cityCnt+=1

    print "[+] Found " + str(locCnt) + " locations via Twitter API and " + str(cityCnt) + " locations from text search."
    return locations

def main():
    parser = optparse.OptionParser('[*]Usage: python twitterGeo.py -u <twitter handle> [-c <list of cities>]')
    parser.add_option('-u', dest='handle', type='string', help='specify twitter handle')
    parser.add_option('-c', dest='cityFile', type='string', help='specify file containing cities to search')
    (options, args) = parser.parse_args()
    handle = options.handle
    cityFile = options.cityFile
    if (handle==None):
        print parser.usage
        exit(0)
    cities = []
    if (cityFile!=None):
        cities = load_cities(cityFile)
    tweets = get_tweets(handle)
    locations = twitter_locate(tweets,cities)
    print "[+] Locations: "+str(locations)

if __name__ == '__main__':
    main()
用正则表达式解析Twitter用户的兴趣爱好:
#!/usr/bin/python
#coding=utf-8
import json
import re
import urllib
import urllib2
import optparse
from anonBrowser import *

def get_tweets(handle):
    query = urllib.quote_plus('from:' + handle + ' since:2009-01-01 include:retweets')
    tweets = []
    browser = anonBrowser()
    browser.anonymize()
    response = browser.open('http://search.twitter.com/search.json?q='+ query)
    json_objects = json.load(response)
    for result in json_objects['results']:
        new_result = {}
        new_result['from_user'] = result['from_user_name']
        new_result['geo'] = result['geo']
        new_result['tweet'] = result['text']
        tweets.append(new_result)
    return tweets

def find_interests(tweets):
    interests = {}
    interests['links'] = []
    interests['users'] = []
    interests['hashtags'] = []

    for tweet in tweets:
        text = tweet['tweet']
        links = re.compile('(http.*?)\Z|(http.*?) ').findall(text)

        for link in links:
            if link[0]:
                link = link[0]
            elif link[1]:
                link = link[1]
            else:
                continue

            try:
                response = urllib2.urlopen(link)
                full_link = response.url
                interests['links'].append(full_link)
            except:
                pass
        interests['users'] += re.compile('(@\w+)').findall(text)
        interests['hashtags'] += re.compile('(#\w+)').findall(text)

    interests['users'].sort()
    interests['hashtags'].sort()
    interests['links'].sort()

    return interests

def main():
    parser = optparse.OptionParser('[*]Usage: python twitterInterests.py -u <twitter handle>')
    parser.add_option('-u', dest='handle', type='string', help='specify twitter handle')
    (options, args) = parser.parse_args()
    handle = options.handle
    if handle == None:
        print parser.usage
        exit(0)

    tweets = get_tweets(handle)
    interests = find_interests(tweets)
    print '\n[+] Links.'
    for link in set(interests['links']):
        print ' [+] ' + str(link)

    print '\n[+] Users.'
    for user in set(interests['users']):
        print ' [+] ' + str(user)

    print '\n[+] HashTags.'
    for hashtag in set(interests['hashtags']):
        print ' [+] ' + str(hashtag)

if __name__ == '__main__':
    main()
编写reconPerson类,封装所有抓取的地理位置、兴趣爱好以及Twitter页面的代码:
#!/usr/bin/python
#coding=utf-8
import urllib
from anonBrowser import *
import json
import re
import urllib2

class reconPerson:
    def __init__(self, handle):
        self.handle = handle
        self.tweets = self.get_tweets()

    def get_tweets(self):
        query = urllib.quote_plus('from:' + self.handle + ' since:2009-01-01 include:retweets')
        tweets = []
        browser = anonBrowser()
        browser.anonymize()
        response = browser.open('http://search.twitter.com/search.json?q=' + query)
        json_objects = json.load(response)
        for result in json_objects['results']:
            new_result = {}
            new_result['from_user'] = result['from_user_name']
            new_result['geo'] = result['geo']
            new_result['tweet'] = result['text']
            tweets.append(new_result)
        return tweets

    def find_interests(self):
        interests = {}
        interests['links'] = []
        interests['users'] = []
        interests['hashtags'] = []

        for tweet in self.tweets:
            text = tweet['tweet']
            links = re.compile('(http.*?)\Z|(http.*?) ').findall(text)

            for link in links:
                if link[0]:
                    link = link[0]
                elif link[1]:
                    link = link[1]
                else:
                    continue
            try:
                response = urllib2.urlopen(link)
                full_link = response.url
                interests['links'].append(full_link)
            except:
                pass
            interests['users'] += re.compile('(@\w+)').findall(text)
            interests['hashtags'] += re.compile('(#\w+)').findall(text)

        interests['users'].sort()
        interests['hashtags'].sort()
        interests['links'].sort()
        return interests

    def twitter_locate(self, cityFile):
        cities = []
        if cityFile != None:
            for line in open(cityFile).readlines():
                city = line.strip('\n').strip('\r').lower()
                cities.append(city)

        locations = []
        locCnt = 0
        cityCnt = 0
        tweetsText = ''

        for tweet in self.tweets:
            if tweet['geo'] != None:
                locations.append(tweet['geo'])
                locCnt += 1
            tweetsText += tweet['tweet'].lower()

        for city in cities:
            if city in tweetsText:
                locations.append(city)
                cityCnt += 1

        return locations
4、匿名电子邮件、批量社工:
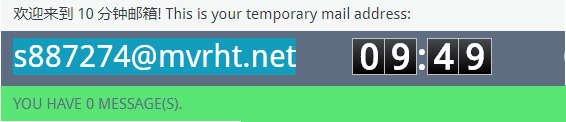
一次性电子邮箱提高匿名性,可以使用十分钟邮箱:
https://10minutemail.com/10MinuteMail/index.html
使用Smtplib给目标对象发邮件:
这里用Python编写客户端的电子邮件并发送给目标主机,调用smtplib库来使用谷歌的Gmail SMTP服务器,进行登录、发送邮件等操作。
当然,gmail的安全措施做得很好,在用Python登录Gmail账号之前要保证你在Gmail中设置了允许不安全登录的选项。
#!/usr/bin/python
#coding=utf-8
import smtplib
from email.mime.text import MIMEText

def sendMail(user, pwd, to, subject, text):
    msg = MIMEText(text)
    msg['From'] = user
    msg['To'] = to
    msg['Subject'] = subject
    try:
        smtpServer = smtplib.SMTP('smtp.gmail.com', 587)
        print "[+] Connecting To Mail Server."
        smtpServer.ehlo()
        print "[+] Starting Encrypted Session."
        smtpServer.starttls()
        smtpServer.ehlo()
        print "[+] Logging Into Mail Server."
        smtpServer.login(user, pwd)
        print "[+] Sending Mail."
        smtpServer.sendmail(user, to, msg.as_string())
        smtpServer.close()
        print "[+] Mail Sent Successfully."
    except:
        print "[-] Sending Mail Failed."

user = 'username'
pwd = 'password'
sendMail(user, pwd, '[email protected]', 'Re: Important', 'Test Message')
运行结果:

由Gmail邮箱发往自己的QQ邮箱,到QQ邮箱查看:
用smtplib进行网络钓鱼:
这里主要是结合前面twitterClass.py文件来利用目标对象留在Twitter上可以公开访问的信息进行攻击的,会找到目标的地理位置、@过的用户、hash标签以及链接,然后生成和发送一个含有恶意链接的电子邮件,等待目标对象去点击。自行修改了Twitter类解析的规则之后可以测试一下。
#!/usr/bin/python
#coding=utf-8
import smtplib
import optparse
from email.mime.text import MIMEText
from twitterClass import *
from random import choice

def sendMail(user, pwd, to, subject, text):
    msg = MIMEText(text)
    msg['From'] = user
    msg['To'] = to
    msg['Subject'] = subject
    try:
        smtpServer = smtplib.SMTP('smtp.gmail.com', 587)
        print "[+] Connecting To Mail Server."
        smtpServer.ehlo()
        print "[+] Starting Encrypted Session."
        smtpServer.starttls()
        smtpServer.ehlo()
        print "[+] Logging Into Mail Server."
        smtpServer.login(user, pwd)
        print "[+] Sending Mail."
        smtpServer.sendmail(user, to, msg.as_string())
        smtpServer.close()
        print "[+] Mail Sent Successfully."
    except:
        print "[-] Sending Mail Failed."

def main():
    parser = optparse.OptionParser('[*]Usage: python sendSam.py -u <twitter target> -t <target email> ' + '-l <gmail login> -p <gmail password>')
    parser.add_option('-u', dest='handle', type='string', help='specify twitter handle')
    parser.add_option('-t', dest='tgt', type='string', help='specify target email')
    parser.add_option('-l', dest='user', type='string', help='specify gmail login')
    parser.add_option('-p', dest='pwd', type='string', help='specify gmail password')
    (options, args) = parser.parse_args()
    handle = options.handle
    tgt = options.tgt
    user = options.user
    pwd = options.pwd
    if handle == None or tgt == None or user ==None or pwd==None:
        print parser.usage
        exit(0)

    print "[+] Fetching tweets from: " + str(handle)
    spamTgt = reconPerson(handle)
    spamTgt.get_tweets()
    print "[+] Fetching interests from: " + str(handle)
    interests = spamTgt.find_interests()
    print "[+] Fetching location information from: " + str(handle)
    location = spamTgt.twitter_locate('mlb-cities.txt')

    spamMsg = "Dear " + tgt + ","

    if (location != None):
        randLoc = choice(location)
        spamMsg += " Its me from " + randLoc + "."

    if (interests['users'] != None):
        randUser = choice(interests['users'])
        spamMsg += " " + randUser + " said to say hello."

    if (interests['hashtags'] != None):
        randHash=choice(interests['hashtags'])
        spamMsg += " Did you see all the fuss about " + randHash + "?"

    if (interests['links']!=None):
        randLink=choice(interests['links'])
        spamMsg += " I really liked your link to: " + randLink + "."

    spamMsg += " Check out my link to http://evil.tgt/malware"
    print "[+] Sending Msg: " + spamMsg

    sendMail(user, pwd, tgt, 'Re: Important', spamMsg)

if __name__ == '__main__':
    main()