pom:
        <!--rabbitMQ-->
        <dependency>
            <groupId>org.springframework.boot</groupId>
            <artifactId>spring-boot-starter-amqp</artifactId>
        </dependency>
properties:
#rabbitMQ
#fundamental properties
spring.rabbitmq.addresses=127.0.0.1:5672
spring.rabbitmq.username=guest
spring.rabbitmq.password=guest
spring.rabbitmq.virtual-host=/
spring.rabbitmq.connection-timeout=2000
#customer properties
spring.rabbitmq.listener.simple.concurrency=5
spring.rabbitmq.listener.simple.max-concurrency=10
spring.rabbitmq.listener.simple.acknowledge-mode=manual
spring.rabbitmq.listener.simple.prefetch=1
spring.rabbitmq.listener.simple.auto-startup=true
spring.rabbitmq.listener.simple.default-requeue-rejected= true
#other properties
spring.rabbitmq.template.retry.enabled=true
spring.rabbitmq.template.retry.initial-interval=1000
spring.rabbitmq.template.retry.max-attempts=3
spring.rabbitmq.template.retry.max-interval=10000
spring.rabbitmq.template.retry.multiplier=1.0
这次的实现比上次的实现更简单!易理解,对了这里不展示headers方式了,它和topic差不多
这次演示一共是建立三个class:
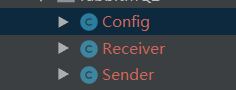
分别是配置,消费者和生产者
Config:
package com.van.mall.rabbitMQ2;
import lombok.extern.slf4j.Slf4j;
import org.springframework.amqp.core.*;
import org.springframework.context.annotation.Bean;
import org.springframework.context.annotation.Configuration;
/**
* @author Van
* @date 2020/3/31 - 10:56
*/
@Configuration
@Slf4j
public class Config {
public static final String DIRECT_QUEUE="directQueue";
public static final String TOPIC_QUEUE="topicQueue";
public static final String TOPIC_EXCHANGE="topicExchange";
public static final String TOPIC_ROUTING_KEY="topic.#";
public static final String FANOUT_QUEUE="fanoutQueue";
public static final String FANOUT_EXCHANGE="fanoutExchange";
@Bean
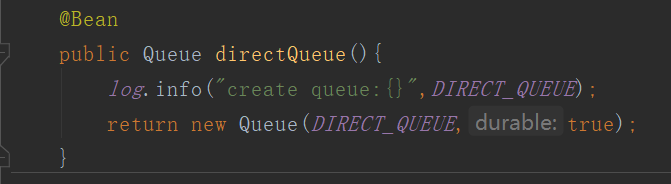
public Queue directQueue(){
log.info("create queue:{}",DIRECT_QUEUE);
return new Queue(DIRECT_QUEUE,true);
}
@Bean
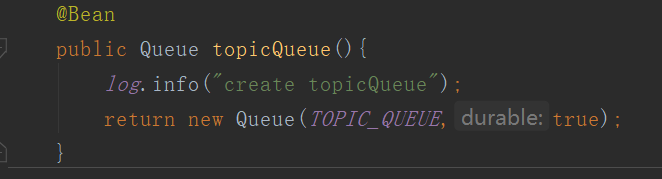
public Queue topicQueue(){
log.info("create topicQueue");
return new Queue(TOPIC_QUEUE,true);
}
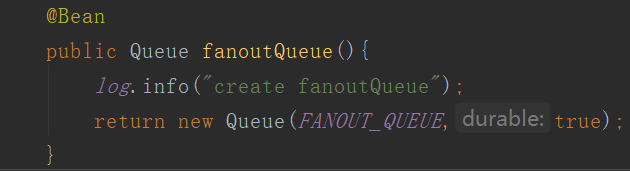
@Bean
public Queue fanoutQueue(){
log.info("create fanoutQueue");
return new Queue(FANOUT_QUEUE,true);
}
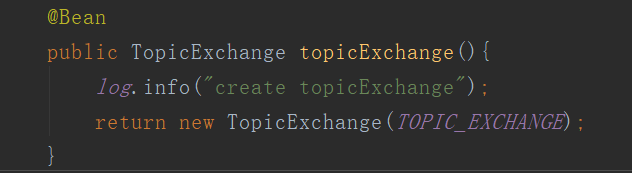
@Bean
public TopicExchange topicExchange(){
log.info("create topicExchange");
return new TopicExchange(TOPIC_EXCHANGE);
}
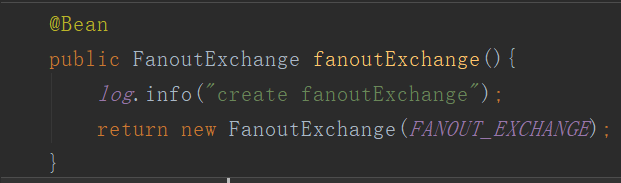
@Bean
public FanoutExchange fanoutExchange(){
log.info("create fanoutExchange");
return new FanoutExchange(FANOUT_EXCHANGE);
}
//topic Binding
@Bean
public Binding topicBinding(){
return BindingBuilder.bind(topicQueue()).to(topicExchange()).with(TOPIC_ROUTING_KEY);
}
//fanout binding
@Bean
public Binding fanoutBinding(){
return BindingBuilder.bind(fanoutQueue()).to(fanoutExchange());
}
}
receiver:
package com.van.mall.rabbitMQ2;
import lombok.extern.slf4j.Slf4j;
import org.springframework.amqp.rabbit.annotation.RabbitListener;
import org.springframework.stereotype.Component;
/**
* @author Van
* @date 2020/3/31 - 11:03
*/
@Component
@Slf4j
public class Receiver {
// direct.......................................................
// @RabbitListener(queues =Config.DIRECT_QUEUE)
// public void receive(String mes){
// log.info("receive message:{}",mes);
// }
// ............................................................end
// topic .......................................................
// @RabbitListener(queues = Config.TOPIC_QUEUE)
// public void receive(String mes){
// log.info("receive message:{}",mes);
// }
// ............................................................end
// fanout .......................................................
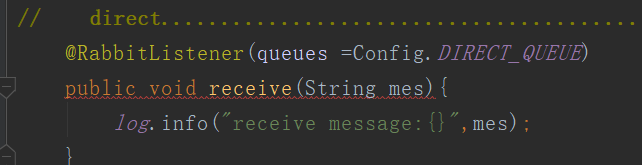
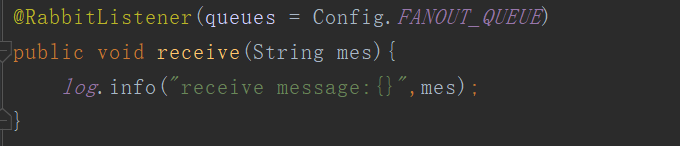
@RabbitListener(queues = Config.FANOUT_QUEUE)
public void receive(String mes){
log.info("receive message:{}",mes);
}
// ............................................................end
}
sender:
package com.van.mall.rabbitMQ2;

import lombok.extern.slf4j.Slf4j;
import org.springframework.amqp.rabbit.core.RabbitTemplate;
import org.springframework.stereotype.Component;

import javax.annotation.Resource;

/**
 * @author Van
 * @date 2020/3/31 - 10:59
 */
@Component
@Slf4j
public class Sender {
    public static final String DIRECT_MESSAGE="directMessage";
    public static final String TOPICK_MESSAGE="topicMessage";
    public static final String FANOUT_MESSAGE="fanoutMessage";
    @Resource
    public RabbitTemplate rabbitTemplate;
//    direct mode.........................................................
//    public void directSend(){
//        log.info("send message............{}",DIRECT_MESSAGE);
//        rabbitTemplate.convertAndSend(Config.DIRECT_QUEUE,DIRECT_MESSAGE);
//    }
//    ................................................................end
//    topic mode.........................................................
//    public void topicSend(){
//        log.info("send topic message......{}",TOPICK_MESSAGE);
//        rabbitTemplate.convertAndSend(Config.TOPIC_EXCHANGE,"topic.asd",TOPICK_MESSAGE);
//    }
    //    ................................................................end
    public void fanoutSend(){
        rabbitTemplate.convertAndSend(Config.FANOUT_EXCHANGE,FANOUT_MESSAGE,FANOUT_MESSAGE);
        log.info("send fanout message.....{}",FANOUT_MESSAGE);
    }
}
test:
package com.van.mall.rabbitMQ2;

import org.junit.jupiter.api.Test;
import org.junit.runner.RunWith;
import org.springframework.boot.test.context.SpringBootTest;
import org.springframework.test.context.junit4.SpringRunner;

import javax.annotation.Resource;

import static org.junit.jupiter.api.Assertions.*;

/**
 * @author Van
 * @date 2020/3/31 - 11:21
 */
@SpringBootTest
@RunWith(SpringRunner.class)
public class SenderTest {
    @Resource
    private Receiver receiver;
    @Resource
    private Sender sender;
    @Test
    public void test(){
        sender.fanoutSend();
    }
}
下面开始:
1.direct
直连模式:生产者直接指定要发到哪一个queue上去,然后消费者直接监听这个queue(其实在这4个模式中。都是消费者直接监听queue 的)
1.建立queue:指定queue的名称,和是否要持久话
2.发送message:指定要发送到哪个queue上去

3.接受message:监听这个queue,然后接受message
2.topic
总的来说,就是生产者不直接把信息投放在queue上,而且把message和routingKey一起投放到指定的交换机上,而交换机通过routingKey找到与之绑定的queue,于是就把message放到queue上了,监听这个queue的消费者就能够接受到message了
1.创建topicQueue:
2.创建topicExchange:
3.将queue和exchange通过routingKey绑定:

4.生产者指定exchange和routingKey,发送message:

5.消费者监听queue并且获取message:

3.fanout
这个是广播,于topic不同的是,fanoutExchange和queue绑定的时候不通过routigKey绑定。生产着发送消息的时候也不发routingKey,就只要指定fanoutExchange就行了,通过fanoutExchange到达与之绑定的queue
1.创建queue:
2.创建fanoutExchange:
3.绑定queue和Exchange:

4.生产者:就只要指定exchange和message

5.接收者:还是一样,只需要监听queue和接受message就行
注意几点:
rabbitTemplate.convertAndSend方法:不能传null
接收者的方法参数,一定要与发送者对应,不能自己加入发送者没有的东西
体会
用法:
如果一个方法内包含了很多操作数据库的操作。那么可以对这个方法的调用来进行优化(假设方法名称为“methodA”),比如一开始是在controller(Service)中直接调用,但现在我可以换成MQ调用。在controller(Service)调用sender,然后返回一个等待标识,sender传入这个方法所需的参数,receive这边接受sender的参数,调用methodA方法。而methodA方法自己执行完会有记录(比如在redis上搞了缓存),或者执行完methodA后receiver自己做个标记,代表已经执行完。 那么再在controller中启一个方法,去检查methodA有无执行完毕。由前端轮询这个方法即可。
例子:
比如秒杀例子:methodA:(订单插入数据库,订单加入redis)。由于秒杀,这个时候会有大量的并发,会短时间内调用methodA很多次。那么就可以把methodA由receiver调用。而不是controller直接调用。然后再在controller中搞个方法,去查询redis中有无该订单(如果有,就代表methodA执行完毕,返回一个处理完毕标识)。由前端反复调用这个方法,如果得到了标识,就返回给用户一个秒杀成功结果,否则就是在排队。
反例:
MQ貌似不适用于controller中返回结果的情形,比如返回查找到的结果:一大堆json。因为controller中return会把对象序列化。但receiver做这件事情很难搞,这是异步。如果硬要搞,那就只能把receiver中查找到的结果再放到第三方中(如redis),然后再调用,但是就有点…不ok了,如果这样搞,访问redis也是开销
