Spring boot非常适合Web应用程序开发。您可以轻松创建自包含的HTTP应用。web服务器采用嵌入式Tomcat,或者Jetty等。
几点说明:
- Spring boot开发web项目,通常打成jar包,使用内置的web服务器 Tomcat、Jetty、undertow 来运行。
- 静态资源(css、js、图片等)默认放在resources/static下面。如果要修改默认存放目录,可以通过设置属性 spring.mvc.static-path-pattern来实现。
- 模板文件默认放在 templates目录下
- Spring boot支持使用模板来开发web应用,支持的模板类型包括
- FreeMarker
- Groovy
- Thymeleaf
- Mustache
Spring boot不建议使用jsp开发web。
先通过一个简单示例显示用户列表展示如何使用spring boot和Thymeleaf开发web项目,了解这个后在讲jpa连接数据库执行操作。
Thymeleaf
Thymeleaf是一个Java模板引擎开发库,可以处理和生成HTML、XML、JavaScript、CSS和文本,在Web和非Web环境下都可以正常工作。
Thymeleaf可以跟Spring boot很好的集成。下面我们使用Spring Boot+Thymeleaf来做一个简单例子
创建spring boot项目
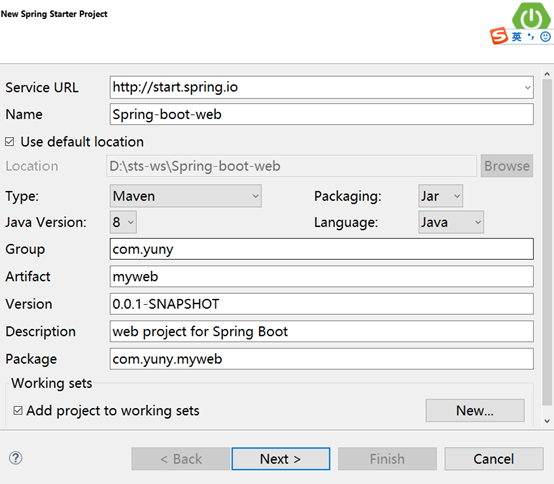
选择spring boot和依赖 ,注意需要的依赖包括web和Thymeleaf

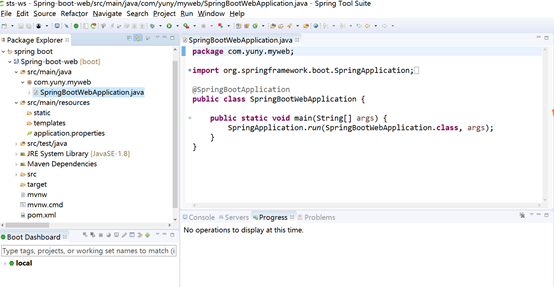
点击finish。创建的项目结构如下:
其中SpringBootWebApplication.java是自动生成的。是程序启动入口。
生成的POM.xml文件如下
<?xml version="1.0" encoding="UTF-8"?>
<project xmlns="http://maven.apache.org/POM/4.0.0" xmlns:xsi="http://www.w3.org/2001/XMLSchema-instance"
    xsi:schemaLocation="http://maven.apache.org/POM/4.0.0 http://maven.apache.org/xsd/maven-4.0.0.xsd">
    <modelVersion>4.0.0</modelVersion>

    <groupId>com.yuny</groupId>
    <artifactId>myweb</artifactId>
    <version>0.0.1-SNAPSHOT</version>
    <packaging>jar</packaging>

    <name>Spring-boot-web</name>
    <description>web project for Spring Boot</description>

    <parent>
        <groupId>org.springframework.boot</groupId>
        <artifactId>spring-boot-starter-parent</artifactId>
        <version>1.5.9.RELEASE</version>
        <relativePath/>
    </parent>

    <properties>
        <project.build.sourceEncoding>UTF-8</project.build.sourceEncoding>
        <project.reporting.outputEncoding>UTF-8</project.reporting.outputEncoding>
        <java.version>1.8</java.version>
    </properties>

    <dependencies>
        <dependency>
            <groupId>org.springframework.boot</groupId>
            <artifactId>spring-boot-starter-thymeleaf</artifactId>
        </dependency>
        <dependency>
            <groupId>org.springframework.boot</groupId>
            <artifactId>spring-boot-starter-web</artifactId>
        </dependency>

        <dependency>
            <groupId>org.springframework.boot</groupId>
            <artifactId>spring-boot-starter-test</artifactId>
            <scope>test</scope>
        </dependency>
    </dependencies>

    <build>
        <plugins>
            <plugin>
                <groupId>org.springframework.boot</groupId>
                <artifactId>spring-boot-maven-plugin</artifactId>
            </plugin>
        </plugins>
    </build>
</project>
增加实体User
public class User {
    private Integer id;
    private String name;
    private String age;
    private String address;
    //省略get和set方法、构造函数
}
增加UserController
@Controller
@RequestMapping("/user")
public class UserController {

    @RequestMapping("/{id}")
    public String  getUser(@PathVariable Integer id,Model model) {

        model.addAttribute("user",new User(id,"张三",20,"中国广州"));
        return "/user/detail";
    }

    @RequestMapping("/list")
    public String  listUser(Model model) {
        List<User> userList = new ArrayList<User>();
        for (int i = 0; i <10; i++) {
            userList.add(new User(i,"张三"+i,20+i,"中国广州"));
        }

        model.addAttribute("users", userList);
        return "/user/list";
    }
}
增加模版文件list.html,注意模版文件是放在tempplates目录下。本案例将文件放在/templates/user/下面。
<!DOCTYPE html>
<html xmlns:th="http://www.thymeleaf.org">
<head>
<meta charset="UTF-8" />
<title>Insert title here</title>
</head>
<body>
  <h2>用户列表</h2>
  <div>
     <ul>
         <li  th:each="user:${users}">
              <span th:text="${user.id}"></span>-
             <span th:text="${user.name}"></span>-
             <span th:text="${user.age}"></span>-
             <span th:text="${user.address}"></span>
         </li>
     </ul>
   </div>
</body>
</html>
启动
以application方式启动SpringBootWebApplication.java

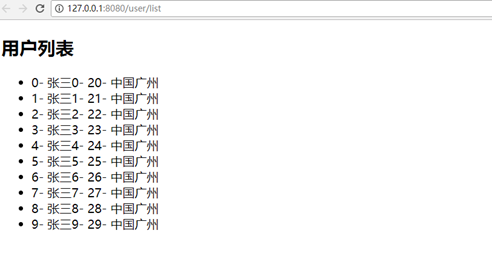
访问http://localhost:8080/user/list ,效果如下
总结
Spring boot开发web项目非常简单,对模版的支持也很到位。Thymeleaf模版引擎跟el表达式很相似,所以从jsp过度到使用Thymeleaf 并不是太难的事。
下面我们开始使用Spring boot通过JPA访问MySQL数据库并实现分页查询及一套增删改查
JPA全称Java Persistence API,即Java持久化API,它为Java开发人员提供了一种对象/关系映射工具来管理Java应用中的关系数据,结合其他ORM的使用,能达到简化开发流程的目的,使开发者能够专注于实现自己的业务逻辑上。
Spring boot结合Jpa 能够简化创建 JPA 数据访问层和跨存储的持久层功能,用户的持久层Dao接口只需要继承定义好的接口,无需再写实现类,就可以实现对象的CRUD操作以及分页排序等功能。
添加MySQL数据库驱动及jpa依赖(这里我们创建一个新项目添加以下依赖)
application.properties中配置数据库连接信息
- ########################################################
- ### 数据源信息配置
- ########################################################
- # 数据库地址
- spring.datasource.url = jdbc:mysql://localhost:3306/db_mytest
- # 用户名
- spring.datasource.username = leon
- # 密码
- spring.datasource.password =****
- # 数据库驱动
- spring.datasource.driverClassName = com.mysql.jdbc.Driver
- # 指定连接池中最大的活跃连接数.
- spring.datasource.max-active=20
- # 指定连接池最大的空闲连接数量.
- spring.datasource.max-idle=8
- # 指定必须保持连接的最小值
- spring.datasource.min-idle=8
- # 指定启动连接池时,初始建立的连接数量
- spring.datasource.initial-size=10
- ########################################################
- ### JPA持久化配置
- ########################################################
- # 指定数据库的类型
- spring.jpa.database = MYSQL
- # 指定是否需要在日志中显示sql语句
- spring.jpa.show-sql = true
- # 指定自动创建|更新|验证数据库表结构等配置,配置成update
- # 表示如果数据库中存在持久化类对应的表就不创建,不存在就创建对应的表
- spring.jpa.hibernate.ddl-auto = update
- # Naming strategy
- # 指定命名策略
- spring.jpa.hibernate.naming-strategy = org.hibernate.cfg.ImprovedNamingStrategy
- # 指定数据库方言
- spring.jpa.properties.hibernate.dialect = org.hibernate.dialect.MySQL5Dialect
以上数据库连接信息根据实际情况进行调整。
注意pring.jpa.hibernate.ddl-auto的值可以是none、create、update、create-drop。具体参考hibernate的文档。
创建实体模型
import javax.persistence.Entity;
import javax.persistence.GeneratedValue;
import javax.persistence.GenerationType;
import javax.persistence.Id;

@Entity
public class User {

    @Id
    @GeneratedValue(strategy = GenerationType.AUTO)
    private Integer id;
    private String name;
    private String sex;
    private String email;
    //此处省略get和set
}
增加数据访问接口
此接口会自动由spring实现,并且产生对应的实例放在容器中,该实例的名称为类名首字母小写userDao。
我们看下PagingAndSortingRepository 接口的底层实现吧
很明显这个接口继承了CrudRepository (可以往下看源码),里面定义了排序和分页查询, 我们在往下看CrudRepository源码
这个CrudRepository又继承了Repository 接口,从这里可以看到它里面已经定义了新增,查询单条数据,删除等接口,可以自行去了解一下源码
添加业务层执行方法
创建Controller测试
import java.util.List;
import java.util.Optional;

import javax.annotation.Resource;

import org.springframework.data.domain.Page;
import org.springframework.data.domain.PageRequest;
import org.springframework.data.domain.Pageable;
import org.springframework.data.domain.Sort;
import org.springframework.web.bind.annotation.RequestMapping;
import org.springframework.web.bind.annotation.RestController;

import com.leon.javaweb.user.entity.User;
import com.leon.javaweb.user.service.UserService;

@RestController
@RequestMapping("/user")
public class UserController {

    @Resource
    private UserService userService;

    /**
     * 获取用户列表数据
     * @return
     */
    @RequestMapping("/findList")
    public Iterable<User> findList(){
        // 指定排序参数对象:根据id,进行降序查询
        Sort.Order order = new Sort.Order(Sort.Direction.DESC, "id");
        Sort sort = new Sort(order);
        return userService.findListUser(sort);
    }

    /**
     * 分页查询
     * @param pageIndex 第n页
     * @return
     */
    @RequestMapping("/findPageList")
    public List<User> findPageList(int pageIndex){
        // 指定排序参数对象:根据id,进行降序查询
        Sort.Order order = new Sort.Order(Sort.Direction.DESC, "id");
        Sort sort = new Sort(order);
        /**
        * 封装分页实体
        * 参数一:pageIndex表示当前查询的第几页(默认从0开始,0表示第一页)
        * 参数二:表示每页展示多少数据,现在设置每页展示2条数据
        * 参数三:封装排序对象,根据该对象的参数指定根据id降序查询
        */
        Pageable page = new PageRequest(pageIndex, 2, sort);
        Page<User> articleDatas = userService.findPageList(page);
        System.out.println("查询总页数:" + articleDatas.getTotalPages());
        System.out.println("查询总记录数:" + articleDatas.getTotalElements());
        System.out.println("查询当前第几页:" + articleDatas.getNumber() + 1);
        System.out.println("查询当前页面的记录数:" + articleDatas.getNumberOfElements());
        // 查询出的结果数据集合
        List<User> articles = articleDatas.getContent();
        System.out.println("查询当前页面的集合:" + articles);
        return articles;
    }

    /**
     * 单条数据
     * @param id
     * @return
     */
    @RequestMapping("/findById")
    public Optional<User> findById(Integer id){
        return userService.findById(id);
    }

    /**
     * 新增
     * @param id
     * @return
     */
    @RequestMapping("/save")
    public User save(User user){
        return userService.save(user);
    }

    /**
     * 判断是否存在
     * @param id
     * @return
     */
    @RequestMapping("/existsById")
    public boolean existsById(Integer id){
        return  userService.existsById(id);
    }

    /**
     * 删除
     * @param id
     * @return
     */
    @RequestMapping("/deleteById")
    public void deleteById(Integer id){
        userService.deleteById(id);
    }

}
测试
运行SpringBootJpademoApplication后,访问http://localhost:8080/http://localhost:8080/user/save?id=1&name=小爱同学&sex=女&email=223334测试。结果如下:
数据库显示插入数据成功
访问http://localhost:8080/user/findList 测试
总结
在没用使用jpa支持的时候,我们的代码要定义UserDao(持久层接口)、UserDaoImpl(持久层实现类)、UserService(业务层接口)等,这样每写一个实体类,都要衍生出多个类来进行操作。
而在Spring boot 中使用JPA,只需要声明一个接口就可以了。实现简单多了