Spring boot 入门示例
文章目录
生成项目模板
浏览器打开
https://start.spring.io/
运行项目
- IDE 运行
找到含有public static void main(String[] args)方法的类,右键运行即可。这里的启动类为:
package com.example.demo;

import org.springframework.boot.SpringApplication;
import org.springframework.boot.autoconfigure.SpringBootApplication;

@SpringBootApplication
public class DemoApplication {

	public static void main(String[] args) {
		SpringApplication.run(DemoApplication.class, args);
	}

}
- 构建工具运行
MacOS/Linux:
./mvnw spring-boot:run
Windows:
mvnw spring-boot:run
单元测试
package com.example.demo;

import org.junit.jupiter.api.Test;
import org.springframework.beans.factory.annotation.Autowired;
import org.springframework.boot.test.autoconfigure.web.servlet.AutoConfigureMockMvc;
import org.springframework.boot.test.context.SpringBootTest;
import org.springframework.test.web.servlet.MockMvc;

import static org.springframework.test.web.servlet.request.MockMvcRequestBuilders.get;
import static org.springframework.test.web.servlet.result.MockMvcResultMatchers.content;
import static org.springframework.test.web.servlet.result.MockMvcResultMatchers.status;

@SpringBootTest
@AutoConfigureMockMvc
class MockMvcExampleTests {
    @Test
    void exampleTest(@Autowired MockMvc mvc) throws Exception {
        mvc.perform(get("/")).andExpect(status().isOk()).andExpect(content().string("Hello World!"));
    }
}
package com.example.demo;

import org.junit.jupiter.api.Test;
import org.springframework.beans.factory.annotation.Autowired;
import org.springframework.boot.test.context.SpringBootTest;
import org.springframework.boot.test.web.client.TestRestTemplate;

import static org.assertj.core.api.Assertions.assertThat;

/**
 * Testing with a running server
 */
@SpringBootTest(webEnvironment = SpringBootTest.WebEnvironment.RANDOM_PORT)
class RealWebEnvExampleTests {
    @Test
    void exampleTest(@Autowired TestRestTemplate restTemplate) {
        String body = restTemplate.getForObject("/", String.class);
        assertThat(body).isEqualTo("Hello World!");
    }
}
开发环境调试(自动重启)
添加依赖

<dependency>
	<groupId>org.springframework.boot</groupId>
	<artifactId>spring-boot-devtools</artifactId>
	<scope>runtime</scope>
	<optional>true</optional>
</dependency>
每当classpath上的文件更改时,使用spring-boot-devtools的应用程序都会自动重新启动
没有添加该依赖前,启动日志:
2020-04-18 11:51:13.619  INFO 7756 --- [           main] com.example.demo.DemoApplication         : No active profile set, falling back to default profiles: default
2020-04-18 11:51:14.181  INFO 7756 --- [           main] o.s.b.w.embedded.tomcat.TomcatWebServer  : Tomcat initialized with port(s): 9090 (http)
注意main
添加该依赖后,启动日志:
2020-04-18 11:55:05.393  INFO 9492 --- [  restartedMain] com.example.demo.DemoApplication         : No active profile set, falling back to default profiles: default
2020-04-18 11:55:05.429  INFO 9492 --- [  restartedMain] .e.DevToolsPropertyDefaultsPostProcessor : Devtools property defaults active! Set 'spring.devtools.add-properties' to 'false' to disable
注意restartedMain
触发重启
由于DevTools监视类路径资源,触发重新启动的唯一方法是更新类路径。导致类路径更新的方式取决于您使用的IDE。在Eclipse中,保存修改过的文件会导致类路径被更新并触发重新启动。在IntelliJ IDEA中,构建项目(Build->Build project)具有相同的效果。
IntelliJ IDEA 配置自动重启应用
为了Spring boot应用自动重启,有两种方式可以达到目的:
- 在IntelliJ IDEA中,构建项目(Build->Build project),使用鼠标点击即可
- 配置IntelliJ IDEA 自动构建项目
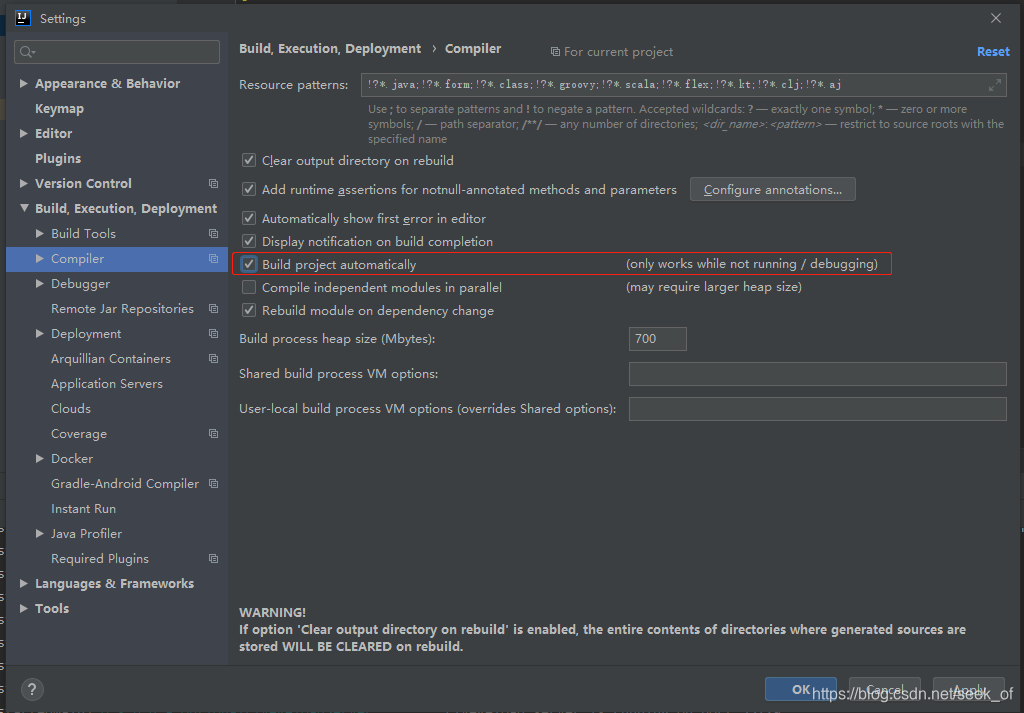
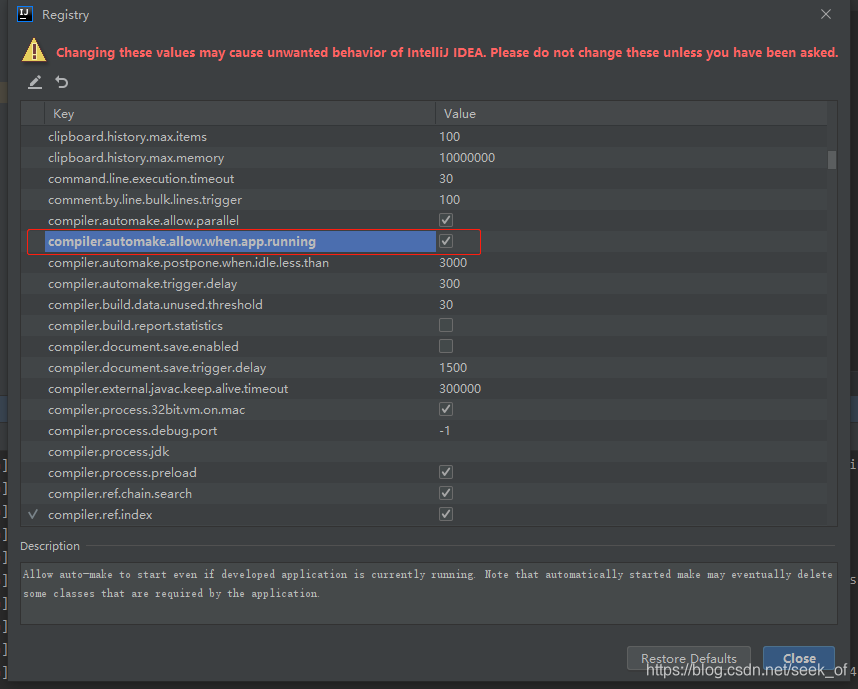
Ctrl+Shift+A 输入Registry,选中Registry…
然后选中 compiler.automake.allow.when.app.running,重启IDEA 即可
Eclipse 自动重启应用
不需要做任何配置。在Eclipse中,保存修改过的文件会导致类路径被更新并触发重新启动
Restart vs Reload
Spring Boot提供的重启技术通过使用两个类加载器来工作。不改变的类(例如,来自第三方jar的类)被加载到基类加载器中。正在积极开发的类将加载到重新启动的类加载器中。当应用程序重新启动时,restart类加载器将被丢弃,并创建一个新的类加载器。这种方法意味着应用程序重启通常比“冷启动”快得多,因为基本类加载器已经可用并已填充。
如果发现重新启动对应用程序来说不够快,或者遇到类加载问题,可以考虑从ZeroTurnaround重新加载JRebel等技术。这些工作是在加载类时重写类,以使它们更易于重新加载。
定制启动Banner
可以通过将banner.txt文件添加到类路径或将spring.banner.location属性设置为此类文件的位置来更改在启动时打印的标题。如果文件的编码不是UTF-8,则可以设置spring.banner.charset。除了文本文件,还可以将banner.gif、banner.jpg或banner.png图像文件添加到类路径中,或设置spring.banner.image.location属性。图像被转换成ASCII艺术表现形式并打印在任何文本横幅的上方。
在线生成
https://www.bootschool.net/ascii
参考
性。图像被转换成ASCII艺术表现形式并打印在任何文本横幅的上方。
在线生成
https://www.bootschool.net/ascii
参考
