感觉好久没发作业了,想想也是,国庆+上周阶段考,两周没做iOS作业了,手都有点生了。老样子,先看作业要求。
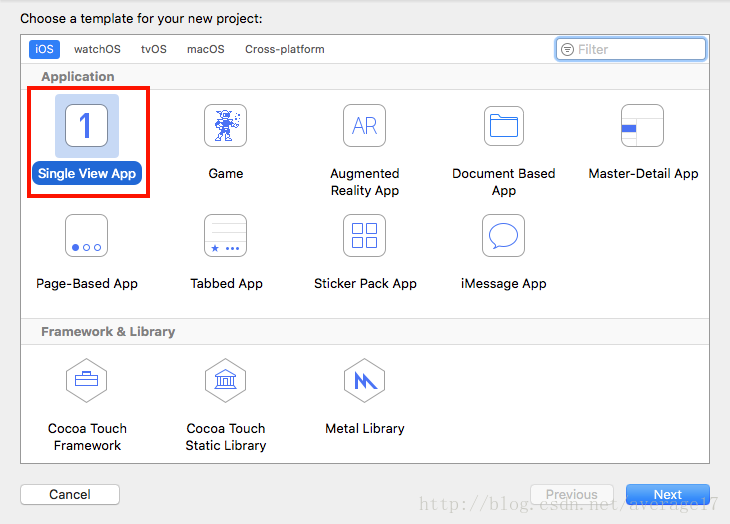
这次作业很基础,但也开始设计到UI方面的开发了。所以现在要创建这个工程:

然后我们需要从UIView派生一个子类出来,这里就叫MyView吧。我们需要重写它的draw(rect:)方法。这个方法是UIView中负责绘制UIView的显示的,我们绘制函数曲线就是通过它。首先我们需要通过它绘制一个简易的坐标系,然后我们还需要一个私有的函数类型的属性,它用来保存传入的需要绘制的函数,在draw方法中,判断该函数是否有值,有值的话就绘制函数曲线,没有值时就只绘制坐标系。最后在视图控制器中创建MyView并显示即可。(当前只实现了绘制一元函数,读者想要扩展可自行思考)
MyView.swift
import UIKit

class MyView: UIView {

    private var function: ((CGFloat) -> CGFloat)? //一元函数

    override func draw(_ rect: CGRect) {
        //调用父类的draw方法
        super.draw(rect)

        //创建一个UIBezierPath变量,UIBezierPath可创建基于矢量的路径,常用来绘图
        let rectPath = UIBezierPath(rect: rect)
        //设置白色填充
        UIColor.white.setFill()
        //先将MyView填充一层白色
        rectPath.fill()

        //再创建一个UIBezierPath变量,用于绘制坐标系
        let path = UIBezierPath()
        //坐标系用红色描边
        UIColor.black.setStroke()
        //坐标系以MyView中心为原点,向右为x正方向,向上为y正方向
        //先将path移动到左边线中点处
        path.move(to: CGPoint(x: 0, y: rect.height / 2))
        //然后添加一条到右边线中点处的直线
        path.addLine(to: CGPoint(x: rect.width, y: rect.height / 2))
        //绘制这条直线
        path.stroke()
        //这样就完成了x轴的绘制

        //绘制y轴原理同上
        path.move(to: CGPoint(x: rect.width / 2, y: 0))
        path.addLine(to: CGPoint(x: rect.width / 2, y: rect.height))
        path.stroke()

        //判断函数是否为空,方便后面会再次调用draw函数
        if function != nil {
            let path = curve(rect: rect, color: UIColor.red, function: function!)
            path.stroke()
        }
    }


    /// 绘制图形的函数
    ///
    /// - Parameter function: 需要绘制的一元函数
    func drawCurve(function: @escaping (CGFloat) -> CGFloat) {
        self.function = function
        self.draw(self.frame)
    }


    /// 计算函数绘制的路径
    ///
    /// - Parameters:
    ///   - rect: 绘制区域
    ///   - color: 绘制函数的颜色
    ///   - function: 需要绘制的函数
    /// - Returns: 返回最终绘制的路径
    private func curve(rect: CGRect, color: UIColor, function: (CGFloat) -> CGFloat) -> UIBezierPath {
        let path = UIBezierPath()

        //该绘制区域的宽度的一半
        let center = rect.width / 2
        //y轴的高度的一半
        let height = rect.height / 2
        //需要计算多少个x值对应的y值(x轴正半轴)
        let rate: CGFloat = 100
        color.setStroke()

        //从原点开始,先计算x轴正半轴的所有y值
        path.move(to: CGPoint(x: center, y: height - function(0) / rate)))
        //stride为步进函数,设置起始值、结尾值和步进值
        for item in stride(from: center / rate, through: center, by: center / rate) {
            path.addLine(to: CGPoint(x: center + item, y: height - function(item) / rate))
        }
        //因为自己建立的简易坐标系与UIView视图默认的坐标系不同(UIView默认视图坐标系原点在左上角,并向右为x轴正方向,向下为y轴正方向)。所以需要用到类似仿射变换的方式转换坐标系,将当前坐标系中的点转换成UIView坐标系中的值。UIView中x值为当前值加上x轴宽度的一半,y值为y轴高度的一半减去在当前坐标系中的y值

        //绘制x轴负半轴的所有y值,原理类似
        path.move(to: CGPoint(x: center, y: height - function(0) / rate)))
        for item in stride(from: center / rate, through: center, by: center / rate) {
            path.addLine(to: CGPoint(x: center - item, y: height - function(-item) / rate))
        }

        return path
    }

}
ViewController.swift
import UIKit
class ViewController: UIViewController {
override func viewDidLoad() {
super.viewDidLoad()
// Do any additional setup after loading the view, typically from a nib.
//设置MyView的区域
let rect = CGRect(x: 0, y: 20, width: self.view.frame.width, height: self.view.frame.height - 20)
//创建MyView
let view = MyView(frame: rect)
//传入需要绘制的函数
view.drawCurve { x in
return x * x * x
}
//将当前视图加入到视图控制器中
self.view.addSubview(view)
}
override func didReceiveMemoryWarning() {
super.didReceiveMemoryWarning()
// Dispose of any resources that can be recreated.
}
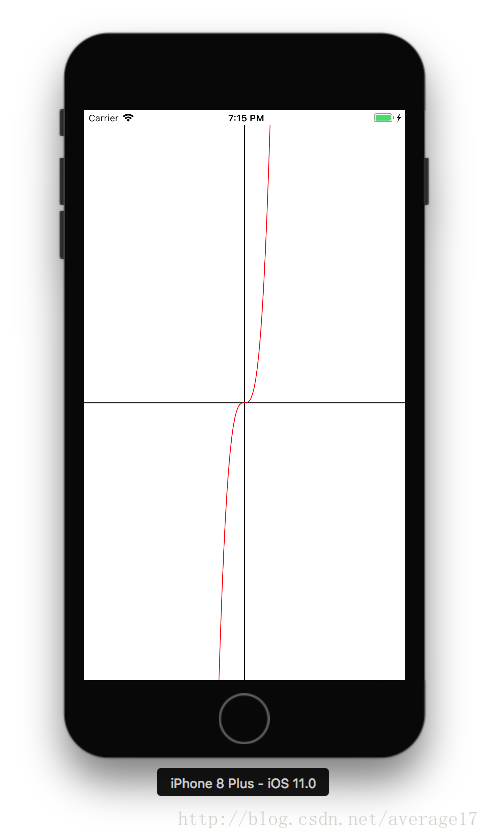
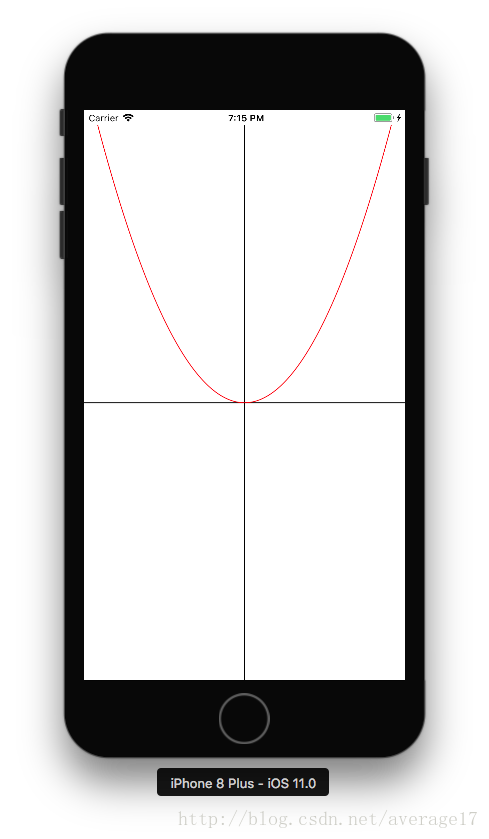
}最后来看看绘制的效果吧。
传入 y = 10000
传入 y = x2
传入 y = x3