需求分析:
 前端展示:首页、详情页、分类、标签、归档、关于我
后台管理:模板页面
课程相关源代码(包含前端页面!)
链接:https://pan.baidu.com/s/1DdacCdIes-K0SHeN2MP2uw 提取码:155o
Semantic UI开发前端,SpringBoot开发后端
1、创建SpringBoot项目勾选依赖
devtools
web
mysql
jpa
thymeleaf
2、编写配置(YML方式)
application.yml
spring:
  thymeleaf:
    mode: HTML
  profiles:
    active: dev #设置开发环境
application-dev.yml(开发环境)
spring:
  datasource:
    driver-class-name: com.mysql.cj.jdbc.Driver
    url: jdbc:mysql://ip地址/blog?useSSL=false&useUnicode=true&characterEncoding=utf-8&serverTimezone=GMT%2B8&zeroDateTimeBehavior=convertToNull
    username: root
    password: 123456
#    jpa配置
  jpa:
    hibernate:
      ddl-auto: update
    show-sql: true
#    日志配置
logging:
  level:
    root: info
    com.hzy: debug
  file: log/blog-dev.log
server:
  port: 8888
application-pro.yml(生产环境)
spring:
  thymeleaf:
    mode: HTML
  datasource:
    driver-class-name: com.mysql.cj.jdbc.Driver
    url: jdbc:mysql://ip地址:3306/blog?useSSL=false&useUnicode=true&characterEncoding=utf-8&serverTimezone=GMT%2B8&zeroDateTimeBehavior=convertToNull
    username: root
    password: 123456
#    jpa配置
  jpa:
    hibernate:
      ddl-auto: none
    show-sql: true
#    日志配置
logging:
  level:
    root: warn
    com.hzy: info
  file: log/blog-pro.log
server:
  port: 8088
日志的配置文件(logback-spring)
<?xml version="1.0" encoding="UTF-8" ?>
<configuration>
    <!--包含Spring boot对logback日志的默认配置-->
    <include resource="org/springframework/boot/logging/logback/defaults.xml" />
    <property name="LOG_FILE" value="${LOG_FILE:-${LOG_PATH:-${LOG_TEMP:-${java.io.tmpdir:-/tmp}}}/spring.log}"/>
    <include resource="org/springframework/boot/logging/logback/console-appender.xml" />

    <!--重写了Spring Boot框架 org/springframework/boot/logging/logback/file-appender.xml 配置-->
    <appender name="TIME_FILE"
              class="ch.qos.logback.core.rolling.RollingFileAppender">
        <encoder>
            <pattern>${FILE_LOG_PATTERN}</pattern>
        </encoder>
        <file>${LOG_FILE}</file>
        <rollingPolicy class="ch.qos.logback.core.rolling.TimeBasedRollingPolicy">
            <fileNamePattern>${LOG_FILE}.%d{yyyy-MM-dd}.%i</fileNamePattern>
            <!--保留历史日志一个月的时间-->
            <maxHistory>30</maxHistory>
            <!--
            Spring Boot默认情况下,日志文件10M时,会切分日志文件,这样设置日志文件会在100M时切分日志
            -->
            <timeBasedFileNamingAndTriggeringPolicy class="ch.qos.logback.core.rolling.SizeAndTimeBasedFNATP">
                <maxFileSize>10MB</maxFileSize>
            </timeBasedFileNamingAndTriggeringPolicy>

        </rollingPolicy>
    </appender>

    <root level="INFO">
        <appender-ref ref="CONSOLE" />
        <appender-ref ref="TIME_FILE" />
    </root>

</configuration>
        <!--
            1、继承Spring boot logback设置(可以在appliaction.yml或者application.properties设置logging.*属性)
            2、重写了默认配置,设置日志文件大小在100MB时,按日期切分日志,切分后目录:

                blog.2017-08-01.0   80MB
                blog.2017-08-01.1   10MB
                blog.2017-08-02.0   56MB
                blog.2017-08-03.0   53MB
                ......
        -->
3、异常处理
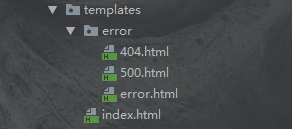
异常处理类
@ControllerAdvice//会拦截所有@Controller注解
public class ControllerExceptionHandler {
    private final Logger logger= LoggerFactory.getLogger(this.getClass());
    @ExceptionHandler(Exception.class)//拦截的异常
    public ModelAndView exceptionHandler(HttpServletRequest request,Exception e) throws Exception {
        logger.error("Request URL:{},Exception:{}",request.getRequestURI(),e);
        if (AnnotationUtils.findAnnotation(e.getClass(), ResponseStatus.class)!=null){
            throw e;
        }
        ModelAndView model=new ModelAndView();
        model.addObject("url",request.getRequestURI());
        model.addObject("exception",e);
        model.setViewName("error/error");
        return model;
    }
}
将404页面独自处理
@ResponseStatus(HttpStatus.NOT_FOUND)
public class NotFoundException extends RuntimeException {
    public NotFoundException() {
    }

    public NotFoundException(String message) {
        super(message);
    }

    public NotFoundException(String message, Throwable cause) {
        super(message, cause);
    }
}
在Controller中抛出异常
@Controller
public class IndexController {
    @GetMapping({"/index","/"})
    public String index(){
//        int i=9/0;
        String blog=null;
        if(blog==null){
            throw new NotFoundException("博客不存在");
        }
        return "index";
    }
}
4、日志处理
1、记录日志内容
- 请求url
- 访问者ip
- 调用方法classMethod
- 参数args
- 返回内容
2、记录日志类
package com.hzy.aspect;

import org.aspectj.lang.JoinPoint;
import org.aspectj.lang.annotation.*;
import org.slf4j.Logger;
import org.slf4j.LoggerFactory;
import org.springframework.stereotype.Component;
import org.springframework.web.context.request.RequestContextHolder;
import org.springframework.web.context.request.ServletRequestAttributes;

import javax.servlet.http.HttpServletRequest;
import java.util.Arrays;

@Aspect
@Component
public class LogAspect {
    private final Logger logger= LoggerFactory.getLogger(this.getClass());
//    定义切面(对哪些方法进行切面)
    @Pointcut("execution(* com.hzy.controller.*.*(..))")
    public void log(){}
//    在切面之前执行
    @Before("log()")
    public void doBefore(JoinPoint joinPoint){
        ServletRequestAttributes attributes= (ServletRequestAttributes)RequestContextHolder.getRequestAttributes();
        HttpServletRequest request = attributes.getRequest();
        String url=request.getRequestURI().toString();
        String ip=request.getRemoteAddr();
        String classMethod=joinPoint.getSignature().getDeclaringTypeName()+"."+joinPoint.getSignature().getName();
        Object[] args=joinPoint.getArgs();
        RequestLog requestLog=new RequestLog(url,ip,classMethod,args);
        logger.info("Request:{}",requestLog);
    }
//    在切面之后执行
    @After("log()")
    public void doAfter(){
//        logger.info("---doAfter---");
    }
    @AfterReturning(returning = "result",pointcut = "log()")
    public void doAfterReturn(Object result){
        logger.info("Result:{}",result);
    }
    private class RequestLog{
        private String url;
        private String ip;
        private String classMethod;
        private Object[] args;

        @Override
        public String toString() {
            return "RequestLog{" +
                    "url='" + url + '\'' +
                    ", ip='" + ip + '\'' +
                    ", classMethod='" + classMethod + '\'' +
                    ", args=" + Arrays.toString(args) +
                    '}';
        }

        public RequestLog(String url, String ip, String classMethod, Object[] args) {
            this.url = url;
            this.ip = ip;
            this.classMethod = classMethod;
            this.args = args;
        }
    }
}
测试切面
@Controller
public class IndexController {
    @GetMapping("/{id}/{name}")
    public String index(@PathVariable("id") Integer id,@PathVariable("name") String name){
//        int i=9/0;
//        String blog=null;
//        if(blog==null){
//            throw new NotFoundException("博客不存在");
//        }
        System.out.println("---index---");
        return "index";
    }
}
5、页面处理
将路径改为@{},必须以/开头(/表示static)
页面组件化
将th:fragment="“属性添加到标签中(普通方式‘单词’,传参方式‘单词(参数)’)
引用组件th:replace=”_fragments(文件名) :: 单词(参数)" 参数可以直接写title,默认会找titlle标签中的值
6、设计与规范
实体设计
实体类
- 博客 Blog
- 博客分类 Type
- 博客标签 Tag
- 博客评论 Comment
- 用户 User
实体关系

评论自关联关系

功能太多,具体参考视频!
补个视频链接
小而美博客部署

先clean再package打成war包然后放到tomcat的webapp下,重启tomcat,就可以正常访问了(访问war包的名字)!
如果访问404
- 修改启动类
@SpringBootApplication
public class BlogApplication extends SpringBootServletInitializer {
    @Override
    protected SpringApplicationBuilder configure(SpringApplicationBuilder builder) {
        return super.configure(builder);
    }

    public static void main(String[] args) {
        SpringApplication.run(BlogApplication.class, args);
    }

}
- 修改pom文件
    <packaging>war</packaging>
<dependency>
            <groupId>org.springframework.boot</groupId>
            <artifactId>spring-boot-starter-web</artifactId>
            <exclusions>
                <exclusion>
                    <groupId>org.springframework.boot</groupId>
                    <artifactId>org.springframework.boot:spring-boot-starter-tomcat:2.2.6.RELEASE</artifactId>
                </exclusion>
            </exclusions>
        </dependency>
        <dependency>
            <groupId>javax.servlet</groupId>
            <artifactId>javax.servlet-api</artifactId>
        </dependency>
3.重新打包,如果还不能访问,检查jdk和tomcat版本
另一种部署方式
直接打成jar包
服务器中必须有jdk环境
使用java -jar jar包名直接运行!
但是有个问题就是不关闭窗口就会停止运行!
解决办法:
nohup java -jar xxx.jar > log.file 2>&1 &
