承接之前的博客,今天主要来记录一下@Cacheable注解的使用
环境准备
首先我们需要创建一个SpringBoot项目,这里直接使用Spring Initializr来创建项目,之后勾选以下模块:

其中web模块是为了观察方便,使用mybatis操作数据库比较方便,同时还要勾选Spring cache abstraction(Spring缓存抽象),这样就会帮我们引入一些缓存抽象和使用注解了(在上一篇博客记录到)。
由于这是一个缓存的操作,肯定需要操作到数据库,我们这里建立一个数据库demo,建一个表user拿来实验:
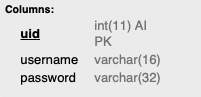
之后建立实体类,并生成getter/setter与tostring():
public class User implements Serializable {
    private int uid;
    private String username;
    private String password;

    @Override
    public String toString() {
        return "User{" +
                "uid=" + uid +
                ", username='" + username + '\'' +
                ", password='" + password + '\'' +
                '}';
    }

    public int getUid() {
        return uid;
    }

    public void setUid(int uid) {
        this.uid = uid;
    }

    public String getUsername() {
        return username;
    }

    public void setUsername(String username) {
        this.username = username;
    }

    public String getPassword() {
        return password;
    }

    public void setPassword(String password) {
        this.password = password;
    }
}
然后在配置文件中配置数据源,连接哪个数据库、账号、密码等等,这里使用application.yaml:
spring:
  datasource:
    username: root
    password: **********
    url: jdbc:mysql://localhost:3306/demo
    driver-class-name: com.mysql.cj.jdbc.Driver
之后编写对应的mapper与controller:
mapper:
public interface UserMapper {

    @Select("select * from user where uid = #{uid}") //直接在注解中编写sql语句
    public User findUserByUid(Integer uid);
}
controller:
@RestController
@RequestMapping("/user")
public class UserController {

    @Autowired
    private UserMapper userMapper;

    @GetMapping("/getUser/{uid}")
    @Cacheable(cacheNames = "user")
    public User getUser(@PathVariable int uid){
        User userByUid = userMapper.findUserByUid(uid);

        return userByUid;
    }
}
注意,这里我们在方法上加上了@Cacheable注解,并且为其的cacheNames属性赋值,顾名思义,就是给这个缓存组件起名字为"user",到这里还不能访问,需要开启SpringBoot的缓存支持,在启动类中添加如下注解:
@MapperScan(basePackages = {"leslie.springboot_cache.mapper"})
@EnableCaching
@EnableCaching是开启缓存支持。@MapperScan是mybatis的注解,作用是让相应包下mapper自动加入到容器中.
到这里还差一步,我们怎么知道它是查询数据库还是容器呢?我们这是需要把mapper的debug级别的日志打开,在application.yaml中配置:
logging:
  level:
    leslie:
      springboot_cache:
        mapper: debug
关于这一块也在之前的博客记录过,logging.level后面接的是包的全限定类名,属性是日志级别,这样我们就可以看到mapper的debug信息了,接着启动运行,(因为本来我在数据库中就插入了3条数据)
我们在控制台上查看日志信息:
2020-04-20 15:29:04.010 DEBUG 1453 --- [nio-8080-exec-2] l.s.mapper.UserMapper.findUserByUid      : ==>  Preparing: select * from user where uid = ?
2020-04-20 15:29:04.034 DEBUG 1453 --- [nio-8080-exec-2] l.s.mapper.UserMapper.findUserByUid      : ==> Parameters: 1(Integer)
2020-04-20 15:29:04.081 DEBUG 1453 --- [nio-8080-exec-2] l.s.mapper.UserMapper.findUserByUid      : <==      Total: 1
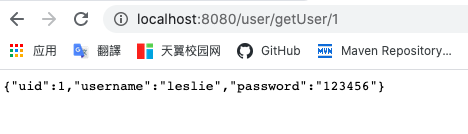
可以看到第一次访问,缓存中肯定没有于是它就去访问了数据库。顺带把查询的数据保存到缓存中
之后我们再次访问相同的路径,控制台上空空如也,但返回结果还是相同,说明第二次之后它查询到缓存中有数据之后,就直接取出来,没有走数据库了
这篇博客记录了@Cacheable注解的基础使用,可以看出在大流量的访问中,缓存可以大大减少数据库的交互次数,从而增加程序运行效率。
