相对布局是采用相对于其他组件的位置的布局方式。在相对布局中,通过指定ID关联其他组件,从而以右对齐、上对齐、下对齐或屏幕中央对齐等方式来排列组件。
在XML布局文件中,由根元素RelativeLayout来标识相对布局。
本博文就以实现图片两种效果为例,讲解如何操作:

在本文阅览之前,确保大家会跑第一个hello,world。可以参考这个mooc讲的内容
mooc链接
布局步骤
创建新Project
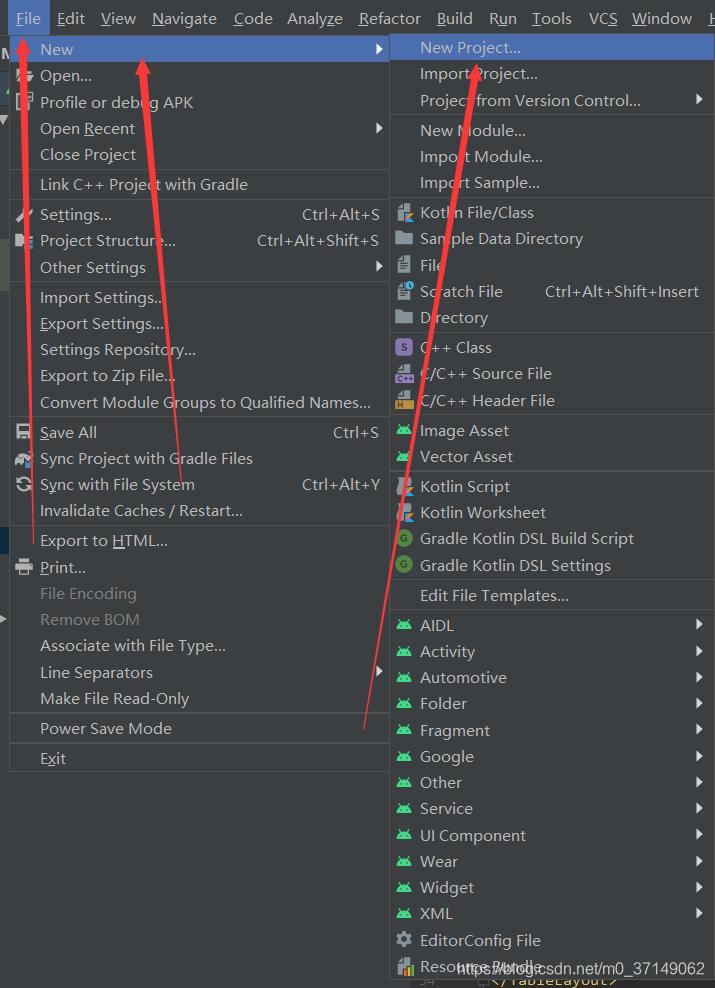
点进Project—>Empty Activity—>然后finish即可。成功之后,点击箭头运行程序。

默认配置的话,应该可以跑起来hello world。然后我们继续做下一个不走
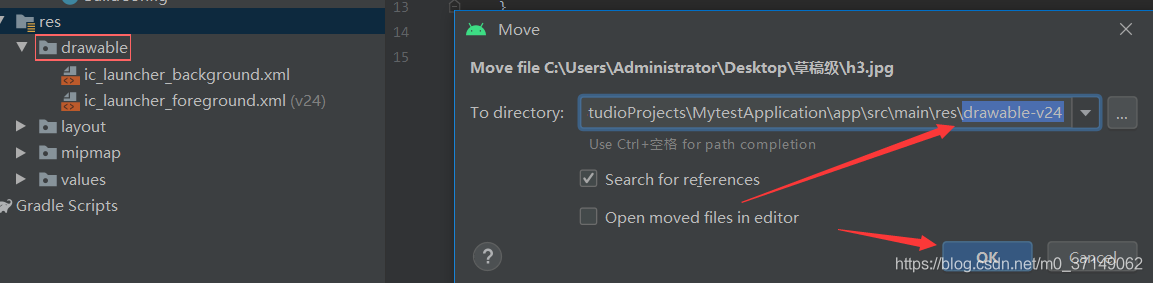
上传图片资源
从网上照一张或者自己搞一张5050~7575之间的图片,任意但不要太大,格式任意,名字不要任意。名字英文!规范!初学者就取by吧(测试里用了by)
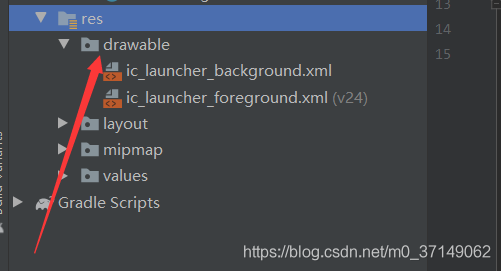
一定要拖到drawable,比如像这种拖拽,
ok后,我们基础图片有了,直接上测试样例
布局测试源码
代码后对此作详细讲解。
<?xml version="1.0" encoding="utf-8"?>
<RelativeLayout xmlns:android="http://schemas.android.com/apk/res/android"
    xmlns:app="http://schemas.android.com/apk/res-auto"
    xmlns:tools="http://schemas.android.com/tools"
    android:layout_width="match_parent"
    android:layout_height="match_parent"

>
    <ImageView
        android:layout_width="80dp"
        android:layout_height="80dp"
        android:layout_centerInParent="true"
        android:src="@drawable/by"
        android:id="@+id/img"
        />

    <Button
        android:id="@+id/btn1"
        android:layout_width="wrap_content"
        android:layout_height="wrap_content"
        android:layout_above="@+id/img"
        android:layout_centerHorizontal="true"
        android:text="上面" />

    <Button
        android:id="@+id/btn2"
        android:layout_width="wrap_content"
        android:layout_height="wrap_content"
        android:layout_below="@+id/img"
        android:layout_centerHorizontal="true"
        android:text="下面" />

    <Button
        android:id="@+id/btn3"
        android:layout_width="wrap_content"
        android:layout_height="wrap_content"
        android:layout_toLeftOf="@+id/img"
        android:layout_centerVertical="true"
        android:text="左边" />

    <Button
        android:id="@+id/btn4"
        android:layout_width="wrap_content"
        android:layout_height="wrap_content"
        android:layout_toRightOf="@+id/img"
        android:layout_centerVertical="true"
        android:text="右边" />


</RelativeLayout>
RelativeLayout讲解
它是来标识相对布局的,在这里只是做了match_parent(匹配父元素)
ImageView讲解
width与height都是80dp,图片路径是引用@drawable中的by,id是img一定要设,后面要对其操作。centerInparent是对其产生居中操作。
Button讲解
width与height包含自身内容,toRightof相对于img的右边,Left就是左边,above就是上边,below就是下边。centerHorizontal中部水平居中。centerVertical就是中部垂直居中。
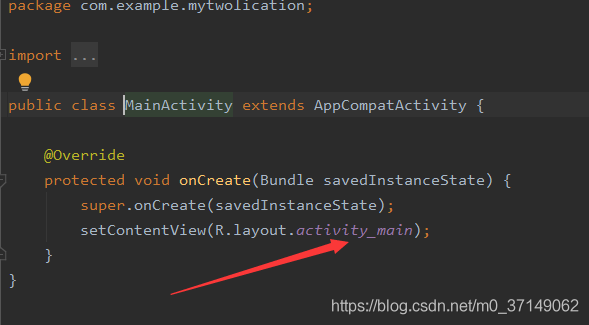
修改java类文件调用
一般按照默认配置,应该是这张图
然后启动程序,观察运行效果。
效果如图

最终效果。应该就是这样。
总结
布局控制所需的步骤不是很多,步骤如下
- 搭建新类
- 上传资源图片
- 编辑布局代码
- 更改文件调用
- run测试效果
相对布局就是将原先组件进行覆盖,后期基础学习都用线性布局,可以参考博主写的这个博文:
Android基础小白线性布局简单案例(附完整源码)
希望此博文对大家有帮助!
