| 主机名 | IP地址 | VIP | 服务名 | 实验环境 |
| KA_HA_01 | ens33:192.168.30.130(NAT) ens36:192.168.0.130(VMnet4) |
192.168.30.100 | keepalived、haproxy、 | CentOS Linux release 7.4.1708 (Core)、 SELINUX=disabled、 systemctl stop firewalld; |
| KA_HA_02 | ens33:192.168.30.131(NAT) ens36:192.168.0.131(VMnet4) |
|||
| Static_Web_Server01 | ens33:192.168.0.137(VMnet4) | 无 | httpd、php、php-mysql | |
| Static_Web_Server02 | ens33:192.168.0.138(VMnet4) | |||
| Dynamic_Web_Server01 | ens33:192.168.0.135(VMnet4) | |||
| Dynamic_Web_Server02 | ens33:192.168.0.136(VMnet4) | |||
| Mariadb_DB_Server | ens33:192.168.0.134(VMnet4) | mariadb、nfs |
开始部署keepalived和haproxy
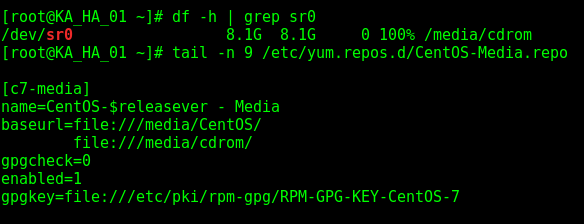
配置好本地YUM源,直接使用YUM一键安装:
[root@KA_HA_01 ~]# yum install -y keepalived haproxy
[root@KA_HA_02 ~]# yum install -y keepalived haproxy
配置keepalived(在KA_HA_01上):
[root@KA_HA_01 ~]# cp /etc/keepalived/keepalived.conf{,.bak}
[root@KA_HA_01 ~]# vim /etc/keepalived/keepalived.conf
! Configuration File for keepalived

global_defs {
   notification_email {
        root@localhost
   }
   notification_email_from keepalived@localhost
   smtp_server 127.0.0.1
   smtp_connect_timeout 30
   router_id KA_HA_01
}

vrrp_script chk_haproxy {
                script "killall -0 haproxy && exit 0 || exit 1"
                interval 1
                weight -5
        }
vrrp_instance haproxy {
    state MASTER
    interface ens36
    virtual_router_id 51
    priority 100
    advert_int 1
    authentication {
        auth_type PASS
        auth_pass 1111
    }
    virtual_ipaddress {
        192.168.30.100 dev ens36
    }
        track_script {
                chk_haproxy
        }
}
在KA_HA_02上做相同操作:
[root@KA_HA_02 ~]# cp /etc/keepalived/keepalived.conf{,.bak}
[root@KA_HA_02 ~]# vim /etc/keepalived/keepalived.conf

! Configuration File for keepalived

global_defs {
   notification_email {
        root@localhost
   }
   notification_email_from keepalived@localhost
   smtp_server 127.0.0.1
   smtp_connect_timeout 30
   router_id KA_HA_01
}
vrrp_script chk_haproxy {
        script "killall -0 haproxy && exit 0 || exit 1"
        interval 1
        weight -5
}
vrrp_instance haproxy {
    state BACKUP
    interface ens36
    virtual_router_id 51
    priority 80
    advert_int 1
    authentication {
        auth_type PASS
        auth_pass 1111
    }
    virtual_ipaddress {
        192.168.30.100 dev ens36
    }
        track_script {
                chk_haproxy
        }

}
配置haproxy:
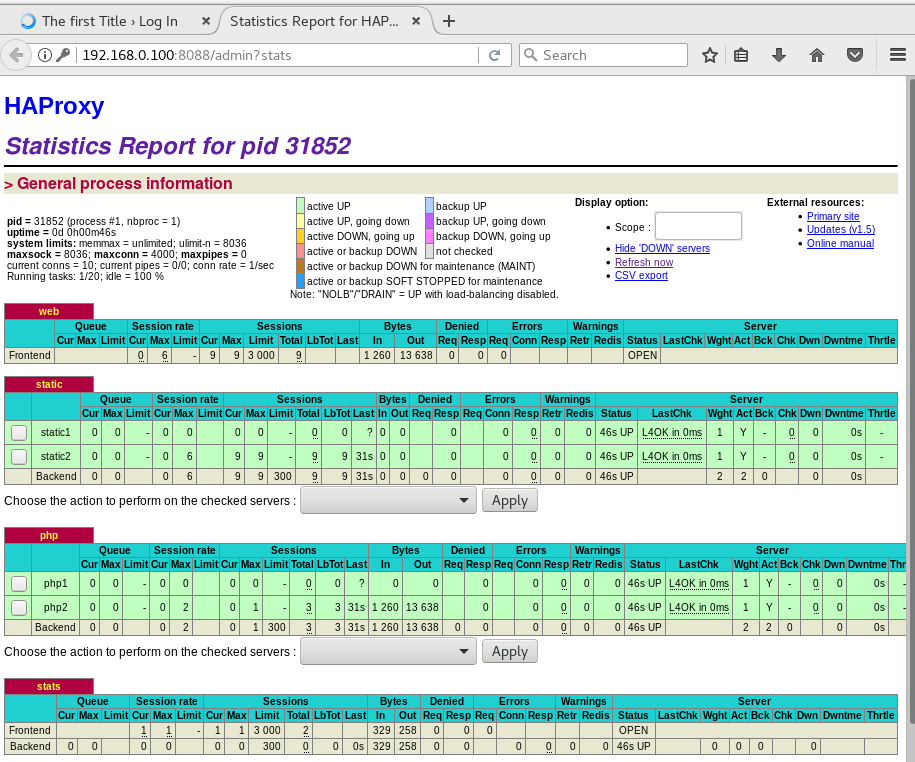
[root@KA_HA_01 ~]# cp /etc/haproxy/haproxy.cfg{,.bak}
#---------------------------------------------------------------------
# Global settings
#---------------------------------------------------------------------
global
    # to have these messages end up in /var/log/haproxy.log you will
    # need to:
    #
    # 1) configure syslog to accept network log events.  This is done
    #    by adding the '-r' option to the SYSLOGD_OPTIONS in
    #    /etc/sysconfig/syslog
    #
    # 2) configure local2 events to go to the /var/log/haproxy.log
    #   file. A line like the following can be added to
    #   /etc/sysconfig/syslog
    #
    #    local2.*                       /var/log/haproxy.log
    #
    log         127.0.0.1 local2

    chroot      /var/lib/haproxy
    pidfile     /var/run/haproxy.pid
    maxconn     4000
    user        haproxy
    group       haproxy
    daemon

    # turn on stats unix socket
    stats socket /var/lib/haproxy/stats

#---------------------------------------------------------------------
# common defaults that all the 'listen' and 'backend' sections will
# use if not designated in their block
#---------------------------------------------------------------------
defaults
    mode                    http
    log                     global
    option                  httplog
    option                  dontlognull
    option http-server-close
    option forwardfor       except 127.0.0.0/8
    option                  redispatch
    retries                 3
    timeout http-request    10s
    timeout queue           1m
    timeout connect         10s
    timeout check           10s
    maxconn                 3000

#---------------------------------------------------------------------
# main frontend which proxys to the backends
#---------------------------------------------------------------------
frontend  web *:80
    acl url_dynamic       path_beg       -i php
    acl url_static       path_end       -i .jpg .gif .png .css .js .html

    use_backend static         if url_static
    default_backend            php

#---------------------------------------------------------------------
# static backend for serving up images, stylesheets and such
#---------------------------------------------------------------------
backend static
    balance     source
    hash-type   consistent
    server      static1 192.168.0.137:80 check
    server      static2 192.168.0.138:80 check

#---------------------------------------------------------------------
# round robin balancing between the various backends
#---------------------------------------------------------------------
backend php
    balance    source
    hash-type  consistent
    server  php1 192.168.0.135:80 check
    server  php2 192.168.0.136:80 check
listen stats
        bind :8088
        stats   enable
        stats   hide-version
        stats   realm 'HAProxy\ admin page'
        acl     allow_ip  src 192.168.30.100
        stats   admin if allow_ip
        stats   uri             /admin?stats
        stats   auth    admin:admin
#       stats   admin   if TRUE
        http-request allow if allow_ip
将配置好的haproxy.cfg直接拷贝到KA_HA_02上;
在KA_HA_01和KA_HA_02上分别启动keepalived和haproxy
[root@KA_HA_01 ~]# systemctl enable keepalived;systemctl start keepalived;systemctl enable haproxy;systemctl start haproxy
[root@KA_HA_02 ~]# systemctl enable keepalived;systemctl start keepalived;systemctl enable haproxy;systemctl start haproxy
部署Mariadb_DB_Server:
安装必要软件:
[root@Mariadb_DB_Server ~]# yum install -y nfs-utils mariadb mariadb-server

新建apache用户(访问NFS时映射为apache)
[root@Mariadb_DB_Server ~]# useradd -u 48 apache

新建需要共享出去的目录,并将目录属主、属组更改为apache

[root@Mariadb_DB_Server ~]# mkdir -p /data/application/web/
[root@Mariadb_DB_Server ~]# install -o apache -g apache -d /data/application/web/

下载wordpress:
[root@Mariadb_DB_Server ~]# wget
https://codeload.github.com/WordPress/WordPress/zip/4.3.1
[root@Mariadb_DB_Server ~]# mv WordPress-4.3.1.zip /data/application/web/
[root@Mariadb_DB_Server web]# unzip WordPress-4.3.1
[root@Mariadb_DB_Server web]# chown -R apache:apache /data/application/web/
[root@Mariadb_DB_Server web]# ll -d !$
ll -d /data/application/web/
drwxr-xr-x 3 apache apache 91 May  4 20:49 /data/application/web/
[root@Mariadb_DB_Server web]# ll
total 9156
-rw-r--r-- 1 apache apache      29 May  4 20:33 index.html
-rw-r--r-- 1 apache apache      51 May  4 20:49 index.php
drwxr-xr-x 5 apache apache    4096 May  4 21:26 WordPress-4.3.1
-rw-r--r-- 1 apache apache 9359816 May  4 16:24 WordPress-4.3.1.zip
[root@Mariadb_DB_Server web]# chmod 777 WordPress-4.3.1/wp-content/
[root@Mariadb_DB_Server ~]# vim /etc/exports
/data/application/web/ 192.168.0.0/24(rw,async,anonuid=48,anongid=48)
或者下面这种
/data/application/web/ 192.168.0.135(rw,async,anonuid=48,anongid=48)
/data/application/web/ 192.168.0.136(rw,async,anonuid=48,anongid=48)
/data/application/web/ 192.168.0.137(rw,async,anonuid=48,anongid=48)
/data/application/web/ 192.168.0.138(rw,async,anonuid=48,anongid=48)
启动NFS,并配置NFS开机自启动:
[root@Mariadb_DB_Server ~]# systemctl start nfs;systemctl enable nfs
[root@Mariadb_DB_Server ~]# showmount -e
Export list for Mariadb_DB_Server:
/data/application/web 192.168.0.138,192.168.0.137,192.168.0.136,192.168.0.135
配置mariadb:
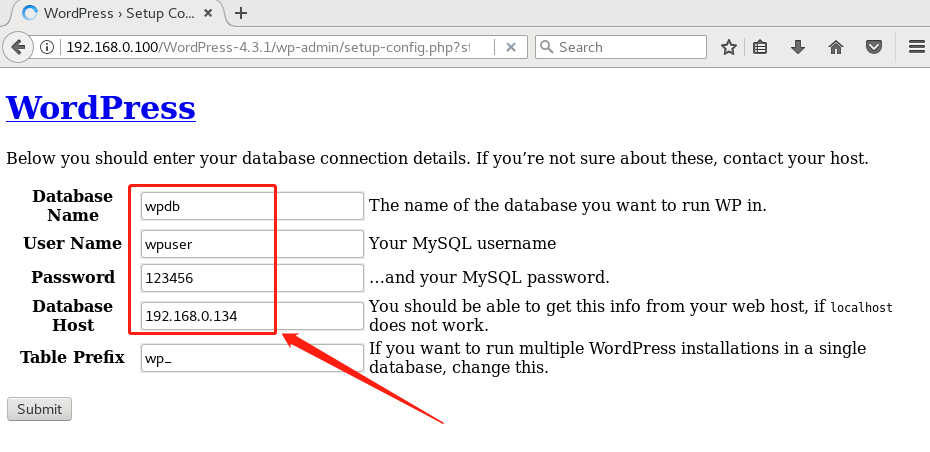
[root@Mariadb_DB_Server ~]# systemctl start mariadb
[root@Mariadb_DB_Server ~]# mysql
Welcome to the MariaDB monitor.  Commands end with ; or \g.
Your MariaDB connection id is 2
Server version: 5.5.56-MariaDB MariaDB Server

Copyright (c) 2000, 2017, Oracle, MariaDB Corporation Ab and others.

Type 'help;' or '\h' for help. Type '\c' to clear the current input statement.

MariaDB [(none)]> create database wpdb;
Query OK, 1 row affected (0.00 sec)
MariaDB [(none)]> grant all privileges on wpdb.* to 'wpuser'@'%' identified by '123456';
Query OK, 0 rows affected (0.00 sec)

MariaDB [(none)]> flush privileges;
Query OK, 0 rows affected (0.00 sec)
MariaDB [(none)]> show grants for wpuser\G;
*************************** 1. row ***************************
Grants for wpuser@%: GRANT USAGE ON *.* TO 'wpuser'@'%' IDENTIFIED BY PASSWORD '*6BB4837EB74329105EE4568DDA7DC67ED2CA2AD9'
*************************** 2. row ***************************
Grants for wpuser@%: GRANT ALL PRIVILEGES ON `wpdb`.* TO 'wpuser'@'%'
2 rows in set (0.00 sec)


MariaDB [(none)]> \q
Bye
配置Dynamic_Web_Server:
[root@Dynamic_Web_Server01 ~]# yum install -y httpd php php-mysql
[root@Dynamic_Web_Server02 ~]# yum install -y httpd php php-mysql
配置Static_Web_server:
[root@Static_Web_Server01 ~]# yum install -y httpd php php-mysql
[root@Static_Web_Server02 ~]# yum install -y httpd php php-mysql
在Static_Web_Server和Dynamic_Web_Server 上启动httpd;
[root@Dynamic_Web_Server01 ~]# systemctl start httpd
在Dynamic_Web_Server上和Static_Web_server上准备测试页面:
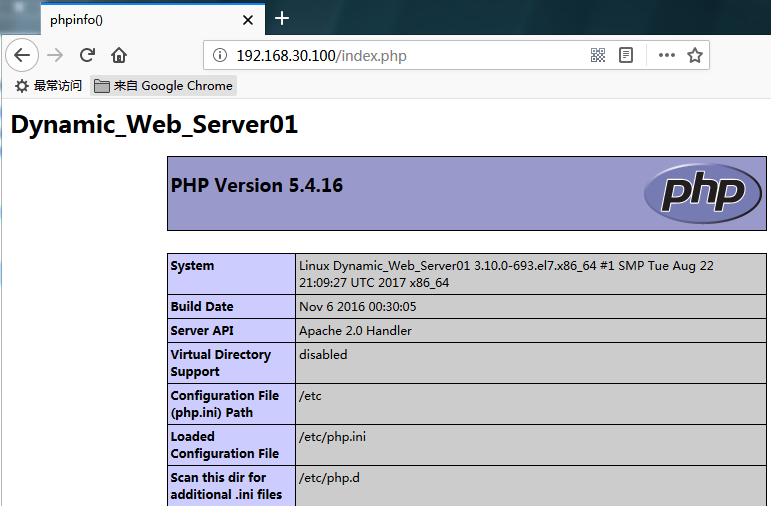
[root@Dynamic_Web_Server01 ~]# cat /var/www/html/index.php
<h1>Dynamic_Web_Server01</h1>
<?php
phpinfo();
?>
[root@Dynamic_Web_Server02 ~]# cat /var/www/html/index.php
<h1>Dynamic_Web_Server02</h1>
<?php
phpinfo();
?>
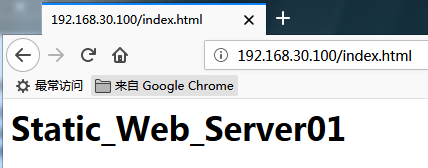
[root@Static_Web_Server01 ~]# cat /var/www/html/index.html
<h1>Static_Web_Server01</h1>
[root@Static_Web_Server02 ~]# cat /var/www/html/index.html
<h1>Static_Web_Server02</h1>
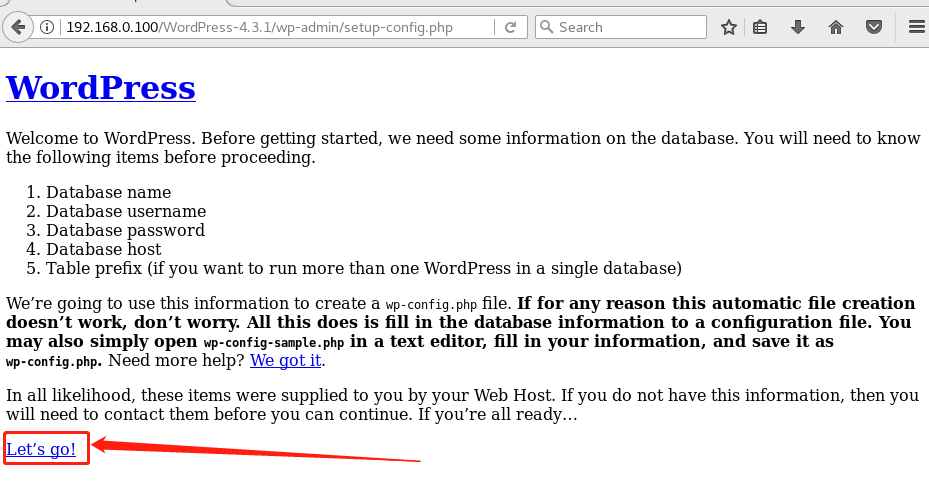
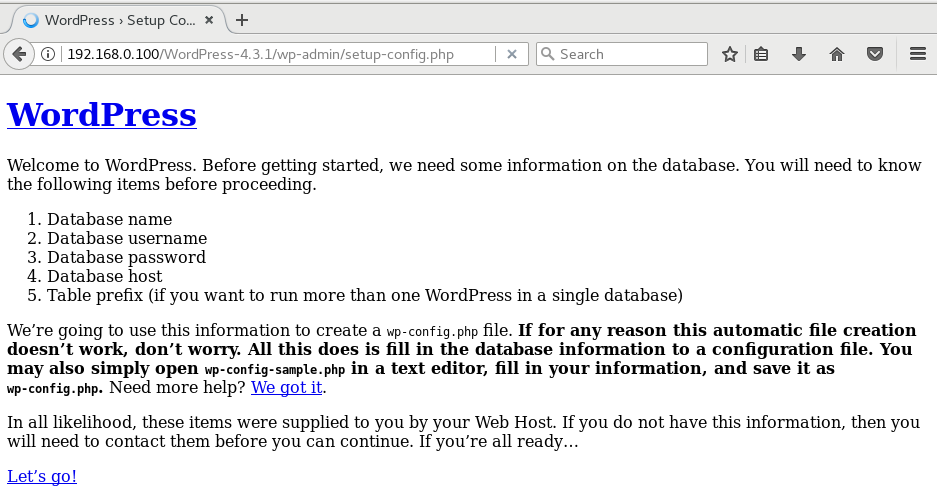
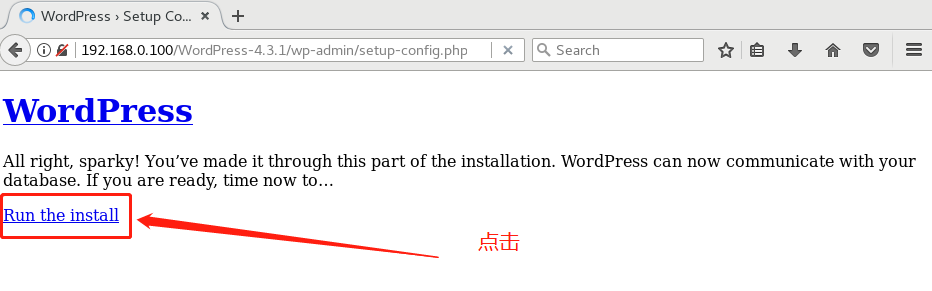
测试:
这里遇到的问题:不明白为什么,在四台web服务器上任意 修改其中一台主机的测试页面,就会将修改结果同步到其他三台:


无解了!!!!
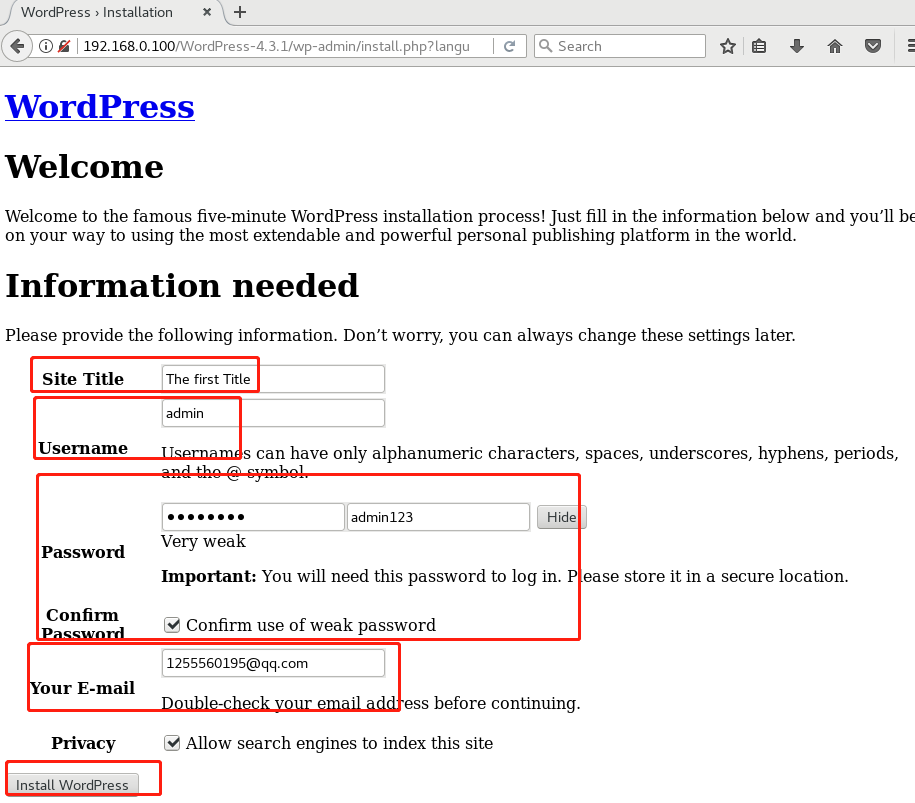
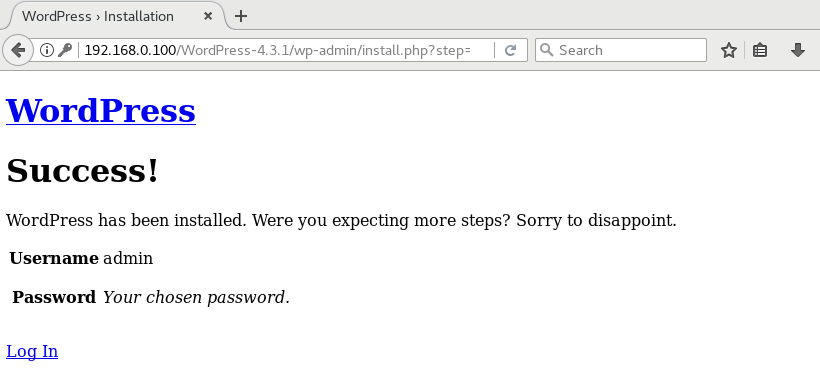
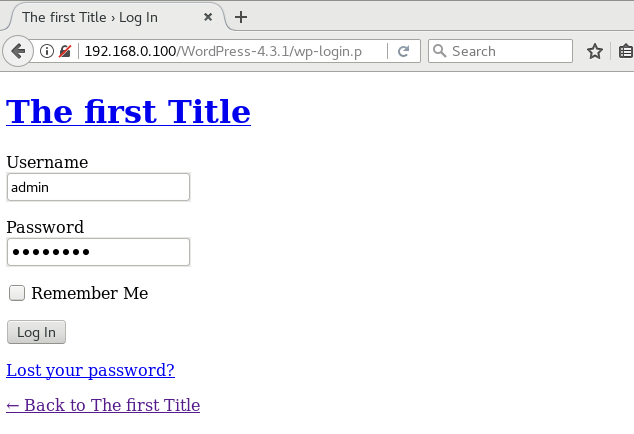
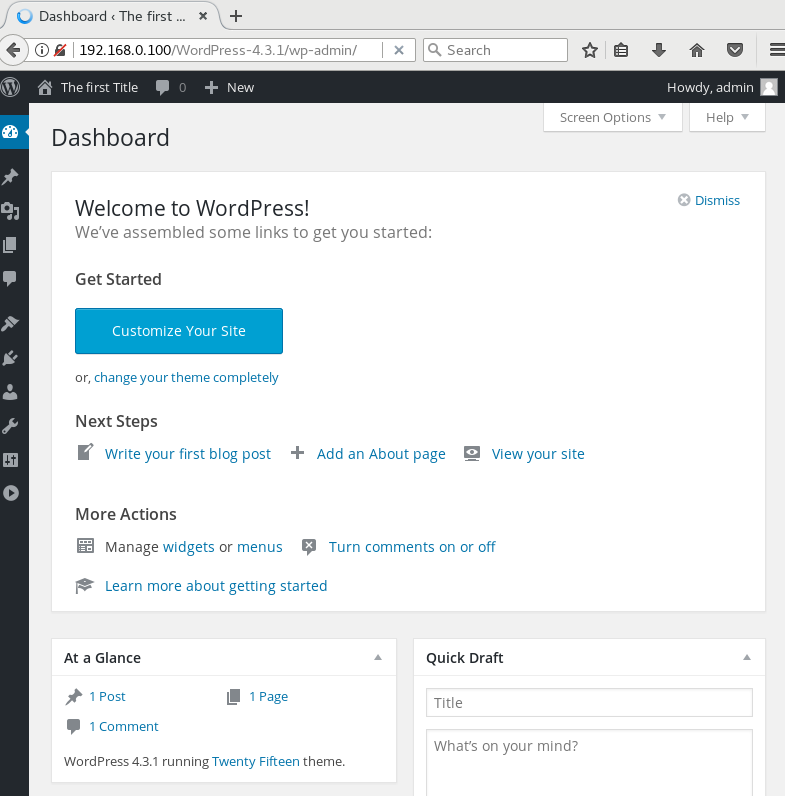
上述步骤是第二次实验了,第一次实验使用的VIP是192.168.0.100,其测试结果如下: