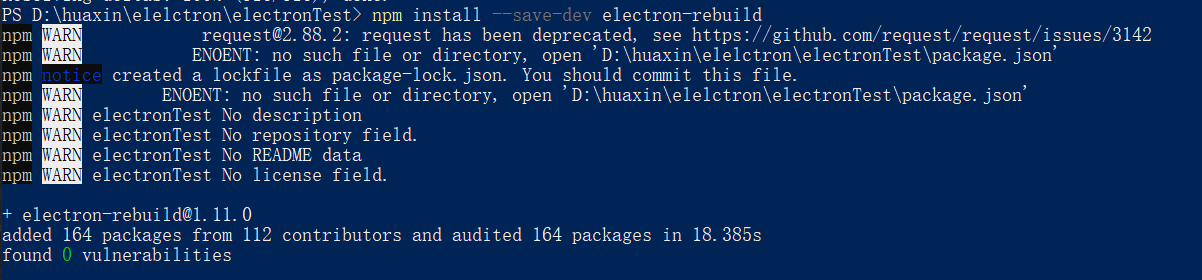
1)下载了electron-rebuild 运行命令npm install --save-dev electron-rebuild
(2)下载node-gyp 运行命令npm install node-gyp -g

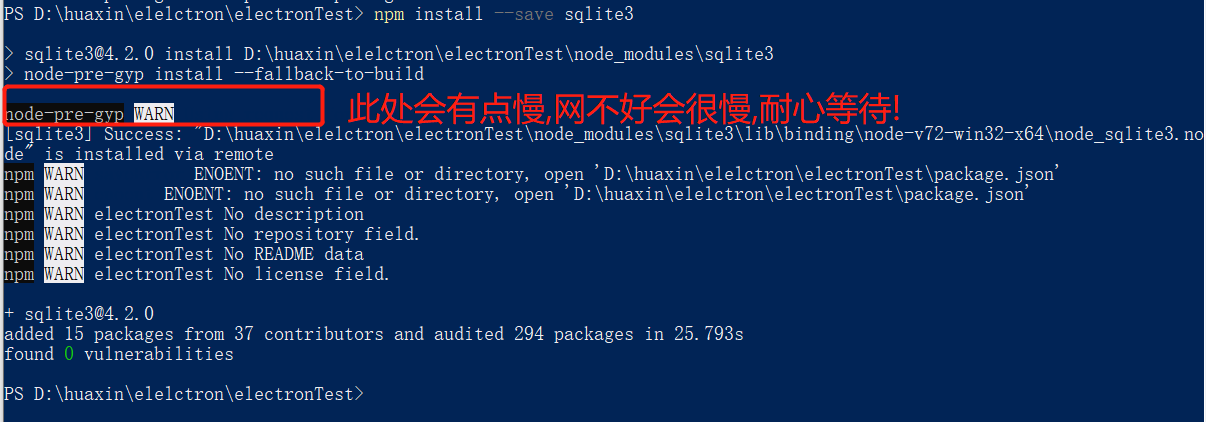
(3)下载sqlite3 运行命令npm install --save sqlite3
(4)在package.json中加入代码 "rebuild": "electron-rebuild -f -w sqlite3"

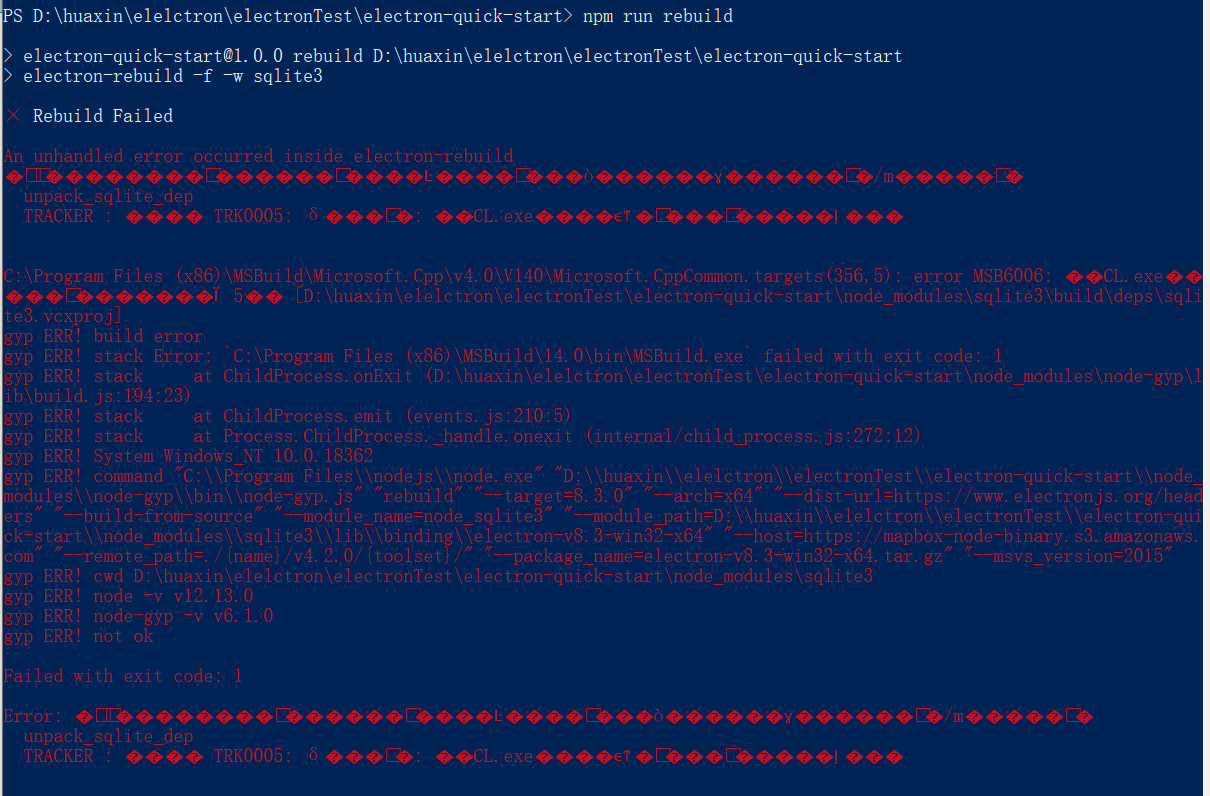
(5)运行编译:运行命令 npm run rebuild
意外出现报错
(7)修改一下镜像,运行代码 npm install -g cnpm --registry=https://registry.npm.taobao.org

测试cnpm的是否安装成功 运行命令cnpm -v

(8)清一下缓存npm cache clean -f (这一步很有必要!!!!!)

(9)紧接着运行命令 cnpm install sqlite3@latest --build-from-source --runtime=electron --target=8.3.0 --dist-url=https://atom.io/download/electron --save(--target=8.3.0注意要写成自己下的electron的版本)
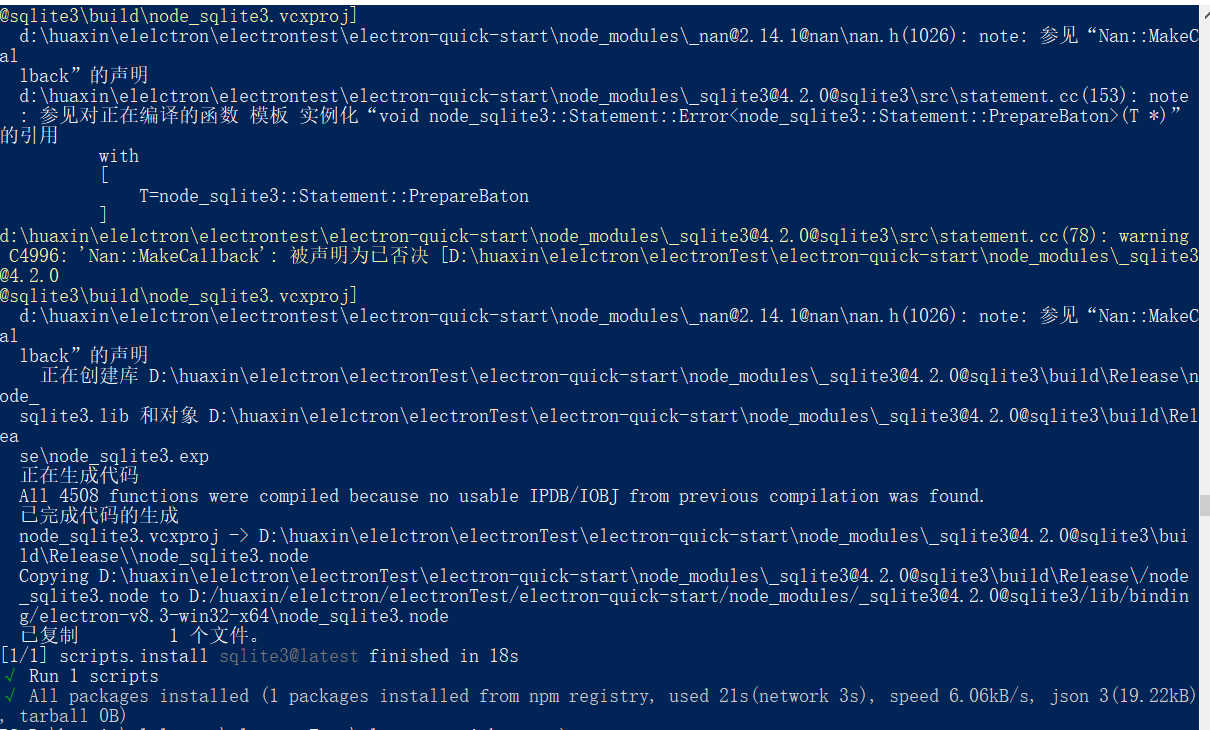
(9)执行第(6)步中的命令npm run rebuild

(10)将代码放入渲染程序中(html中引入的js renderer.js文件中)

// This file is required by the index.html file and will
// be executed in the renderer process for that window.
// No Node.js APIs are available in this process because
// `nodeIntegration` is turned off. Use `preload.js` to
// selectively enable features needed in the rendering
// process.
// src/renderer/utils/db.js
// 建表脚本,导出db对象供之后使用
let path = require('path');
let sq3 = require('sqlite3');
// import { docDir } from './settings';
// 将数据存至系统用户目录,防止用户误删程序
const dbPath = path.join("D:\\huaxin\\elelctron\\electronTest\\electron-quick-start", 'data.sqlite');

const sqlite3 = sq3.verbose();
const db = new sqlite3.Database(dbPath);
db.serialize(() => {

 db.run("create table test(name varchar(15))",function(){
  db.run("insert into test values('hello,word')",function(){
    db.all("select * from test",function(err,res){
      if(!err){
        console.log(JSON.stringify(res));
      }
      else{
        console.log(err);
      }
    });
  });
});


});
当报错require undefined时在main.js中引入nodeIntegration: true代码放到webPreferences对象中

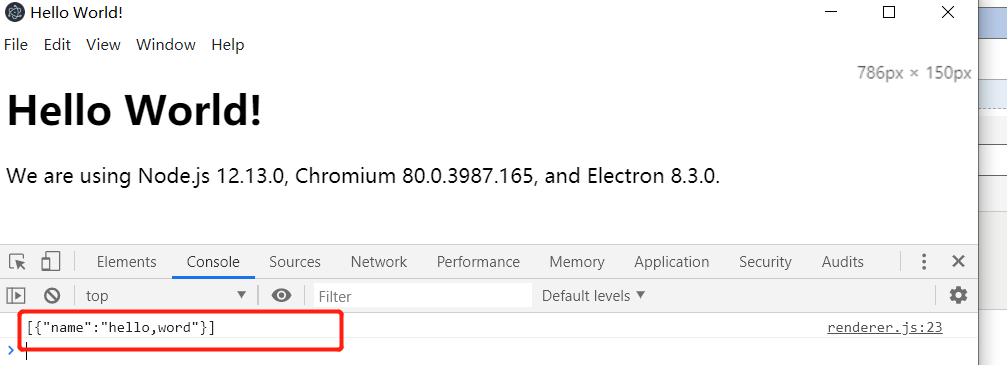
(11)然后运行npm start 会在console中看到输出的代码和再根目录多一个.sqlite结尾的文件

文末附上认为比较好的文章连接
https://blog.csdn.net/zoepriselife316/article/details/89954383
https://www.cnblogs.com/alex96/p/12180296.html
也可以使用sql.js来代替sqlite3:https://www.cnblogs.com/alex96/p/12252992.html