我们知道激发事件与事件处理器是没有关联的,所以事件是不具有约束力的
命令与事件最大的区别就是,命令具有约束力
此文来实现一些简单的命令
文章目录
命令系统的一些概念
-
命令系统四要素:
- 命令:实现
ICommand接口的类 - 命令源:命令的发送者,实现了
ICommandSouce接口的类 - 命令目标:命令作用的地方,实现了
IInputElement接口的类 - 命令关联:将一些外围逻辑与命令关联起来,执行前判断是否可以执行命令,
后续工作有什么等 (CommandBindings)
- 命令:实现
-
RoutedCommand 命令类:
由此类声明的命令是没有包含业务逻辑的,它的执行过程为:
发出命令 --> 命令目标激发路由事件 --> 外围控件捕捉事件 --> 对命令目标加以处理(这句话贼重要!!!)
小试命令
实现这样一个需求:定义一个命令,使用 Button来发送这个命令,当命令送达 TextBox时 TextBox会被清空 (如果TextBox 中没有文字则命令不可被发送)
- 程序XAML界面代码如下:
<Window x:Class="SmallCommand.MainWindow"
        xmlns="http://schemas.microsoft.com/winfx/2006/xaml/presentation"
        xmlns:x="http://schemas.microsoft.com/winfx/2006/xaml"
        Title="MainWindow" Height="175" Width="260" Background="LightBlue">
    <StackPanel x:Name="stackPanel">
        <Button x:Name="button1" Content="Send Command" Margin="5"/>
        <TextBox x:Name="textBoxA" Margin="5,0" Height="100"/>
    </StackPanel>
</Window>
效果如下:

- 后台逻辑部分:
- 声明并定义命令(在MainWindow类中定义):
private RoutedCommand clearCmd =
new RoutedCommand("Clear", typeof(MainWindow));- 指定命令源并设置快捷键(在MainWindow类的构造器中):
this.button1.Command = this.clearCmd;
this.clearCmd.InputGestures.Add(new KeyGesture(Key.C, ModifierKeys.Alt));- 指定命令目标:
this.button1.CommandTarget = this.textBoxA; - 创建命令关联:
CommandBinding cb = new CommandBinding();
cb.Command = this.clearCmd;
cb.CanExecute += Cb_CanExecute;
cb.Executed += Cb_Executed;- 将命令关联安置在外围控件上:
this.stackPanel.CommandBindings.Add(cb); // 不放在外围控件上 将无法捕捉路由事件- 探测命令是否可以被执行(放在类中):
private void Cb_CanExecute(object sender, CanExecuteRoutedEventArgs e)
{
	// 判断TextBox中是否有东西
	if (string.IsNullOrEmpty(this.textBoxA.Text))
                e.CanExecute = false;
	else
                e.CanExecute = true;

	e.Handled = true;	// 避免继续上传降低程序性能
}- 当命令送达目标后,此方法被调用(命令已经作用过了,激发此方法):
private void Cb_Executed(object sender, ExecutedRoutedEventArgs e)
{
	this.textBoxA.Clear();

	e.Handled = true;
}- 效果动态图:
-
代码总结:
命令可以判断Button是否,可以添加快捷键
RoutedCommand 是一个与业务逻辑无关的类,上面对TextBox的 Clear是CommandBinding干的事情.
发出命令 --> 命令目标激发路由事件 --> 外围控件捕捉事件 --> 对命令目标加以处理
我在上面写过这句话,理解了之后,就好办了 ^ _ ^& -
示意图:

命令库的一些命令使用(XAML的使用)
有各种各样的常用的命令,微软在WPF中已经为我们准备好了,比如:

下面我们将来尝试使用这个命令,并且解决一个简单的小问题:
如果有两个相同的命令,我们希望他们干些不同的事,但命令的实例只有一个,我们该怎么办呢?
答案是使用 CommandPrameter,通过CommandPrameter的不同,来处理不同的信息
我们来实现一个用于处理相同命令但不同参数的例子,两个参数分别是 Teacher 和 Student,分别将它们存入 “档案”.
- XAML 部分(包含核心功能):
- 将界面进行布局(分成七行):
<Window x:Class="SmallCommand.MainWindow"
        xmlns="http://schemas.microsoft.com/winfx/2006/xaml/presentation"
        xmlns:x="http://schemas.microsoft.com/winfx/2006/xaml"
        Title="MainWindow" Height="240" Width="360" Background="LightBlue"
         	WindowStyle="ToolWindow">
	<Grid Margin="6">
	<Grid.RowDefinitions>
            <RowDefinition Height="24"/>
            <RowDefinition Height="4"/>
            <RowDefinition Height="24"/>
            <RowDefinition Height="4"/>
            <RowDefinition Height="24"/>
            <RowDefinition Height="4"/>
            <RowDefinition Height="*"/>
        </Grid.RowDefinitions>
	</Grid>
</Window>- 三个UI元素,TextBox用于输入信息,ListBox用于显示信息:
<TextBlock Text="Name:" VerticalAlignment="Center" HorizontalAlignment="Left"
 	Grid.Row="0"/>

<TextBox x:Name="nameTextBox" Margin="60,0,0,0" Grid.Row="0"/>

<ListBox x:Name="listBoxNewItems" Grid.Row="6"/>- 两个用于发出命令的Button,命令、命令参数:
<Button Content="New Teachar" Command="New" CommandParameter="Teachar" Grid.Row="2"/>
<Button Content="New Student" Command="New" CommandParameter="Student" Grid.Row="4"/>- 为窗体添加 CommandBinding,命令、两个事件方法:
<Window.CommandBindings>
        <CommandBinding  Command="New" CanExecute="CommandBinding_CanExecute"
        	Executed="CommandBinding_Executed"/>
</Window.CommandBindings>- 后台实现两个路由事件处理器:
- CommandBinding_CanExecute 方法:
private void CommandBinding_CanExecute(object sender, CanExecuteRoutedEventArgs e)
{
	if (string.IsNullOrEmpty(this.nameTextBox.Text)) // 判断需要输入的内容是否为空
		e.CanExecute = false;
	else
               	e.CanExecute = true;

	e.Handled = true;
}- CommandBinding_Executed 方法:
private void CommandBinding_Executed(object sender, ExecutedRoutedEventArgs e)
{
	string name = this.nameTextBox.Text;

	if (e.Parameter.ToString() == "Teachar")
                this.listBoxNewItems.Items.Add(string.Format("New Teacher: {0} ,
                	学而不厌,诲人不倦。", name));

	if (e.Parameter.ToString() == "Student")
                this.listBoxNewItems.Items.Add(string.Format("New Student: {0} ,
                	好好学习,天天向上。", name));
}- 效果动态图:
自定义命令
WPF命令系统并没有为我们准备重写命令方法的步骤
可以说 Commanding 是专门为 RouteCommand 而编写的。
所以我们自定义命令,需要完全的实现 命令、命令源、命令目标
我们需要实现这样一个功能:
- 点击命令源,清除命令目标中的内容
命令的执行会直接调用命令目标的 Clear方法,用于清除里面的内容
如果我们没有Clear这个方法怎么办呢?
这里我就需要使用一个特定的接口来约束命令目标了
- 提供接口用于服务命令目标:
public interface IView
{
	void Clear();
}
里面也可以添加一些其它的逻辑,这里我为了方便,就只提供一个方法用于实现 …
- 自定义命令(继承于 ICommand):
public class ClearCommand : ICommand
{
	// 通过继承而来
	public event EventHandler CanExecuteChanged;

	// 为了方便,这个方法暂不实现
	public bool CanExecute(object parameter)
	{
		throw new NotImplementedException();
	}

	// 命令执行,与业务相关的 Clear逻辑
	public void Execute(object parameter)   // 这个参数是命令目标
	{
		IView view = parameter as IView;

                if(view != null)
                {
                    view.Clear();       // 调用命令目标的 Clear方法,清除内容
                }
	}
}
有了命令之后,我们需要一个命令源来 “发射” 它
- 自定义命令源(继承于 UserControl,ICommandSource):
public class MyCommandSource : UserControl, ICommandSource
{
	// 继承的属性
	public ICommand Command { get; set; }
	public object CommandParameter { get; set; }
	public IInputElement CommandTarget { get; set; }

	protected override void OnMouseLeftButtonDown(MouseButtonEventArgs e)
	{
		base.OnMouseLeftButtonDown(e);

                if(this.CommandTarget != null)  // 命令目标存在
                {
                    this.Command.Execute(this.CommandTarget);
                }
	}
}- 自定义控件,用于命令目标:
-
创建项:

-
XAML部分代码:

-
为自定义控件的类实现 IView接口的方法:

- 程序主体 XAML部分,命令源的控件与命令目标的控件:
<Window x:Class="SmallCommand.MainWindow"
        xmlns="http://schemas.microsoft.com/winfx/2006/xaml/presentation"
        xmlns:x="http://schemas.microsoft.com/winfx/2006/xaml"
        xmlns:local="clr-namespace:SmallCommand"

	Title="MainWindow" Height="205" Width="250" Background="LightBlue">

	<StackPanel>
        <local:MyCommandSource x:Name="ctrlClear" Margin="10">
            <TextBlock Text="清除" FontSize="16" TextAlignment="Center"
                       Background="LightGreen" Width="80"/>
	</local:MyCommandSource>

        <local:MyUserControl x:Name="miniView"/>

    </StackPanel>

</Window>
效果图:
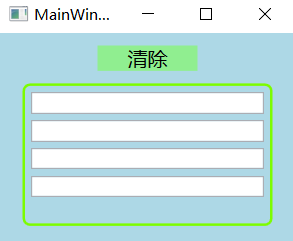
当我们点击上面的清除时,下面四行的内容将被清除 …
- 后台指定命令实例、命令源、命令目标:
ClearCommand clearCommand = new ClearCommand();
this.ctrlClear.Command = clearCommand;
this.ctrlClear.CommandTarget = this.miniView;- 效果动态图: