1.设置是否已经登录的验证
1.在newapp/pages/center/center.vue中:
<template>
    <view class="content">

    </view>
</template>

<script>
    export default {
        data() {
            return {

            }
        },
        methods: {
            isLogin(){
                let token=uni.getStorageSync('token');
                if(token){
                    console.log('已登录')
                }else{
                    uni.navigateTo({url:'/pages/login/login'})
                }
            }

        },
        onShow() {
            this.isLogin()
        }
    }
</script>

<style>

</style>
2.在newapp/pages/me/me.vue中:
<template>
    <view>

    </view>
</template>

<script>
    export default {
        data() {
            return {

            }
        },
        methods: {
            isLogin(){
                let token=uni.getStorageSync('token');
                if(token){
                    console.log('已登录')
                }else{
                    uni.navigateTo({url:'/pages/login/login'})
                }
            }
        },
        onShow() {
            this.isLogin()
        }
    }
</script>

<style>

</style>
2.在后端项目中开发小程序用户登录的api
1.NewCenter/apps/user_operations/views.py:
from django.shortcuts import render,HttpResponse
from rest_framework.views import APIView,Response
from users.models import PianQu,UserProfile
from users.serializers import PianQuModelSerializer,UserProfileModelSerializer
from .models import Notice
from .serializers import NoticeModelSerializer
import json,time,hashlib

# Create your views here.


#……

class UserLoginView(APIView):
    """小程序端用户登录"""
    def post(self, request):
        pwd=request.data.get('pwd')
        tel=request.data.get('tel')
        if pwd and tel:
            user = UserProfile.objects.filter(mobile=tel,password=pwd).first()
            if user:
                # 生成token
                now_time=str(int(time.time()))
                word=user.mobile+now_time
                token=hashlib.sha256(word.encode("utf-8")).hexdigest()
                # print(token)
                user.token=token
                user.save()
                re=UserProfileModelSerializer(user)
                result = {"status": "200", "data":{'info':re.data,'token':token} }
            else:
                result = {"status": "403", "data": {'msg': '电话或密码错误。'}}
        else:
            result = {"status": "404", "data": {'msg': '未收到足够参数。'}}
        return HttpResponse(json.dumps(result, ensure_ascii=False), content_type="application/json,charset=utf-8")
2.NewCenter/apps/user_operations/urls.py:
from django.urls import path
from .views import GetPianQuBannerView,GetNoticeListView,UserLoginView

urlpatterns = [
    path('getbanner/',GetPianQuBannerView.as_view()),#手机端获取banner图
    path('getnoticeclist/',GetNoticeListView.as_view()),#获取公告列表
    path('userlogin/',UserLoginView.as_view()),#小程序用户登录
]
3.在xadmin后台,输入几个实验用户数据
(前面填入过)
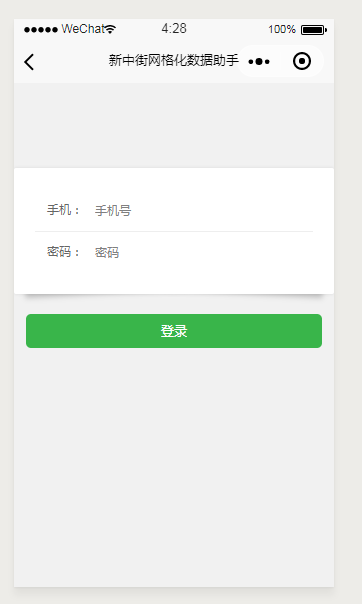
3.在uni-app端newapp/pages/login/login.vue中:
<template>

    <view class="content">
        <view class="padding-xl radius shadow-warp bg-white margin-top">
            <view class="cu-form-group">
                <view class="title">手机:</view>
                <input placeholder="手机号" v-model="tel"></input>
            </view>
            <view class="cu-form-group">
                <view class="title">密码:</view>
                <input placeholder="密码" v-model="pwd"></input>
            </view>
        </view>
        <view class="padding flex flex-direction">
            <button class="cu-btn bg-green margin-tb-sm lg" @tap="goLogin" data-target="Modal">登录</button>
        </view>


        <view class="cu-modal" :class="modalName=='Modal'?'show':''">
            <view class="cu-dialog">
                <view class="cu-bar bg-white justify-end">
                    <view class="content">错误提示:</view>
                    <view class="action" @tap="hideModal">
                        <text class="cuIcon-close text-red"></text>
                    </view>
                </view>
                <view class="padding-xl">
                    {{title}}
                </view>
            </view>
        </view>

    </view>


</template>

<script>
import {host,get,post} from '@/commons/post_and_get.js';
    export default {
        data() {
            return {
                modalName: null,
                title:'请输入正确的手机号和密码',
                tel:'',
                pwd:'',

            }
        },
        methods: {
            showModal(e) {
                this.modalName = e.currentTarget.dataset.target
            },
            hideModal(e) {
                this.modalName = null
            },
            async goLogin(e){
                if(this.tel &&this.pwd){
                    if(this.tel.length==11){
                        console.log('提交登录数据')
                        let re=await post('/user_operations/userlogin/',{'tel':this.tel,'pwd':this.pwd})
                        console.log(re)
                        if(re.status==200){
                            console.log('登录成功')
                            uni.setStorageSync('token' , re.data.token);
                            uni.setStorageSync('info' , re.data.info);
                            uni.switchTab({url: '/pages/me/me'});
                        }else{
                            this.title=re.data.msg
                            this.showModal(e)
                        }
                    }else{
                        this.showModal(e)
                    }
                }else{
                    this.showModal(e)
                }
            }


        }
    }
</script>

<style>
.content{
    margin-top: 200upx;
}
</style>
运行效果