SpringMVC是SSM(SpringMVC Spring Mybatis)框架重要的组成部分之一.
在javaWeb中使用servlet基于MVC开发模式流程如下:

springMvc其实就是基于servlet与mvc开发模式而推出的表现层管理框架.
一、配置简单SpringMVC的web项目
主要应用于客户端(浏览器)与业务逻辑层的连接,配置使用如下:
1、创建工程导入jar包
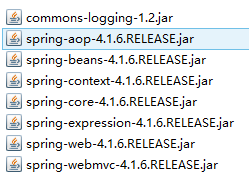
注意:导入jar包版本号最好保持一致,否则可能因为版本号不一致导致项目报错
2、书写配置文件
(1)web.xml
<!--configure the setting of springmvcDispatcherServlet and configure the mapping-->
  <servlet>
      <servlet-name>springmvc</servlet-name>
      <servlet-class>org.springframework.web.servlet.DispatcherServlet</servlet-class>
        <init-param>
            <param-name>contextConfigLocation</param-name>
            <param-value>classpath:springmvc-servlet.xml</param-value>
        </init-param>
  </servlet>
  <servlet-mapping>
      <servlet-name>springmvc</servlet-name>
      <url-pattern>/</url-pattern>
  </servlet-mapping>
(2)在src新建springmvc-servlet(与web.xml中init-param中配置的param-value相同)
<?xml version="1.0" encoding="UTF-8"?>
<beans xmlns="http://www.springframework.org/schema/beans"
    xmlns:xsi="http://www.w3.org/2001/XMLSchema-instance"
    xmlns:context="http://www.springframework.org/schema/context"
    xmlns:mvc="http://www.springframework.org/schema/mvc"
    xsi:schemaLocation="http://www.springframework.org/schema/beans http://www.springframework.org/schema/beans/spring-beans.xsd
        http://www.springframework.org/schema/context http://www.springframework.org/schema/context/spring-context-4.1.xsd
        http://www.springframework.org/schema/mvc http://www.springframework.org/schema/mvc/spring-mvc-4.1.xsd">
    <!-- scan the package and the sub package -->
    <context:component-scan base-package="com.zhiyou100.controller"/>
    <!-- don't handle the static resource -->
    <mvc:default-servlet-handler />
    <!-- if you use annotation you must configure following setting -->
    <mvc:annotation-driven />
    <!-- configure the InternalResourceViewResolver -->
    <bean class="org.springframework.web.servlet.view.InternalResourceViewResolver"
            id="internalResourceViewResolver">
        <!-- 前缀 -->
        <property name="prefix" value="/WEB-INF/jsp/" />
        <!-- 后缀 -->
        <property name="suffix" value=".jsp" />
    </bean>
</beans>
3、在WEB-INF文件夹下创建名为jsp的文件夹,创建hello.jsp,用来存放jsp视图(根据springmvc-servlet.xml中视图解析器配置创建文件夹)
4、创建包创建相应controller类(根据springmvc-servlet.xml中所扫描包创建保存controller类的包)
@Controller
public class mvcController {

    @RequestMapping("hello")
    public String hello(){
        return "hello";
    }
}
注意:定义的方法为public公开的
5、启动服务器,输入入 http://localhost:8080/项目名/hello
二、SpringMVC配置解析
1、web.xml中
(1)rg.springframework.web.servlet.DispatcherServlet
DispatcherServlet是前置控制器,拦截自定义匹配的请求,把拦截下来的请求,依据相应的规则分发到目标Controller来处理,是配置spring MVC的第一步。
(2)contextConfigLocation与classpath:springmvc-servlet.xml
定义DispatcherServlet配置文件springmvc-servlet.xml加载位置
2、springmvc-servlet.xml中(springmvc配置文件)
(1)<beans>中
为当前xml的约束文件,配置文件中很多标签如:mvc/context等需要导入约束后才能使用否则不能识别
注意:约束导入与版本号最好保持一致,否则可能在项目可以正常运行的情况下配置文件报错
(2)<context:component-scan base-package="com.zhiyou100.controller"/>
注解开发配置,配置扫描的包,为注解组件提供扫描位置
(3)<mvc:annotation-driven />
注解开发驱动,自动注册DefaultAnnotationHandlerMapping与AnnotationMethodHandlerAdapter 两个bean,是spring MVC为@Controllers分发请求所必须的,解决了@Controller注解使用的前提配置
(4)<mvc:default-servlet-handler />
在springMVC-servlet.xml中配置<mvc:default-servlet-handler />后,会在Spring MVC上下文中定义一个org.springframework.web.servlet.resource.DefaultServletHttpRequestHandler,它会像一个检查员,对进入DispatcherServlet的URL进行筛查,如果发现是静态资源的请求,就将该请求转由Web应用服务器默认的Servlet处理,如果不是静态资源的请求,才由DispatcherServlet继续处理
(5)org.springframework.web.servlet.view.InternalResourceViewResolver
视图解析器,他的作用是在Controller返回的时候进行解析视图,有两个属性prefix目录和suffix后缀,分别对应Controller返回视图的目录与后缀
三、常用注解
@Controller
负责注册一个bean 到spring 上下文中
@RequestMapping
注解为控制器指定可以处理哪些 URL 请求
@RequestBody
该注解用于读取Request请求的body部分数据,使用系统默认配置的HttpMessageConverter进行解析,然后把相应的数据绑定到要返回的对象上 ,再把HttpMessageConverter返回的对象数据绑定到 controller中方法的参数上
@ResponseBody
该注解用于将Controller的方法返回的对象,通过适当的HttpMessageConverter转换为指定格式后,写入到Response对象的body数据区
@ModelAttribute
在方法定义上使用 @ModelAttribute 注解:Spring MVC 在调用目标处理方法前,会先逐个调用在方法级上标注了@ModelAttribute 的方法
在方法的入参前使用 @ModelAttribute 注解:可以从隐含对象中获取隐含的模型数据中获取对象,再将请求参数 –绑定到对象中,再传入入参将方法入参对象添加到模型中
@RequestParam
在处理方法入参处使用 @RequestParam 可以把请求参 数传递给请求方法
@PathVariable
绑定 URL 占位符到入参
@ExceptionHandler
注解到方法上,出现异常时会执行该方法
@ControllerAdvice
使一个Contoller成为全局的异常处理类,类中用@ExceptionHandler方法注解的方法可以处理所有Controller发生的异常
四、参数获取
1、根据名字返回定义数据类型数据(自动匹配参数)
在方法中定义相应接受数据参数自动获取进行类型转换后封装数据
2、根据类数据进行获取(自动装箱)
在方法中定义参数为类类型,参数会自动根据相应名字数据进行封装保存
五、特殊数据类型date获取
使用InitBinder来处理Date类型的参数
  @RequestMapping("date")
    public String date(Date date){
        System.out.println(date);
        return "hello";
    }


    @InitBinder
    public void initBinder(ServletRequestDataBinder binder){
        binder.registerCustomEditor(Date.class, new CustomDateEditor(new SimpleDateFormat("yyyy-MM-dd"),
                true));
    }
六、数据传递
1、定义方法参数返回数据
(1)HttpServletRequest
@RequestMapping("param")
    public String param(HttpServletRequest request){
        request.setAttribute("param","param");
        return "hello";
    }
(2)Map<String,Object> map
@RequestMapping("param")
    public String param(Map<String,Object> map){
        User u =new User("爱先森","男",18);
        map.put("user", u);
        return "hello";
    }
2、定义返回值返回数据
@RequestMapping("param")
	public ModelAndView param(){
		ModelAndView mav=new ModelAndView();
		mav.setViewName("index");
		mav.addObject("ok", "ok");
		return mav;
	}
3、返回json数据
(1)导入额外jar包
(2)使用@ResponBody注解
@Controller
public class jsonController {
    @ResponseBody
    @RequestMapping("user")
    public  User get(){
        User u = new User();
        u.setId(1);
        u.setName("ai");
        u.setBirth(new Date());
        return u;
    }
}
七、请求跳转
1、重定向
@RequestMapping("/redirect")
    public String redirect(){
        return "redirect:hello";
    }
2、转发
@RequestMapping("/forward")
    public String redirect(){
        return "forward:hello";
    }
八、文件上传
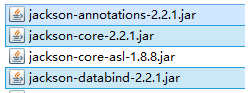
1、额外导入jar包
![]()
2、springmvc-servlet.xml加入额外配置
<bean id="multipartResolver"
		class="org.springframework.web.multipart.commons.CommonsMultipartResolver">
		<property name="maxUploadSize" value="104857600" />
		<property name="maxInMemorySize" value="4096" />
		<property name="defaultEncoding" value="UTF-8"></property>
</bean>
org.springframework.web.multipart.commons.CommonsMultipartResolver 文件上传组件
maxUploadSize 上传文件最大字节
maxInMemorySize 上传文件最小字节
defaultEncoding 默认编码字符集
代码书写注意事项:
(1)前台代码
<form action="/upload" method="post" enctype="multipart/form-data">
          <input type="file" name="file"><br>
          <input type="submit" value="submit">
</form>
1)method请求方式必须为post
2)必须有enctype="multipart/form-data
3)form表单中必须有type为file的input标签
(2)后台代码
	@RequestMapping("upload")
	public String upload(@RequestParam("file")MultipartFile file,HttpServletRequest request){
		 String path = request.getServletContext().getRealPath("/upload");
		 File file=new File(path);
		 if(!file.exists()){
			 file.mkdirs();
		 }else{
			 String photoName = photo.getOriginalFilename();
			 File photoFile=new File(file,photoName);
			 FileUtils.writeByteArrayToFile(photoFile, photo.getBytes());
			 System.out.println(file.getAbsolutePath());
			 System.out.println(photoName);
		 }
		 return "index";
	}
参数使用注解@RequestParam("参数名") 并且接收类型为MultipartFile