本章从源码安装开始,如只看负载均衡部分,可以直接从第三节开始
将前端超高并发访问转发至后端多台服务器进行处理,解决单个节点压力过大,造成Web服务响应过慢,严重的情况下导致服务瘫痪,无法正常提供服务的问题。
负载均衡分为四层负载均衡和七层负载均衡。
四层负载均衡
是工作在七层协议的第四层-传输层,主要工作是转发。它在接收到客户端的流量以后通过修改数据包的地址信息(目标地址和端口和源地址)将流量转发到应用服务器。
七层负载均衡
是工作在七层协议的第七层-应用层,主要工作是代理。它首先会与客户端建立一条完整的连接并将应用层的请求流量解析出来,再按照调度算法选择一个应用服务器,并与应用服务器建立另外一条连接将请求发送过去。
一、环境
代理端:
IP:192.168.1.113
后端服务器:
IP:192.168.1.114
IP:192.168.1.115
系统:CentOS Linux release 7.7.1908 (Core)
二、源码安装nginx-1.18.0
1、使用国内阿里base与epel源
base源
[root@localhost ~]# curl -o /etc/yum.repos.d/CentOS-Base.repo https://mirrors.aliyun.com/repo/Centos-7.repo
epel源
[root@localhost ~]# wget -O /etc/yum.repos.d/epel.repo http://mirrors.aliyun.com/repo/epel-7.repo
[root@localhost ~]# yum clean all
[root@localhost ~]# yum makecache
2、安装环境支持
[root@localhost ~]# yum install pcre-devel pcre gcc gcc-c++ openssl openssl-devel zlib-devel -y
3、下载源码包
[root@localhost ~]# cd /usr/src/
[root@localhost src]# wget http://nginx.org/download/nginx-1.18.0.tar.gz
4、编译安装
创建用户组
[root@localhost ~]# useradd -s /sbin/nologin -r www
预编译
[root@localhost nginx-1.18.0]#./configure \
--user=www \
--group=www \
--prefix=/usr/local/nginx \
--with-http_stub_status_module \
--with-http_ssl_module \
--with-http_mp4_module \
--with-http_realip_module \
--with-pcre \
--with-http_gunzip_module \
--with-http_gzip_static_module \
--with-stream
编译
[root@localhost nginx-1.18.0]#make
[root@localhost nginx-1.18.0]#make install
配置快捷启动
[root@localhost nginx-1.18.0]# alias nginx="/usr/local/nginx/sbin/nginx"
启动
[root@localhost nginx-1.18.0]# nginx
5、关闭selinux及配置防火墙
关闭selinux
[root@localhost nginx-1.18.0]# vim /etc/selinux/config
SELINUX=disabled
[root@localhost nginx-1.18.0]# setenforce 0
配置防火墙端口
[root@localhost nginx-1.18.0]# firewall-cmd --zone=public --add-port=80/tcp --permanent   #永久开启80端口
[root@localhost nginx-1.18.0]# firewall-cmd --reload #重新加载防火墙
[root@localhost nginx-1.18.0]# firewall-cmd --zone=public --list-ports #查看防火墙开启了哪些端口
访问192.168.1.113

三、配置负载均衡配置详解-7层
环境
代理端:IP:192.168.1.113
后端服务器:
IP:192.168.1.114
IP:192.168.1.115
基础配置
修改主网页index.html内容
[root@localhost ~]# echo "This is 113_proxy" >/usr/local/nginx/html/index.html   #113代理服务器,后端服务器这里把113_proxy改成114与115
[root@localhost ~]# mkdir /usr/local/nginx/conf/vhost
[root@localhost ~]# vim /usr/local/nginx/conf/nginx.conf
    include     /usr/local/nginx/conf/vhost/*.conf;
    并注释掉server {}块
192.168.1.114配置文件
[root@localhost nginx-1.18.0]# vim /usr/local/nginx/conf/vhost/114.yjy.com.conf
server {
        listen 80;
        server_name 114.yjy.com;
        root html;
        index index.html;
        }
192.168.1.115配置文件
[root@localhost nginx-1.18.0]# vim /usr/local/nginx/conf/vhost/115.yjy.com.conf
server {
        listen 80;
        server_name 115.yjy.com;
        root html;
        index index.html;
        }
1、nginx轮询加权重
代理服务器113配置
[root@localhost ~]# vim /usr/local/nginx/conf/vhost/www.yjy.com.conf
upstream web {
        server 192.168.1.114 weight=4;
        server 192.168.1.115 weight=1;
            }
server {
        listen 80;
        server_name www.yjy.com;
        location /{
                proxy_pass http://web;
        }
}
效果:后端服务器被访问的比例是4:1
[root@localhost ~]# while true;do curl www.yjy.com;sleep 1;done
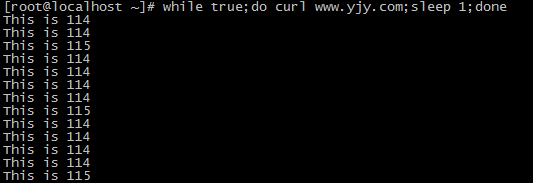
注:当其中一台后端服务器down机时,nginx默认跳转至另一台。
2、nginx -hash选择
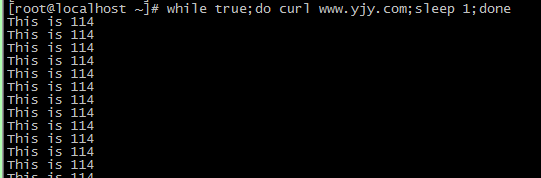
通过客户端ip进行hash,再通过hash值选择后端server,之后会一直访问其中一台,直至这一台down机
[root@localhost ~]# vim /usr/local/nginx/conf/vhost/www.yjy.com.conf
upstream web {
        ip_hash;
        location /{
        server 192.168.1.114 weight=1 max_fails=3 fail_timeout=10s; 3次失败连接,10后重连,重连失败后,将不会再次重连
        server 192.168.1.115 weight=1;
                        }
server {
        listen 80;
        server_name www.yjy.com;

        location /{
                proxy_pass http://web;
                proxy_next_upstream error http_404 http_502;    当出现404或502时,也会跳至另一台
        }
}
效果:通过hash值,单一访问一台
3、URL-hash
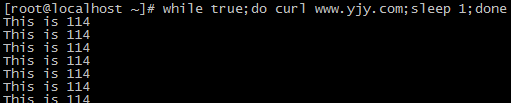
通过请求url进行hash,再通过hash值选择后端server
[root@localhost ~]# vim /usr/local/nginx/conf/vhost/www.yjy.com.conf
server {
upstream web {
        hash $repuest_uri consistent;
        server 192.168.1.114 weight=1 max_fails=3 fail_timeout=10s;
        server 192.168.1.115 weight=1;
                        }
server {
        listen 80;
        server_name www.yjy.com;
        location /{
                proxy_pass http://web;
        }
}
效果

4、备用服务器
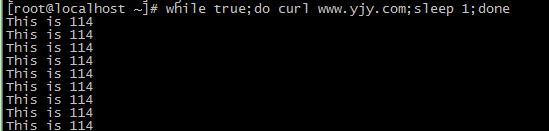
当后端服务器挂掉时,由备用服务器顶上
注:这里不能与hash同用
upstream web {
        server 192.168.1.114 weight=1 max_fails=3 fail_timeout=9s;
        server 192.168.1.115 weight=1 backup;
              }
server {
        listen 80;
        server_name www.yjy.com;

        location /{
                proxy_pass http://web;

        }
}
效果:
四、配置负载均衡配置详解-四层
工作在七层协议的第四层-传输层,主要工作是转发。它在接收到客户端的流量以后通过修改数据包的地址信息(目标地址和端口和源地址)将流量转发到应用服务器,前端服务器主要配置stream{}和upstream
[root@localhost ~]# vim /usr/local/nginx/conf/nginx.conf
events {
    worker_connections  1024;
}
stream {
        upstream web {
                server 192.168.1.114:80 weight=1 max_fails=3 fail_timeout=9s;
                server 192.168.1.115:80 weight=1 backup;
                      }
        server {
                listen 80;
                proxy_pass web;
        }
}
效果:
---------------------end