1. 基本四瓣花型图案
根据四瓣花卉线的参数方程:
t= r*(1+sin(12*θ)/5)*(0.5+sin(4*θ)/2);
x=t*cos(θ));
y=t*sin(θ));
编写如下的HTML文件。
<!DOCTYPE html>
<head>
<title>基本的四瓣花型图案</title>
<script type="text/javascript">
function draw(id)
{
var canvas=document.getElementById(id);
if (canvas==null)
return false;
var context=canvas.getContext('2d');
context.fillStyle="#EEEEFF";
context.fillRect(0,0,320,320);
context.strokeStyle="blue";
context.lineWidth=1;
var dig=Math.PI/64;
context.beginPath();
for (var i=0;i<=128;i++)
{
d=120*(1+Math.sin(12*i*dig)/5);
t=d*(0.5+Math.sin(4*i*dig)/2);
x=(160+t*Math.cos(i*dig));
y=(160+t*Math.sin(i*dig));
if (i==0)
context.moveTo(x,y);
else
context.lineTo(x,y);
}
context.stroke();
}
</script>
</head>
<body onload="draw('myCanvas');">
<canvas id="myCanvas" width="320" height="320"></canvas>
</body>
</html>
在浏览器中打开包含这段HTML代码的html文件,可以看到在画布中绘制出如图1所示的四瓣花卉线图案。
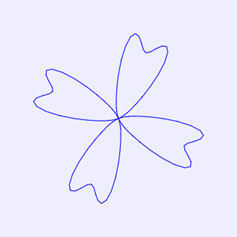
图1 四瓣花卉线图案
2.平铺的100朵四瓣花
用一个二重循环将图1的四瓣花卉绘制10行10列共100朵。编写的HTML文件内容如下。
<!DOCTYPE html>
<head>
<title>平铺的100朵四瓣花</title>
<script type="text/javascript">
function draw(id)
{
var canvas=document.getElementById(id);
if (canvas==null)
return false;
var context=canvas.getContext('2d');
context.fillStyle="#EEEEFF";
context.fillRect(0,0,320,320);
context.strokeStyle="blue";
context.lineWidth=1;
var dig=Math.PI/64;
context.beginPath();
for (px=20;px<320;px+=30)
for (py=20;py<320;py+=30)
{
for (var i=0;i<=128;i++)
{
d=20*(1+Math.sin(12*i*dig)/5);
t=d*(0.5+Math.sin(4*i*dig)/2);
x=px+t*Math.cos(i*dig);
y=py+t*Math.sin(i*dig);
if (i==0)
context.moveTo(x,y);
else
context.lineTo(x,y);
}
context.stroke();
}
}
</script>
</head>
<body onload="draw('myCanvas');">
<canvas id="myCanvas" width="320" height="320"></canvas>
</body>
</html>
在浏览器中打开包含这段HTML代码的html文件,可以看到在画布中绘制出如图2所示的平铺的100朵四瓣花卉图案。
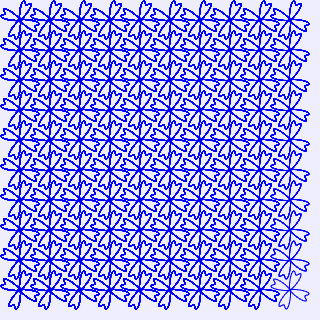
图2 平铺的100朵四瓣花卉图案
3.放大镜看平铺的四瓣花
将图2图形中位于中心点周围100以内的点的坐标进行球面镜反射变换,可以实现放大镜效果。编写的HTML文件内容如下。
<!DOCTYPE html>
<head>
<title>球面镜反射变换</title>
<script type="text/javascript">
function draw(id)
{
var canvas=document.getElementById(id);
if (canvas==null)
return false;
var context=canvas.getContext('2d');
context.fillStyle="#EEEEFF";
context.fillRect(0,0,320,320);
context.strokeStyle="blue";
context.lineWidth=1;
var dig=Math.PI/64;
context.beginPath();
var r=140;
var x0=160;
var y0=160;
for (px=20;px<320;px+=30)
for (py=20;py<320;py+=30)
{
for (var i=0;i<=128;i++)
{
d=20*(1+Math.sin(12*i*dig)/5);
t=d*(0.5+Math.sin(4*i*dig)/2);
x=px+t*Math.cos(i*dig);
y=py+t*Math.sin(i*dig);
l=Math.sqrt((x-x0)*(x-x0)+(y-y0)*(y-y0));
if (l<r)
{ // 圆心为(160,160),半径为140的圆内各点进行球面镜反射变换
s=x-x0<0?-1:1;
if (x-x0==0) x=x0+0.1;
bt=2*Math.atan(l/r);
th=Math.atan((y-y0)/(x-x0));
m=r*Math.sin(bt);
x=s*m*Math.cos(th)+x0;
y=s*m*Math.sin(th)+y0;
}
if (i==0)
context.moveTo(x,y);
else
context.lineTo(x,y);
}
context.stroke();
}
}
</script>
</head>
<body onload="draw('myCanvas');">
<canvas id="myCanvas" width="320" height="320"></canvas>
</body>
</html>
在浏览器中打开包含这段HTML代码的html文件,可以看到在画布中绘制出如图3所示的图形放大镜效果1。
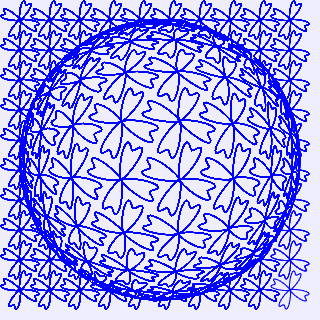
图3 图形放大镜效果1
上面程序中语句var r=140;、var x0=160;和var y0=160;用于设置放大镜的圆心坐标和半径。若修改r=100,x0=100,y0=100,则在画布中绘制出如图4所示的图形放大镜效果2。

图4 图形放大镜效果2