| 文件名称 | 版本号 | 作者 | 版本 | |
|---|---|---|---|---|
| 问道阿里哨兵Sentinel框架_仪表盘_限流 | v0.0.2 | 若布与宫合 | 8416837 | SpringBoot 2.2.2 Spring-cloud-starter-alibaba-sentinel 2.2.1 |
介绍
查看阿里哨兵
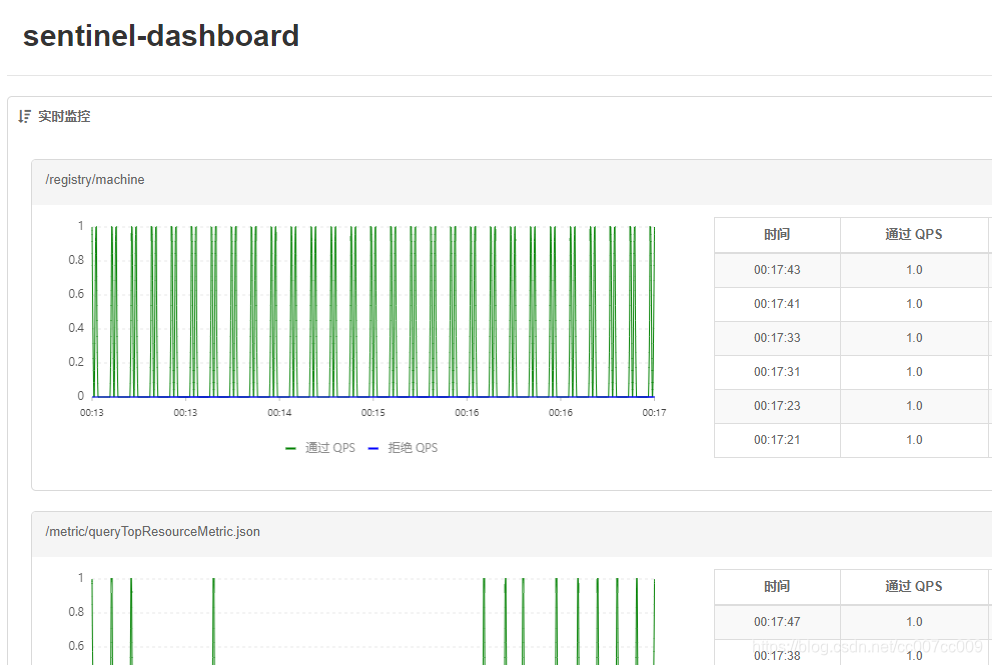
仪表盘 控制台
代码
- yaml
将下述yaml文件写到通信项目里,这个项目负责与sentinel通信,一般是个SpringBoot后端。注意看注释。
spring:
  cloud:
    sentinel:
      # 取消控制台懒加载
      eager: true
      transport:
        # 控制台地址 访问地址
        dashboard: 127.0.0.1:8718
        port: 8719 # 通信端口 默认8719
      # nacos配置持久化
      datasource:
        ds1:
          nacos:
            server-addr: 192.168.59.135:8848
            dataId: sentinel-${spring.application.name}
            groupId: COMPONENT_GROUP
#            groupId: DEFAULT_GROUP
            data-type: json
            rule-type: flow
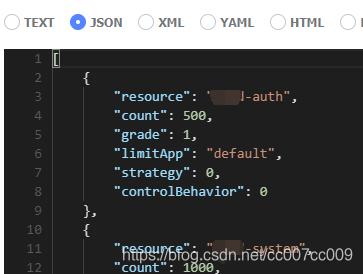
另外,在Nacos新建【数据源】配置,配置的Data Id与上文数据源dataId相同:
abc-auth、abc-system指spring.application.name,请改成你自己项目的。
[
    {
        "resource": "abc-auth",
        "count": 500,
        "grade": 1,
        "limitApp": "default",
        "strategy": 0,
        "controlBehavior": 0
    },
	{
        "resource": "abc-system",
        "count": 1000,
        "grade": 1,
        "limitApp": "default",
        "strategy": 0,
        "controlBehavior": 0
    }
]
		<!--        哨兵-->
        <!-- SpringCloud Ailibaba Sentinel -->
        <dependency>
            <groupId>com.alibaba.cloud</groupId>
            <artifactId>spring-cloud-starter-alibaba-sentinel</artifactId>
        </dependency>

        <!-- SpringCloud Ailibaba Sentinel Gateway -->
        <dependency>
            <groupId>com.alibaba.cloud</groupId>
            <artifactId>spring-cloud-alibaba-sentinel-gateway</artifactId>
        </dependency>

        <!-- Sentinel Datasource Nacos -->
        <dependency>
            <groupId>com.alibaba.csp</groupId>
            <artifactId>sentinel-datasource-nacos</artifactId>
        </dependency>
- 免费下载sentinel-dashboard-1.7.2.jar
或者下载源码:
# 克隆后,使用远程仓库的Dashboard部分
git clone https://gitee.com/mirrors/Sentinel
启动App或者打成Fat Jar包。

- 启动命令 单机试水
# 注意:8718呼应上文的控制台地址
java -Dserver.port=8718 -Dcsp.sentinel.dashboard.server=localhost:8718 -Dproject.name=sentinel-dashboard -jar sentinel-dashboard-1.7.2.jar
启动
- 启动成功,但还未与主机通信。账号密码:
sentinel=sentinel
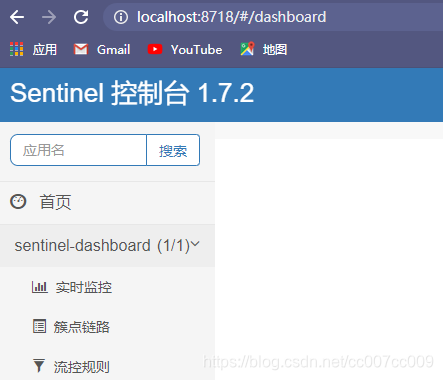
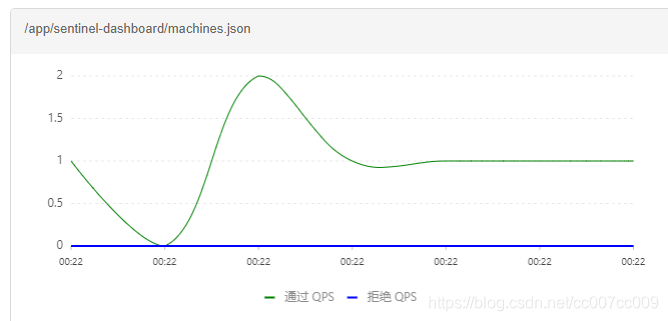
- 启动通信机(被监控的应用须与通信机在同样GROUP),再查看sentinel控制台:
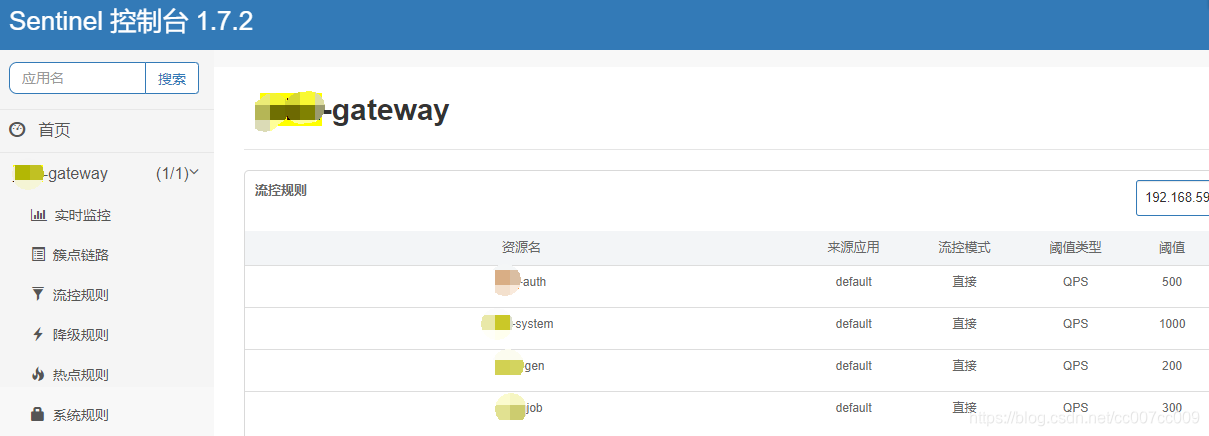
限流 资源模式
基础工作
引入依赖
	<properties>
        <alibaba.cloud.version>2.2.1.RELEASE</alibaba.cloud.version>
	</properties>
		<dependency>
            <groupId>com.alibaba.cloud</groupId>
            <artifactId>spring-cloud-starter-alibaba-sentinel</artifactId>
            <version>${alibaba.cloud.version}</version>
        </dependency>
代码
- 基本配置
package test.config;

import com.alibaba.csp.sentinel.slots.block.RuleConstant;
import com.alibaba.csp.sentinel.slots.block.flow.FlowRule;
import com.alibaba.csp.sentinel.slots.block.flow.FlowRuleManager;
import org.springframework.context.annotation.Configuration;

import javax.annotation.PostConstruct;
import java.util.ArrayList;
import java.util.List;

/**
 * 功能:哨兵限流配置 声明式预定义,到时候应用到资源
 *
 * @author: cc
 * @qq: 8416837
 * @date: 2020/5/5 13:39
 */
@Configuration
public class SentinelConfig {

	@PostConstruct
	public void initFlowRules() {
		List<FlowRule> rules = new ArrayList<>();
		FlowRule rule = new FlowRule();
//		HelloCC: 哨兵限流配置
		rule.setResource("HelloCC");
		rule.setGrade(RuleConstant.FLOW_GRADE_QPS);
		// Set limit QPS to 5.
		rule.setCount(5);
		rules.add(rule);
		FlowRuleManager.loadRules(rules);
	}
}
- 应用到下述接口:
	@GetMapping("/get")
	public ResponseEntity get() {
		while (true) {
			Entry entry = null;
			try {
				log.debug("{} === {}", "[代码主动阻塞100毫秒,保证每秒大约10个'模拟请求']");
				Thread.sleep(100L);
				// HelloCC指上文的限流资源配置
				entry = SphU.entry("HelloCC");
				/*您的业务逻辑 - 开始*/
				log.debug("{} === {}", "[>>业务逻辑中 。。。<<]");
				/*您的业务逻辑 - 结束*/
			} catch (BlockException e1) {
				/*流控逻辑处理 - 开始*/
				log.debug("{} === {}", "[请求已被阻塞!]");
				/*流控逻辑处理 - 结束*/
			} catch (InterruptedException e) {
				e.printStackTrace();
			} finally {
				if (entry != null) {
					entry.exit();
				}
			}
		}
	}
主要就是用entry = SphU.entry("HelloCC");和entry.exit();将业务代码包起来,或者使用【注解】更优雅。
测试
触发限流
调用上文写的get接口
日志
根据日志,可以发现,单机限流成功了。qps设置5,即每秒大概允许5个请求,实际有10个请求,大概5个请求被限流了。但是还要细分析是滑动窗口限流,还是令牌桶限流;限流后的处理是服务降级还是拒绝服务从而直接返回响应提示。
2020-05-05 14:13:13.917 DEBUG 36424 --- [  XNIO-1 task-1] test.rest.TestController                 : [代码主动阻塞100毫秒,保证每秒大约10个'模拟请求'] === {}
2020-05-05 14:13:14.017 DEBUG 36424 --- [  XNIO-1 task-1] test.rest.TestController                 : [>>业务逻辑中 。。。<<] === {}
2020-05-05 14:13:14.017 DEBUG 36424 --- [  XNIO-1 task-1] test.rest.TestController                 : [代码主动阻塞100毫秒,保证每秒大约10个'模拟请求'] === {}
2020-05-05 14:13:14.118 DEBUG 36424 --- [  XNIO-1 task-1] test.rest.TestController                 : [请求已被阻塞!] === {}
2020-05-05 14:13:14.118 DEBUG 36424 --- [  XNIO-1 task-1] test.rest.TestController                 : [代码主动阻塞100毫秒,保证每秒大约10个'模拟请求'] === {}
2020-05-05 14:13:14.218 DEBUG 36424 --- [  XNIO-1 task-1] test.rest.TestController                 : [请求已被阻塞!] === {}
2020-05-05 14:13:14.219 DEBUG 36424 --- [  XNIO-1 task-1] test.rest.TestController                 : [代码主动阻塞100毫秒,保证每秒大约10个'模拟请求'] === {}
2020-05-05 14:13:14.319 DEBUG 36424 --- [  XNIO-1 task-1] test.rest.TestController                 : [请求已被阻塞!] === {}
2020-05-05 14:13:14.319 DEBUG 36424 --- [  XNIO-1 task-1] test.rest.TestController                 : [代码主动阻塞100毫秒,保证每秒大约10个'模拟请求'] === {}
2020-05-05 14:13:14.420 DEBUG 36424 --- [  XNIO-1 task-1] test.rest.TestController                 : [请求已被阻塞!] === {}
2020-05-05 14:13:14.420 DEBUG 36424 --- [  XNIO-1 task-1] test.rest.TestController                 : [代码主动阻塞100毫秒,保证每秒大约10个'模拟请求'] === {}
2020-05-05 14:13:14.521 DEBUG 36424 --- [  XNIO-1 task-1] test.rest.TestController                 : [>>业务逻辑中 。。。<<] === {}
2020-05-05 14:13:14.521 DEBUG 36424 --- [  XNIO-1 task-1] test.rest.TestController                 : [代码主动阻塞100毫秒,保证每秒大约10个'模拟请求'] === {}
2020-05-05 14:13:14.621 DEBUG 36424 --- [  XNIO-1 task-1] test.rest.TestController                 : [>>业务逻辑中 。。。<<] === {}
2020-05-05 14:13:14.621 DEBUG 36424 --- [  XNIO-1 task-1] test.rest.TestController                 : [代码主动阻塞100毫秒,保证每秒大约10个'模拟请求'] === {}
2020-05-05 14:13:14.721 DEBUG 36424 --- [  XNIO-1 task-1] test.rest.TestController                 : [>>业务逻辑中 。。。<<] === {}
2020-05-05 14:13:14.721 DEBUG 36424 --- [  XNIO-1 task-1] test.rest.TestController                 : [代码主动阻塞100毫秒,保证每秒大约10个'模拟请求'] === {}
2020-05-05 14:13:14.822 DEBUG 36424 --- [  XNIO-1 task-1] test.rest.TestController                 : [>>业务逻辑中 。。。<<] === {}
2020-05-05 14:13:14.822 DEBUG 36424 --- [  XNIO-1 task-1] test.rest.TestController                 : [代码主动阻塞100毫秒,保证每秒大约10个'模拟请求'] === {}
2020-05-05 14:13:14.922 DEBUG 36424 --- [  XNIO-1 task-1] test.rest.TestController                 : [请求已被阻塞!] === {}
2020-05-05 14:13:14.922 DEBUG 36424 --- [  XNIO-1 task-1] test.rest.TestController                 : [代码主动阻塞100毫秒,保证每秒大约10个'模拟请求'] === {}
2020-05-05 14:13:15.023 DEBUG 36424 --- [  XNIO-1 task-1] test.rest.TestController                 : [>>业务逻辑中 。。。<<] === {}