Springboot项目是集成了tomcat,所以项目是打成jar包,通过SpringMVC注解的方式去运行,对于界面跳转,SpringBoot支持thymeleaf页面模板技术,也可以向普通java web项目一样使用jsp,下面就两种方式作说明:
1.使用thymeleaf模板技术
首先创建一个springboot web项目,可以在https://start.spring.io/ 上直接创建,添加spring web 组件,生成项目后导入到eclipse中即可,在pom文件中添加thymeleaf依赖:
<dependency>
    <groupId>org.springframework.boot</groupId>
    <artifactId>spring-boot-starter-thymeleaf</artifactId>
</dependency>
然后在application.properties文件中配置
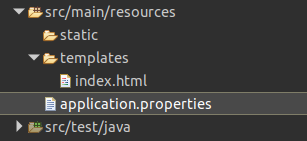
spring.thymeleaf.prefix=classpath:/templates/项目的页面文件放置在/src/main/resources下的templates文件夹下。例如在templates下创建index.html文件:
下面创建Controller层:
@Controller
public class DemoController {

    @RequestMapping("/hello")
    public  String  login(){
        return "index";
    }
    @RequestMapping("closed")
    public String  close(){
        return "This door is closed!";
    }
}
这里一定需要注意的是将类的注解改成@Controller。
完成之后启动springboot程序,访问localhost:8080/hello,即可跳转至index界面。
2.不使用thymeleaf
在上面程序的基础上作修改
pom文件中将thymeleaf依赖注释掉
<!-- <dependency>
	<groupId>org.springframework.boot</groupId>
	<artifactId>spring-boot-starter-thymeleaf</artifactId>
    </dependency> -->
在创建src/main/webapp源文件夹,在下面创建page包,里面存放页面文件,例如创建index.html
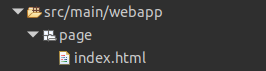
修改application.properties配置文件,因为创建了page包,所以spring.mvc.view.prefix写成了/page/,如果webapp下直接是界面文件,那么spring.mvc.view.prefix直接写成"/".
#spring.thymeleaf.prefix=classpath:/templates/
spring.mvc.view.prefix=/page/
spring.mvc.view.suffix=.html
这样配置完成后,再次启动项目,访问localhost:8080/hello,也可以跳转到index页面,这就是不使用thymeleaf的界面跳转。