1.编辑:vi /etc/oratab
orcl:/u01/app/oracle/product/11.2.0/dbhome_1:Y2.编辑vi /etc/rc.d/rc.local
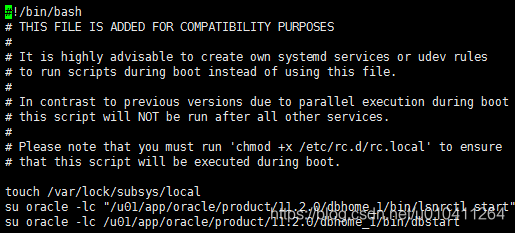
新增以下内容:
su oracle -lc "/u01/app/oracle/product/12.1.0/dbhome_1/bin/lsnrctl start"
su oracle -lc /u01/app/oracle/product/12.1.0/dbhome_1/bin/dbstart
如下图示:
为什么要新增以下内容?以后讲解
3.创建 vi /etc/init.d/oracle
#!/bin/sh
# chkconfig: 345 61 61
# description: Oracle 11g R2 AutoRun Servimces
# /etc/init.d/oracle
#
# Run-level Startup script for the Oracle Instance, Listener, and
# Web Interface
export ORACLE_BASE=/u01/app/oracle    #根据个人情况修改路径
export ORACLE_HOME=$ORACLE_BASE/product/11.2.0/dbhome_1
export ORACLE_SID=orcl          #改成自己的ORACLE_SID
export PATH=$PATH:$ORACLE_HOME/bin
ORA_OWNR="oracle"
# if the executables do not exist -- display error
if [ ! -f $ORACLE_HOME/bin/dbstart -o ! -d $ORACLE_HOME ]
then
echo "Oracle startup: cannot start"
exit 1
fi
# depending on parameter -- startup, shutdown, restart
# of the instance and listener or usage display
case "$1" in
start)
# Oracle listener and instance startup
su $ORA_OWNR -lc $ORACLE_HOME/bin/dbstart
echo "Oracle Start Succesful!OK."
;;
stop)
# Oracle listener and instance shutdown
su $ORA_OWNR -lc $ORACLE_HOME/bin/dbshut
echo "Oracle Stop Succesful!OK."
;;
reload|restart)
$0 stop
$0 start
;;
*)
echo $"Usage: `basename $0` {start|stop|reload|reload}"
exit 1
esac
exit 0
4.将oracle脚本文件赋予执行权限
cd /etc/rc.d/init.d
chmod +x oracle
发现这个 /etc/rc.d/init.d文件夹和==/etc/init.d==这个文件夹竟然是一样的。
5.修改dbstart和dbshut启动关闭脚本
使其启动数据库的同时也自动启动监听器(即启动数据库时启动监听器,停止数据库时停止监听器)
- 编辑 dbstart
vi /u01/app/oracle/product/11.2.0/dbhome_1/bin/dbstart找到下面的代码,在30行:
ORACLE_HOME_LISTNER=$1将其改为
ORACLE_HOME_LISTNER=$ORACLE_HOME- 编辑dbshut
vi /u01/app/oracle/product/11.2.0/dbhome_1/bin/dbshut找到下面的代码,大概在32行:
ORACLE_HOME_LISTNER=$1 将其改为
ORACLE_HOME_LISTNER=$ORACLE_HOME6.将 oracle服务加入到系统服务
chkconfig --level 234 oracle on
chkconfig --add oracle
7.检查是否生效
chkconfig --list oracle