首先先将最后的整个模块结构图展示一下:
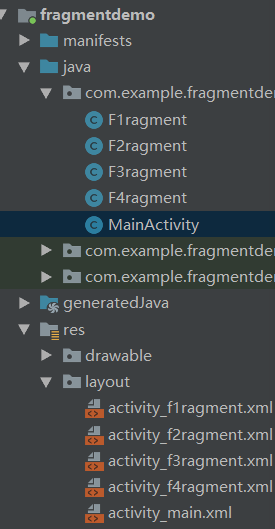
由图片可知建立了四个Fragment用来切换。准备工作首先建立四个Fragment类并继承Fragment(android.support.v4.app.Fragment)视版本而定。再建立四个相对应的Fragment的xml布局。xml布局代码:
<?xml version="1.0" encoding="utf-8"?>
<LinearLayout xmlns:android="http://schemas.android.com/apk/res/android"
    android:layout_width="match_parent"
    android:layout_height="match_parent"
    android:orientation="vertical"
    android:background="#ff0f">

    <Button
        android:id="@+id/btn_f1_say"
        android:layout_width="wrap_content"
        android:layout_height="wrap_content"
        android:text="godv1" />
</LinearLayout>
在Fragment类里面建立关联:
public class F2ragment extends Fragment {
    @Nullable
    @Override
    public View onCreateView(@NonNull LayoutInflater inflater, @Nullable ViewGroup container, @Nullable Bundle savedInstanceState) {
//        return super.onCreateView(inflater, container, savedInstanceState);
        View view = inflater.inflate(R.layout.activity_f2ragment, container, false);
        return view;
    }
}
接下来对main.xml进行布局:
<?xml version="1.0" encoding="utf-8"?>
<LinearLayout xmlns:android="http://schemas.android.com/apk/res/android"
    android:layout_width="match_parent"
    android:layout_height="match_parent"
    android:orientation="vertical">

    <LinearLayout
        android:id="@+id/fg_main_show"
        android:layout_width="match_parent"
        android:layout_height="0dp"
        android:layout_weight="5"
        android:orientation="horizontal"/>

    <LinearLayout
        android:layout_width="match_parent"
        android:layout_height="0dp"
        android:layout_weight="1"
        android:orientation="horizontal">

        <Button
            android:id="@+id/btn_main_godv1"
            android:layout_width="0dp"
            android:layout_height="match_parent"
            android:layout_weight="1"
            android:text="G" />

        <Button
            android:id="@+id/btn_main_godv2"
            android:layout_width="0dp"
            android:layout_height="match_parent"
            android:layout_weight="1"
            android:text="O" />

        <Button
            android:id="@+id/btn_main_godv3"
            android:layout_width="0dp"
            android:layout_height="match_parent"
            android:layout_weight="1"
            android:text="D" />
        <Button
            android:id="@+id/btn_main_godv4"
            android:layout_width="0dp"
            android:layout_height="match_parent"
            android:layout_weight="1"
            android:text="V" />

    </LinearLayout>
    <TextView
        android:id="@+id/tv_mian_text"
        android:layout_width="match_parent"
        android:layout_height="0dp"
        android:layout_weight="1"
        android:textSize="30dp"
        android:gravity="center"/>
</LinearLayout>
main类里面的代码:因为整个Activity开始加载时需要直接对Fragment进行加载,所以Fragment的add方法就在onCreate方法里面直接进行体现。
public class MainActivity extends AppCompatActivity implements View.OnClickListener,F1ragment.F1ragmentInt{
    Button btn_main_godv1;
    Button btn_main_godv2;
    Button btn_main_godv3;
    Button btn_main_godv4;
    TextView tv_mian_text;

    @Override
    protected void onCreate(Bundle savedInstanceState) {
        super.onCreate(savedInstanceState);
        setContentView(R.layout.activity_main);
        loading();
        showFrag();

    }

    private void showFrag() {
        // 创建Fragment对象
        F1ragment f1ragment = new F1ragment();
        // 得到FragmentManager
        FragmentManager manager = getSupportFragmentManager();
        // 得到FragmentTransacation
        FragmentTransaction transaction = manager.beginTransaction();
        // 添加Fragment对象并提交
        transaction.add(R.id.fg_main_show, f1ragment).commit();
    }

    private void loading() {
        btn_main_godv1 = findViewById(R.id.btn_main_godv1);
        btn_main_godv2 = findViewById(R.id.btn_main_godv2);
        btn_main_godv3 = findViewById(R.id.btn_main_godv3);
        btn_main_godv4 = findViewById(R.id.btn_main_godv4);
        tv_mian_text = findViewById(R.id.tv_mian_text);
        btn_main_godv1.setOnClickListener(this);
        btn_main_godv2.setOnClickListener(this);
        btn_main_godv3.setOnClickListener(this);
        btn_main_godv4.setOnClickListener(this);
    }

    @Override
    public void onClick(View view) {
        switch (view.getId()) {
            case R.id.btn_main_godv1:
                F1ragment f1ragment = new F1ragment();
                replace(f1ragment);
//                add();
                break;
            case R.id.btn_main_godv2:
                F2ragment f2ragment = new F2ragment();
                replace(f2ragment);
                break;
            case R.id.btn_main_godv3:
                F3ragment f3ragment = new F3ragment();
                replace(f3ragment);
                break;
            case R.id.btn_main_godv4:
                F4ragment f4ragment = new F4ragment();
                replace(f4ragment);
                break;
        }
    }

    private void replace(Fragment fragment) {
        // 得到FragmentManager
        FragmentManager manager = getSupportFragmentManager();
        // 得到FragmentTransacation
        FragmentTransaction transaction = manager.beginTransaction();

        //将当前操作添加到回退栈, 这样点击back回到上一个状态
        transaction.addToBackStack(null);

        // 替换Fragment对象并提交
        transaction.replace(R.id.fg_main_show, fragment).commit();
    }

    @Override
    public void showDetails(String msg) {
        tv_mian_text.setText(msg);
    }
}
最后的效果图:

可以通过点击按钮切换不同的Fragment。
通信部分:在Fragment实现类中编写接口(这里参照网上资源也进行异常处理)当Fragment控件中Button被点击后调用接口中的方法,会调用具体实现类的方法,在实现类中实现该接口并重写方法。重写的方法中即可进行Acticity界面通信。
public class F1ragment extends Fragment {
    F1ragmentInt f1ragmentInt;
    Button btn_f1_say;

    @Nullable
    @Override
    public View onCreateView(@NonNull LayoutInflater inflater, @Nullable ViewGroup container, @Nullable Bundle savedInstanceState) {
//        return super.onCreateView(inflater, container, savedInstanceState);
        View view = inflater.inflate(R.layout.activity_f1ragment, container, false);
        return view;
    }

    @Override
    public void onViewCreated(@NonNull View view, @Nullable Bundle savedInstanceState) {
        super.onViewCreated(view, savedInstanceState);
        btn_f1_say = view.findViewById(R.id.btn_f1_say);
        btn_f1_say.setOnClickListener(new View.OnClickListener() {
            @Override
            public void onClick(View v) {
                f1ragmentInt.showDetails("我是通过接口传递到MainActivity中");
            }
        });

    }

    public interface F1ragmentInt {
        void showDetails(String msg);

    }

    @Override
    public void onAttach(Context context) {
        super.onAttach(context);
        if (context instanceof F1ragmentInt) {
            f1ragmentInt = (F1ragmentInt) context;
        } else {
            throw new IllegalArgumentException("Activity must implements F1ragmentInt");
        }

    }

}