品优购项目笔记(十一)
SpringBoot
介绍
springboot是spring组织生产的一个后端全栈框架(不包括页面的技术)
作用:提倡零配置,不用整合框架结构,直接编写业务代码,给企业提高人员利用率,提高开发效率。
缺点:springboot只适合小项目使用
小例子(1)
一、创建maven的普通项目
二、引入依赖,并配置spring-boot-starter-parent为父级项目
<parent>
    <groupId>org.springframework.boot</groupId>
    <artifactId>spring-boot-starter-parent</artifactId>
    <version>1.4.0.RELEASE</version>
</parent>

<dependencies>
    <dependency>
        <groupId>org.springframework.boot</groupId>
        <artifactId>spring-boot-starter-web</artifactId>
    </dependency>
</dependencies>
三、创建包结构,并在上层包中创建一个启动类
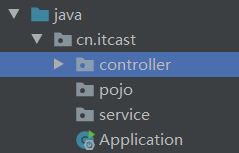
四、启动类编写
package cn.itcast;

import org.springframework.boot.SpringApplication;
import org.springframework.boot.autoconfigure.SpringBootApplication;

/**
 * 启动类
 */
@SpringBootApplication
public class Application {
    public static void main(String[] args) {
        //启动当前项目中的tomcat插件,运行当前项目
        SpringApplication.run(Application.class,args);
    }
}
五、写一个controller进行测试
@RestController
@RequestMapping("/test")
public class TestController {

    @RequestMapping("/hello")
    public String hello(){
        return "helloWorld";
    }
}
六、运行启动类的main方法,即可启动项目


小例子(2)
一、修改tomcat启动端口
在resources目录下,创建application.properties文件,并加上
server.port=8081
二、读取properties文件属性
注入属性Environment,并使用getProperty("属性名")即可
url=123456
@RestController
@RequestMapping("/test")
public class TestController {

    @Autowired
    private Environment env;

    @RequestMapping("/hello")
    public String hello(){
        String url = env.getProperty("url");
        return "helloWorld"+url;
    }
}
三、热部署
修改代码后不用重启tomcat
注意:idea不生效,eclipse生效
<dependency>
    <groupId>org.springframework.boot</groupId>
    <artifactId>spring-boot-devtools</artifactId>
</dependency>
springboot与activemq整合
一、添加坐标
<dependency>
    <groupId>org.springframework.boot</groupId>
    <artifactId>spring-boot-starter-activemq</artifactId>
</dependency>
二、配置avtivemq服务器
在application.properties中配置,如果不配,则使用默认的消息服务器
spring.activemq.broker-url=tcp://192.168.200.128:61616
三、编写消息发送方
@RestController
@RequestMapping("/testJms")
public class TestJms {
    @Autowired
    private JmsMessagingTemplate jmsMessagingTemplate;

    @RequestMapping("/send")
    public void send(String text){
        //发送消息到消息服务器
        //参数1:指定队列名称
        //参数2:发送的内容
        jmsMessagingTemplate.convertAndSend("itcast", text);
    }

}
四、编写消息的接收方
@Component
public class Consumer {

    /**
     * 定义监听器,监听从消息服务器发来的消息
     * destination是指从哪个队列中接收消息
     * @param text
     */
    @JmsListener(destination="itcast")
    public void readMessage(String text){
        System.out.println("接收到消息:"+text);
    }

}
五、发送、接收消息

阿里大于
一、注册阿里云账号,申请模板和签名
二、添加子账户,使用子账户的id和密码
三、发短信流程图

四、添加发短信工具类
@Component
public class SmsUtil {
    //产品名称:云通信短信API产品,开发者无需替换
    static final String product = "Dysmsapi";
    //产品域名,开发者无需替换
    static final String domain = "dysmsapi.aliyuncs.com";

    @Autowired
    private Environment env;

    // TODO 此处需要替换成开发者自己的AK(在阿里云访问控制台寻找)

    /**
     * 发送短信
     * @param mobile 手机号
     * @param template_code 模板号
     * @param sign_name 签名
     * @param param 参数
     * @return
     * @throws ClientException
     */
    public SendSmsResponse sendSms(String mobile,String template_code,String sign_name,String param) throws ClientException {

        String accessKeyId =env.getProperty("accessKeyId");
        String accessKeySecret = env.getProperty("accessKeySecret");

        //可自助调整超时时间
        System.setProperty("sun.net.client.defaultConnectTimeout", "10000");
        System.setProperty("sun.net.client.defaultReadTimeout", "10000");

        //初始化acsClient,暂不支持region化
        IClientProfile profile = DefaultProfile.getProfile("cn-hangzhou", accessKeyId, accessKeySecret);
        DefaultProfile.addEndpoint("cn-hangzhou", "cn-hangzhou", product, domain);
        IAcsClient acsClient = new DefaultAcsClient(profile);

        //组装请求对象-具体描述见控制台-文档部分内容
        SendSmsRequest request = new SendSmsRequest();
        //必填:待发送手机号
        request.setPhoneNumbers(mobile);
        //必填:短信签名-可在短信控制台中找到
        request.setSignName(sign_name);
        //必填:短信模板-可在短信控制台中找到
        request.setTemplateCode(template_code);
        //可选:模板中的变量替换JSON串,如模板内容为"亲爱的${name},您的验证码为${code}"时,此处的值为
        request.setTemplateParam(param);

        //选填-上行短信扩展码(无特殊需求用户请忽略此字段)
        //request.setSmsUpExtendCode("90997");

        //可选:outId为提供给业务方扩展字段,最终在短信回执消息中将此值带回给调用者
        request.setOutId("yourOutId");

        //hint 此处可能会抛出异常,注意catch
        SendSmsResponse sendSmsResponse = acsClient.getAcsResponse(request);

        return sendSmsResponse;
    }

}
五、使用消息服务器监听消息
@Component
public class SmsListener {
    @Autowired
    private SmsUtil smsUtil;

    @JmsListener(destination="sms")
    public void sendSms(Map<String,String> map){
        try {
            SendSmsResponse response = smsUtil.sendSms(
                    map.get("mobile"),
                    map.get("template_code"),
                    map.get("sign_name"),
                    map.get("param")  );
            System.out.println("Code=" + response.getCode());
            System.out.println("Message=" + response.getMessage());
            System.out.println("RequestId=" + response.getRequestId());
            System.out.println("BizId=" + response.getBizId());
        } catch (ClientException e) {
            e.printStackTrace();
        }
    }

}
六、发送消息
分别发送手机号、模板code、签名名称、验证码
@RequestMapping("/sendSms")
    public void sendSms(){
        Map map=new HashMap();
        map.put("mobile", "手机号");
        map.put("template_code", "模板id");
        map.put("sign_name", "签名名称");
        map.put("param", "{\"code\":\"123456\"}");
        jmsMessagingTemplate.convertAndSend("sms",map);

    }