前言
今天要为大家分享的博客知识点呢,是Easyui中的Tree简介,逐步开始Easyui的入门啦!
Tree组件简介
1、Tree组件概念
树(tree)在网页中以树形结构显示分层数据。它向用户提供展开、折叠、拖拽、编辑和异步加载功能。
2、案例
例子:假如我要展示以下这张图片左边的树形结构,该怎么做呢?
解决方案1:
新建一个index.jsp页面,写上以下代码:
<%@ page language="java" contentType="text/html; charset=UTF-8"
    pageEncoding="UTF-8"%>
<!DOCTYPE html PUBLIC "-//W3C//DTD HTML 4.01 Transitional//EN" "http://www.w3.org/TR/html4/loose.dtd">
<html>
<head>
<meta http-equiv="Content-Type" content="text/html; charset=UTF-8">
<!-- 写全局样式 -->
<link rel="stylesheet" type="text/css" href="${pageContext.request.contextPath }/static/js/jquery-easyui-1.5.1/themes/default/easyui.css">
<!-- 定义图标的样式 -->
<link rel="stylesheet" type="text/css" href="${pageContext.request.contextPath }/static/js/jquery-easyui-1.5.1/themes/icon.css">
<!--组件库源文件的js文件  -->
<script type="text/javascript" src="${pageContext.request.contextPath }/static/js/jquery-easyui-1.5.1/jquery.min.js"></script>
<script type="text/javascript" src="${pageContext.request.contextPath }/static/js/jquery-easyui-1.5.1/jquery.easyui.min.js"></script>
<title>登录后的主界面</title>
</head>
<body class="easyui-layout">

		<div data-options="region:'north',border:false"
			style="height:60px;background:#B3DFDA;padding:10px">管理系统</div>
		<div data-options="region:'west',split:true,title:'目录'"
			style="width:150px;padding:10px;">
		<div style="margin:20px 0;"></div>
	<div class="easyui-panel" style="padding:5px">
		<ul class="easyui-tree">
			<li>
				<span>My Documents</span>
				<ul>
					<li data-options="state:'closed'">
						<span>Photos</span>
						<ul>
							<li>
								<span>Friend</span>
							</li>
							<li>
								<span>Wife</span>
							</li>
							<li>
								<span>Company</span>
							</li>
						</ul>
					</li>
					<li>
						<span>Program Files</span>
						<ul>
							<li>Intel</li>
							<li>Java</li>
							<li>Microsoft Office</li>
							<li>Games</li>
						</ul>
					</li>
					<li>index.html</li>
					<li>about.html</li>
					<li>welcome.html</li>
				</ul>
			</li>
		</ul>
	</div>
			</div>
		<div data-options="region:'east',split:true,collapsed:true,title:'右边'"
			style="width:100px;padding:10px;">east region</div>
		<div data-options="region:'south',border:false"
			style="height:50px;background:#A9FACD;padding:10px;">底部版权</div>
		<div data-options="region:'center',title:'内容'"></div>
</body>
</html>
首先找到jquery-easyui-1.5.1这个文件,也就是下面我圈起来的这个:

然后再打开该文件夹,找到该文件夹下的demo文件夹,再找到demo文件夹下的tree文件夹,然后就会看到这些文件:

然后找到basic.html文件,以记事本的形式去复制代码:

然后把下面这一段代码复制过来:
<div style="margin:20px 0;"></div>
  <div class="easyui-panel" style="padding:5px">
	<ul class="easyui-tree">
	 <li>
	   <span>My Documents</span>
		<ul>
		 <li data-options="state:'closed'">
			<span>Photos</span>
			  <ul>
				<li>
				 <span>Friend</span>
				</li>
				<li>
				<span>Wife</span>
				</li>
				<li>
				<span>Company</span>
				</li>
				</ul>
				</li>
				<li>
				<span>Program Files</span>
				<ul>
				<li>Intel</li>
				<li>Java</li>
				<li>Microsoft Office</li>
				<li>Games</li>
				</ul>
				</li>
				<li>index.html</li>
		    	<li>about.html</li>
			    <li>welcome.html</li>
			</ul>
		</li>
   </ul>
</div>
上面这种解决方案呢,是固定写死的,不太灵活,也不方便我们使用!
解决方案2:
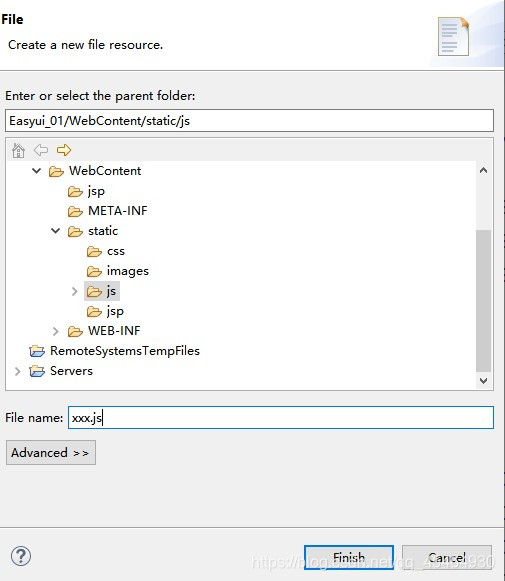
1、同样新建一个jsp页面,然后在js的文件夹下新建一个index.js文件
<%@ page language="java" contentType="text/html; charset=UTF-8"
    pageEncoding="UTF-8"%>
<!DOCTYPE html PUBLIC "-//W3C//DTD HTML 4.01 Transitional//EN" "http://www.w3.org/TR/html4/loose.dtd">
<html>
<head>
<meta http-equiv="Content-Type" content="text/html; charset=UTF-8">
<!-- 写全局样式 -->
<link rel="stylesheet" type="text/css" href="${pageContext.request.contextPath }/static/js/jquery-easyui-1.5.1/themes/default/easyui.css">
<!-- 定义图标的样式 -->
<link rel="stylesheet" type="text/css" href="${pageContext.request.contextPath }/static/js/jquery-easyui-1.5.1/themes/icon.css">
<!--组件库源文件的js文件  -->
<script type="text/javascript" src="${pageContext.request.contextPath }/static/js/jquery-easyui-1.5.1/jquery.min.js"></script>
<script type="text/javascript" src="${pageContext.request.contextPath }/static/js/jquery-easyui-1.5.1/jquery.easyui.min.js"></script>
<script type="text/javascript" src="${pageContext.request.contextPath }/static/js/index.js"></script>

<title>登录后的主界面</title>
</head>
<body class="easyui-layout">

		<div data-options="region:'north',border:false"
			style="height:60px;background:#B3DFDA;padding:10px">管理系统</div>
		<div data-options="region:'west',split:true,title:'目录'"
			style="width:150px;padding:10px;">
        <ul id="tt"></ul>
		</div>
		<div data-options="region:'east',split:true,collapsed:true,title:'右边'"
			style="width:100px;padding:10px;">east region</div>
		<div data-options="region:'south',border:false"
			style="height:50px;background:#A9FACD;padding:10px;">底部版权</div>
		<div data-options="region:'center',title:'内容'"></div>

</body>
</html>
这个jsp页面的代码和上面的代码唯一不同的是:
上面复制的那些代码用了下面这一行来代替:
<ul id="tt"></ul>
2、index.js文件
$('#tt').tree({
    url:'tree_data1.json'
});
写了index.js文件,记得在jsp页面进行引用!
注意index.js文件中的url与引入的tree_data1.json的文件名字保持一致,否则页面效果显示不出来!
3、然后再写一个tree_data1.json的文件,记得放在与新建的jsp页面同一级的位置!
[{
	"id":1,
	"text":"My Documents",
	"children":[{
		"id":11,
		"text":"Photos",
		"state":"closed",
		"children":[{
			"id":111,
			"text":"Friend"
		},{
			"id":112,
			"text":"Wife"
		},{
			"id":113,
			"text":"Company"
		}]
	},{
		"id":12,
		"text":"Program Files",
		"children":[{
			"id":121,
			"text":"Intel"
		},{
			"id":122,
			"text":"Java",
			"attributes":{
				"p1":"Custom Attribute1",
				"p2":"Custom Attribute2"
			}
		},{
			"id":123,
			"text":"Microsoft Office"
		},{
			"id":124,
			"text":"Games",
			"checked":true
		}]
	},{
		"id":13,
		"text":"index.html"
	},{
		"id":14,
		"text":"about.html"
	},{
		"id":15,
		"text":"welcome.html"
	}]
}]
两种解决方案的对比:
一个用的是固定写死的数据,另外一个用的是数据库的数据搭配其他文件进行渲染,虽然两者的解决方案都是一样的,但是更推荐使用第二种解决方案,会比较灵活,也更加方便使用!
3、最终效果

那么问题就来了,怎样让自己提供的json格式的数据和数据库表中的数据保持一致呢?
以下面这张表为例:

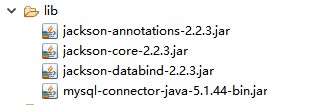
首先,导入在lib中导入以下几个jar包依赖:
然后在src目录下新建一个util、entity、dao 包:
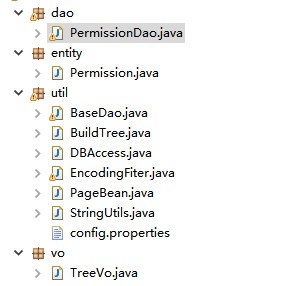
util包中的BaseDao、PageBean之前在分享自定义Mvc的时候,就有粘贴过啦,就不重复粘贴了:
上代码:
Permission实体类:
package com.wangqiuping.entity;

public class Permission {
	private long id;
	private String name;
	private String description;
	private String url;
	private long pid;
	private int ismenu;
	private long displayno;
	public long getId() {
		return id;
	}
	public void setId(long id) {
		this.id = id;
	}
	public String getName() {
		return name;
	}
	public void setName(String name) {
		this.name = name;
	}
	public String getDescription() {
		return description;
	}
	public void setDescription(String description) {
		this.description = description;
	}
	public String getUrl() {
		return url;
	}
	public void setUrl(String url) {
		this.url = url;
	}
	public long getPid() {
		return pid;
	}
	public void setPid(long pid) {
		this.pid = pid;
	}
	public int getIsmenu() {
		return ismenu;
	}
	public void setIsmenu(int ismenu) {
		this.ismenu = ismenu;
	}
	public long getDisplayno() {
		return displayno;
	}
	public void setDisplayno(long displayno) {
		this.displayno = displayno;
	}
	@Override
	public String toString() {
		return "Permission [id=" + id + ", name=" + name + ", description=" + description + ", url=" + url + ", pid="
				+ pid + ", ismenu=" + ismenu + ", displayno=" + displayno + "]";
	}
}
Treevo类:
package com.wangqiuping.vo;

import java.util.ArrayList;
import java.util.List;
import java.util.Map;

public class TreeVo<T> {
	/**
	 * 节点ID
	 */
	private String id;
	/**
	 * 显示节点文本
	 */
	private String text;
	/**
	 * 节点状态,open closed
	 */
	private Map<String, Object> state;
	/**
	 * 节点是否被选中 true false
	 */
	private boolean checked = false;
	/**
	 * 节点属性
	 */
	private Map<String, Object> attributes;

	/**
	 * 节点的子节点
	 */
	private List<TreeVo<T>> children = new ArrayList<TreeVo<T>>();

	/**
	 * 父ID
	 */
	private String parentId;
	/**
	 * 是否有父节点
	 */
	private boolean hasParent = false;
	/**
	 * 是否有子节点
	 */
	private boolean hasChildren = false;

	public String getId() {
		return id;
	}

	public void setId(String id) {
		this.id = id;
	}

	public String getText() {
		return text;
	}

	public void setText(String text) {
		this.text = text;
	}

	public Map<String, Object> getState() {
		return state;
	}

	public void setState(Map<String, Object> state) {
		this.state = state;
	}

	public boolean isChecked() {
		return checked;
	}

	public void setChecked(boolean checked) {
		this.checked = checked;
	}

	public Map<String, Object> getAttributes() {
		return attributes;
	}

	public void setAttributes(Map<String, Object> attributes) {
		this.attributes = attributes;
	}

	public List<TreeVo<T>> getChildren() {
		return children;
	}

	public void setChildren(List<TreeVo<T>> children) {
		this.children = children;
	}

	public boolean isHasParent() {
		return hasParent;
	}

	public void setHasParent(boolean isParent) {
		this.hasParent = isParent;
	}

	public boolean isHasChildren() {
		return hasChildren;
	}

	public void setChildren(boolean isChildren) {
		this.hasChildren = isChildren;
	}

	public String getParentId() {
		return parentId;
	}

	public void setParentId(String parentId) {
		this.parentId = parentId;
	}

	public TreeVo(String id, String text, Map<String, Object> state, boolean checked, Map<String, Object> attributes,
                  List<TreeVo<T>> children, boolean isParent, boolean isChildren, String parentID) {
		super();
		this.id = id;
		this.text = text;
		this.state = state;
		this.checked = checked;
		this.attributes = attributes;
		this.children = children;
		this.hasParent = isParent;
		this.hasChildren = isChildren;
		this.parentId = parentID;
	}

	public TreeVo() {
		super();
	}
}
PermissionDao类:
package com.wangqiuping.dao;

import java.sql.SQLException;
import java.util.ArrayList;
import java.util.HashMap;
import java.util.List;
import java.util.Map;
import com.fasterxml.jackson.core.JsonProcessingException;
import com.fasterxml.jackson.databind.ObjectMapper;
import com.wangqiuping.entity.Permission;
import com.wangqiuping.util.BaseDao;
import com.wangqiuping.util.BuildTree;
import com.wangqiuping.util.PageBean;
import com.wangqiuping.vo.TreeVo;

public class PermissionDao extends BaseDao<Permission> {

	public List<Permission> list(Permission permission,PageBean pageBean) throws InstantiationException, IllegalAccessException, SQLException{
		String sql = "select * from t_easyui_permission";
		return super.executeQuery(sql, Permission.class, pageBean);
	}

	//测试
	public static void main(String[] args) throws InstantiationException, IllegalAccessException, SQLException, JsonProcessingException {
		PermissionDao permissionDao = new PermissionDao();
		List<Permission> list = permissionDao.list(null, null);
		for (Permission p : list) {
			 System.out.println(p);
		}
	}
}
这是在PermissionDao类运行之后的结果:

看到了上一步数据库表中的数据可以展示出来的时候,就可以下一步了:
package com.wangqiuping.dao;

import java.sql.SQLException;
import java.util.ArrayList;
import java.util.HashMap;
import java.util.List;
import java.util.Map;
import com.fasterxml.jackson.core.JsonProcessingException;
import com.fasterxml.jackson.databind.ObjectMapper;
import com.wangqiuping.entity.Permission;
import com.wangqiuping.util.BaseDao;
import com.wangqiuping.util.BuildTree;
import com.wangqiuping.util.PageBean;
import com.wangqiuping.vo.TreeVo;

public class PermissionDao extends BaseDao<Permission> {

	public List<Permission> list(Permission permission,PageBean pageBean) throws InstantiationException, IllegalAccessException, SQLException{
		String sql = "select * from t_easyui_permission";
		return super.executeQuery(sql, Permission.class, pageBean);
	}

	//测试
	public static void main(String[] args) throws InstantiationException, IllegalAccessException, SQLException, JsonProcessingException {
		PermissionDao permissionDao = new PermissionDao();
		List<Permission> list = permissionDao.list(null, null);

//		通过工具类完成指定格式的输出
		List<TreeVo<Permission>> nodes = new ArrayList<TreeVo<Permission>>();
//		Permission的格式是不满足easyui的tree组件的展示的数据格式的
//		将List<Permission>转换成List<TreeVo<T>>
//		实现:将List<Permission>得到的单个Permission转成TreeVo,将TreeVo加入到nodes

		TreeVo treeVo = null;
		for (Permission p : list) {
			treeVo = new TreeVo();
			treeVo.setId(p.getId()+"");
			treeVo.setText(p.getName());
			treeVo.setParentId(p.getPid()+"");
//			Map<String, Object> attributes = new HashMap<String, Object>();
//			attributes.put("self", p);
//			treeVo.setAttributes(attributes);
			nodes.add(treeVo);
		}
		TreeVo<Permission> parent = BuildTree.build(nodes);
		 ObjectMapper om = new ObjectMapper();
		 String jsonstr = om.writeValueAsString(parent);
		 System.out.println(jsonstr);
	}
}
然后通过上面一系列的流转之后,就可以看到下面这个json格式的字符串:


然后下面这些代码就是上面的字符串通过json解析之后的代码:
{
	"id": "000",
	"text": "顶级节点",
	"state": {
		"opened": true
	},
	"checked": true,
	"attributes": null,
	"children": [{
		"id": "1",
		"text": "书籍管理",
		"state": null,
		"checked": false,
		"attributes": null,
		"children": [{
			"id": "2",
			"text": "新增(crud)",
			"state": null,
			"checked": false,
			"attributes": null,
			"children": [],
			"parentId": "1",
			"hasParent": true,
			"hasChildren": false
		}, {
			"id": "3",
			"text": "未上架",
			"state": null,
			"checked": false,
			"attributes": null,
			"children": [],
			"parentId": "1",
			"hasParent": true,
			"hasChildren": false
		}, {
			"id": "4",
			"text": "已上架",
			"state": null,
			"checked": false,
			"attributes": null,
			"children": [],
			"parentId": "1",
			"hasParent": true,
			"hasChildren": false
		}, {
			"id": "5",
			"text": "已下架",
			"state": null,
			"checked": false,
			"attributes": null,
			"children": [],
			"parentId": "1",
			"hasParent": true,
			"hasChildren": false
		}],
		"parentId": "0",
		"hasParent": false,
		"hasChildren": true
	}, {
		"id": "6",
		"text": "订单管理",
		"state": null,
		"checked": false,
		"attributes": null,
		"children": [{
			"id": "7",
			"text": "未发货",
			"state": null,
			"checked": false,
			"attributes": null,
			"children": [],
			"parentId": "6",
			"hasParent": true,
			"hasChildren": false
		}, {
			"id": "8",
			"text": "已发货",
			"state": null,
			"checked": false,
			"attributes": null,
			"children": [],
			"parentId": "6",
			"hasParent": true,
			"hasChildren": false
		}, {
			"id": "9",
			"text": "已签收",
			"state": null,
			"checked": false,
			"attributes": null,
			"children": [],
			"parentId": "6",
			"hasParent": true,
			"hasChildren": false
		}, {
			"id": "14",
			"text": "订单项",
			"state": null,
			"checked": false,
			"attributes": null,
			"children": [],
			"parentId": "6",
			"hasParent": true,
			"hasChildren": false
		}],
		"parentId": "0",
		"hasParent": false,
		"hasChildren": true
	}, {
		"id": "10",
		"text": "订单管理",
		"state": null,
		"checked": false,
		"attributes": null,
		"children": [{
			"id": "11",
			"text": "未发货",
			"state": null,
			"checked": false,
			"attributes": null,
			"children": [],
			"parentId": "10",
			"hasParent": true,
			"hasChildren": false
		}, {
			"id": "12",
			"text": "已发货",
			"state": null,
			"checked": false,
			"attributes": null,
			"children": [],
			"parentId": "10",
			"hasParent": true,
			"hasChildren": false
		}, {
			"id": "13",
			"text": "已签收",
			"state": null,
			"checked": false,
			"attributes": null,
			"children": [],
			"parentId": "10",
			"hasParent": true,
			"hasChildren": false
		}],
		"parentId": "0",
		"hasParent": false,
		"hasChildren": true
	}],
	"parentId": "-1",
	"hasParent": false,
	"hasChildren": true
}
然后看到这个结果的时候就说明已经获取到完整的数据啦!
4、注意要点
1、在新建js文件的时候,一定要记得加上js的后缀名,否则如果新建成其他文件的话,引入的js文件就是无效的!
总结
今天分享Easyui中Tree的知识点就先到这里啦,后续会继续为大家分享Easyui的更多内容,欢迎评论留言交流哦,告辞!
