1.组建扫描
什么是组建扫描?
spring容器启动之后,会扫描的指定的包名,会扫描该包及该包下面的所有子包的类,
如果该类前面有特定的注解(例如:@Component),则spring容器会将该类纳入容器管理
- 在配置文件中添加组件扫描
<context:component-scan base-package="edu.shu.spring.domain"/>
- 添加注解
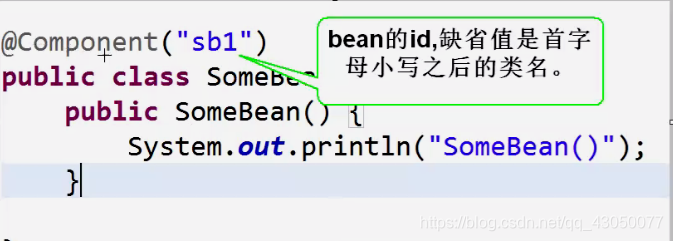
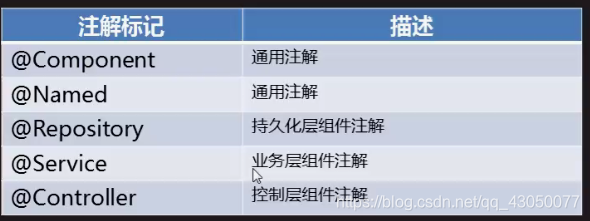
2.基础注解汇总
- spring对每个注解进行了划分,具体的使用如下:
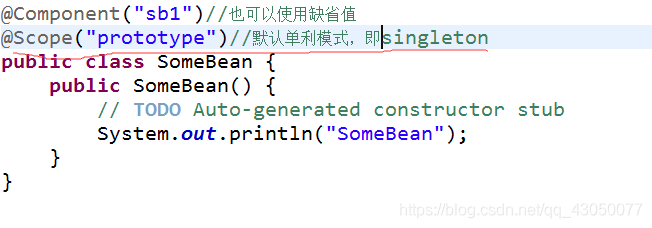
配合 作用域的使用
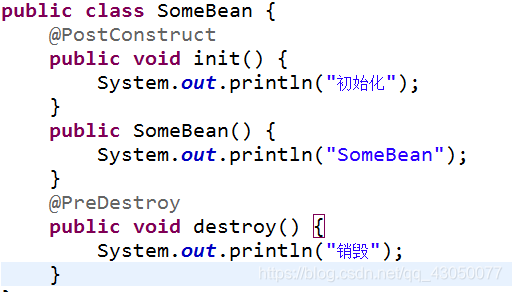
配合生命周期中的注解使用
注意:此时可能出现导包导不进来的情况
解决方法:1.在项目中植入Tomact
2.使用maven
注意:只有在单利模式下,作用域才会生效
配合懒加载使用
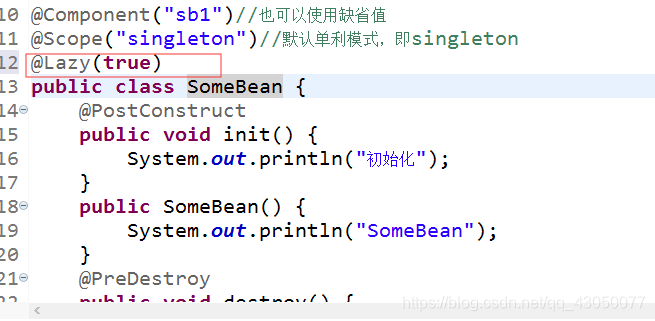
注意:Lazy和SCope一般用的很少,通常默认缺省
依赖注入相关的注解
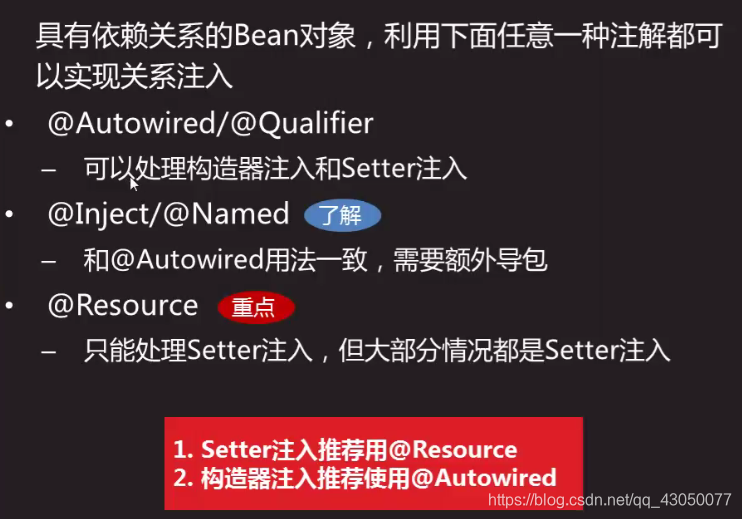
@Autowired 和 @Qualifier
a.该注解支持set方式的注入 和构 造器方式的注入
b.当采用set方式注入时,可以将 @Autowired 添加到set方法的前面,如果不使用 @Qualifier,则容器会使用 byType 的方式来注入,有可能出错,所以建议使用 @Qualifier 注解,明确指出 要注入的bean的id
- set方式注入具体的如下(别忘了配注解扫描器):
import org.springframework.stereotype.Component;

@Component("wt")
public class Waiter {
	public Waiter() {
		System.out.println("Waiter");
	}
}
@Component("resturant")
public class Resturant {
	private Waiter wat;
	public Resturant() {
		System.out.println("Resturant");
	}
	public Resturant(Waiter wat) {
		this.wat = wat;
	}
	public Waiter getwat() {
		return wat;
	}
	@Autowired
	public void setwat(@Qualifier("wt") Waiter wat) {
		System.out.println("setwat");
		this.wat = wat;
	}
	@Override
	public String toString() {
		return "Resturant [waiter=" + wat + "]";
	}

}
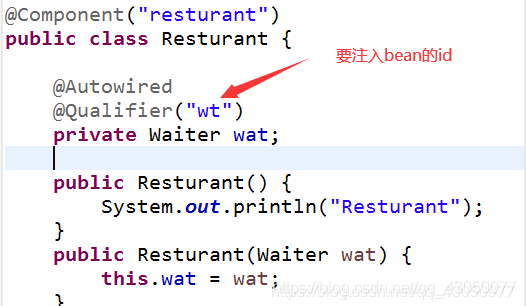
另外也可以直接这样写,即直接将@Autowired 和 @Qualifier(“wt”)添加到成语属性的前面
注意:此时set方法将不再执行,此时实现值得注入是采用的反射(set方法可以去掉)
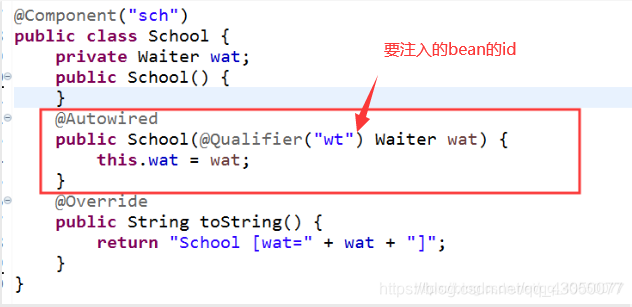
- 构造器的方式注入
只需在set的方式上做一点点的改动就好了,如下:
即只需要将该注解写在构造方法之前就可以了
使用 @Resource 的方式注入(重点)
a.只支持set方式的注入
b.可以将注解添加到set方法的前面,使用name属性指定要注入的bean的id(如果不指定,会按照byType的方式注入)
注:也可以将该注解添加到属性的前面

@Value注解
a.可以使用该注解注入基本类型的值
b.可以使用该注解来使用spring表达式
c.该注解可以添加到属性前面,或者添加到对应的set方法前
@Component("manager")
public class Manager {
	@Value("#{config.pagesize}")
	private String pageSize;

	@Value("老帅了")
	private String name;

	public Manager() {
		System.out.println("Manager()");
	}

	@Override
	public String toString() {
		return "Manager [pageSize=" + pageSize + ",name="+name+"]";
	}
}
<?xml version="1.0" encoding="UTF-8"?>
<beans xmlns="http://www.springframework.org/schema/beans"
	xmlns:xsi="http://www.w3.org/2001/XMLSchema-instance"
	xmlns:context="http://www.springframework.org/schema/context"
	xmlns:jdbc="http://www.springframework.org/schema/jdbc"
	xmlns:jee="http://www.springframework.org/schema/jee"
	xmlns:tx="http://www.springframework.org/schema/tx"
	xmlns:jpa="http://www.springframework.org/schema/data/jpa"
	xmlns:util="http://www.springframework.org/schema/util"
	xmlns:mvc="http://www.springframework.org/schema/mvc"
	xmlns:p="http://www.springframework.org/schema/p"
	xsi:schemaLocation="http://www.springframework.org/schema/jms http://www.springframework.org/schema/jdbc
		http://www.springframework.org/schema/jdbc http://www.springframework.org/schema/jdbc/spring-jdbc-3.2.xsd
		http://www.springframework.org/schema/jee http://www.springframework.org/schema/jee/spring-jee-3.2.xsd
		http://www.springframework.org/schema/mvc http://www.springframework.org/schema/mvc/spring-mvc-3.2.xsd
		http://www.springframework.org/schema/beans http://www.springframework.org/schema/beans/spring-beans-3.2.xsd
		http://www.springframework.org/schema/context http://www.springframework.org/schema/context/spring-context-3.2.xsd
		http://www.springframework.org/schema/lang http://www.springframework.org/schema/lang/spring-lang-4.3.xsd
		http://www.springframework.org/schema/tx http://www.springframework.org/schema/tx/spring-tx-3.2.xsd
		http://www.springframework.org/schema/util http://www.springframework.org/schema/util/spring-util-3.2.xsd">
	<!-- 配置组建扫描 base-package属性:指定要扫描的所有包名,会扫描该包及该包下面的所有子包的类,
		如果该类前面有特定的注解(例如:@Component),则spring容器会将该类纳入容器管理,
		相当于在这儿配置了一个bean -->
	<context:component-scan base-package="cn.tedu.cn"></context:component-scan>
	<!-- 读取.properties文件 -->
	<util:properties id="config" location="classpath:config/config.properties" />
</beans>

3.开发时注解和配置文件的选择
1.注解
- 使用注解简化代码,省区大量的配置文件,但是每次改动内容之后,都需要重启服务器
2.配置文件
- 要书写的内容太多,配置起来太麻烦,导致工程量巨大
3.工作中的选择
- 首先根据公司内部 的要求进行选择
- 对于一次性搞定,达到一劳永逸的结局问题,之后无需经常修改内容的强烈推荐使用注解
- 对于经常需要改动的东西,推荐使用配置文件
注:综合以上三点自行选择