继续上一章的学习,由于之前安装的是ubuntu仓库中的redis-server,导致很多命令都没有,所以专门卸载掉了,从官网重新下载了一个解压版,也推荐大家使用解压版。
集群的配置有两种方式,我们逐一学习
一、使用redis-trib.rb
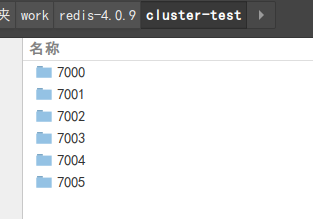
首先在redis目录下新建文件夹cluster-test,由于搭建集群最少需要6个节点,我们在文件夹下创建6个文件夹,以端口命名
给每个文件夹中拷贝redis-server和redis.conf文件

其中的appendonly.aof、dump.rdb、nodes.conf文件是启动后自动生成的
redis.conf文件修改如下
port 7000
pidfile /var/run/redis_7000.pid
appendonly yes
cluster-enabled yes
cluster-config-file nodes.conf
cluster-node-timeout 5000
然后将服务全部启动
启动后可以看到如下输出,代表配置成功
14287:M 06 May 11:36:01.890 * No cluster configuration found, I'm b1f810c73555ca5de844b15eb5e87d2ba304090c接下来创建集群,这里用到了redis-trib.rb文件
执行命令,等待命令执行完成,集群就创建成功了
   ./redis-trib.rb create --replicas 1 127.0.0.1:7000 127.0.0.1:7001 \
127.0.0.1:7002 127.0.0.1:7003 127.0.0.1:7004 127.0.0.1:7005
下面我们测试一下,随便链接到一个master的客户端上,进行的操作会自动定位到对于的实例上面
   redis-cli -c -p 7000
127.0.0.1:7000> set foo bar
-> Redirected to slot [12182] located at 127.0.0.1:7002
OK
127.0.0.1:7002> set hello world
-> Redirected to slot [866] located at 127.0.0.1:7000
OK
127.0.0.1:7000> get foo
-> Redirected to slot [12182] located at 127.0.0.1:7002
"bar"
127.0.0.1:7002> get hello
-> Redirected to slot [866] located at 127.0.0.1:7000
"world"
测试下链接到7001上面,一样执行成功
   redis-cli -c -p 7001
127.0.0.1:7001> set test1 anwser1
-> Redirected to slot [4768] located at 127.0.0.1:7000
OK
127.0.0.1:7000> get test1
"anwser1"
127.0.0.1:7000> set test2 anwser2
-> Redirected to slot [8899] located at 127.0.0.1:7001
OK
127.0.0.1:7001> get test2
"anwser2"
127.0.0.1:7001> get foo
-> Redirected to slot [12182] located at 127.0.0.1:7002
"bar"
127.0.0.1:7002> get hello
-> Redirected to slot [866] located at 127.0.0.1:7000
"world"
二、使用create-cluster脚本创建集群
进入redis文件夹下的utils>create-cluster目录下,执行命令
create-cluster create会自动创建一套集群,默认端口是从30001-30006
同样执行启动和停止操作
create-cluster start
create-cluster stop