一,异步调用
启动类
@SpringBootApplication(scanBasePackages= {"com.boot.*.controller",
		"com.boot.*.service","com.boot.interceptor"})
@EnableAsync  //开启异步调用
public class Application {
	public static void main(String[] args) {
		SpringApplication.run(Application.class, args);
	}
}
controller
@Controller
@RequestMapping("async")
public class AsyncController {
	@Autowired
	private AsyncService asyncService;

	@RequestMapping("testAsync.do")
	@ResponseBody
	public String testAsync() throws Exception {
		long start = System.currentTimeMillis();
		Future<String> taskOne = asyncService.taskOne();
		Future<String> taskTwo = asyncService.taskTwo();
		while(true) {
			if(taskOne.isDone() && taskTwo.isDone()) {
				break;
			}
			Thread.sleep(100);
		}
		long end = System.currentTimeMillis();
		return "异步测试时间:" + (end-start);
	}
}
service
public interface AsyncService {
	public Future<String> taskOne() throws Exception;
	public Future<String> taskTwo() throws Exception;
}
实现类
@Service
public class AsyncServiceImpl implements AsyncService {

	@Override
	@Async //声明异步执行
	public Future<String> taskOne() throws Exception {
		Thread.sleep(1000);
		return new AsyncResult<String>("任务一完成");
	}
	@Override
	@Async
	public Future<String> taskTwo() throws Exception {
		Thread.sleep(1000);
		return new AsyncResult<String>("任务二完成");
	}
}
二,spring boot 官方不推荐使用jsp,因为jsp相对于一些模板引擎,性能比较低,官方推荐使用thymeleaf
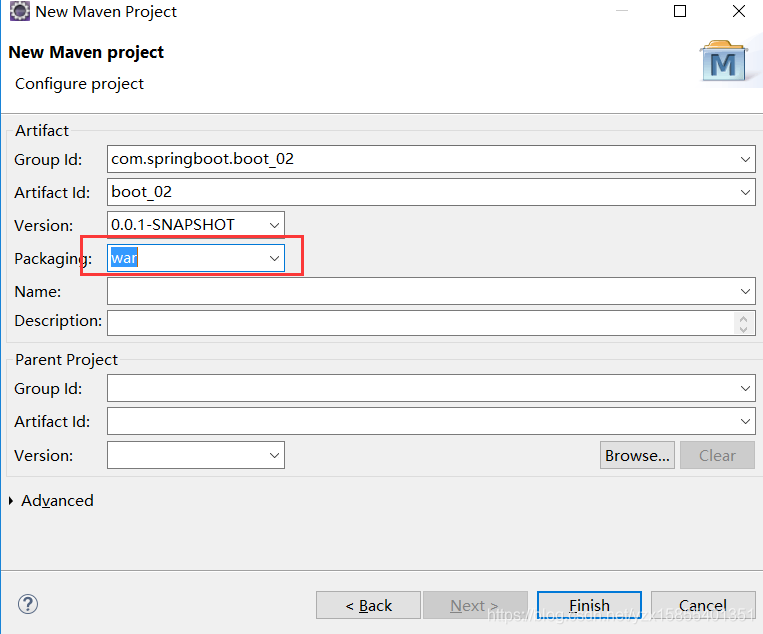
1,创建项目
2.pom.xml
<!-- 父级依赖 -->
	<parent>
		<groupId>org.springframework.boot</groupId>
		<artifactId>spring-boot-starter-parent</artifactId>
		<version>1.5.9.RELEASE</version>
	</parent>

	<!-- 使用springmvc和spring的jar包 -->
	<dependencies>
		<dependency>
			<groupId>org.springframework.boot</groupId>
			<artifactId>spring-boot-starter-web</artifactId>
		</dependency>
		<dependency>
			<groupId>junit</groupId>
			<artifactId>junit</artifactId>
			<scope>test</scope>
		</dependency>
		<!-- 加入以下依赖,代码做了修改,不用重新运行 -->
		<dependency>
			<groupId>org.springframework</groupId>
			<artifactId>springloaded</artifactId>
		</dependency>
		<dependency>
			<groupId>org.springframework.boot</groupId>
			<artifactId>spring-boot-devtools</artifactId>
		</dependency>

		<!-- 整合jsp需要的依赖 -->
		<dependency>
			<groupId>org.springframework.boot</groupId>
			<artifactId>spring-boot-starter-tomcat</artifactId>
		</dependency>
		<dependency>
			<groupId>org.apache.tomcat.embed</groupId>
			<artifactId>tomcat-embed-jasper</artifactId>
		</dependency>
	</dependencies>

	<build>
		<plugins>
			<plugin>
				<groupId>org.apache.maven.plugins</groupId>
				<artifactId>maven-compiler-plugin</artifactId>
				<configuration>
					<source>1.8</source>
					<target>1.8</target>
				</configuration>
			</plugin>
			<!-- maven项目为war包,加入下面插件,无须创建web.xml -->
			<plugin>
				<groupId>org.apache.maven.plugins</groupId>
				<artifactId>maven-war-plugin</artifactId>
				<version>2.3</version>
				<configuration>
					<failOnMissingWebXml>false</failOnMissingWebXml>
				</configuration>
			</plugin>
		</plugins>
	</build>
3,入口
@SpringBootApplication(scanBasePackages= {"com.*.controller","com.*.service"})
public class Application {
	public static void main(String[] args) {
		SpringApplication.run(Application.class, args);
	}
}
4,controller
@Controller
public class PageHomeController {

	@RequestMapping("index.do")
	public  String index(Model model) {
		model.addAttribute("name", "admin");
		return "index";
	}
}
5,application.yml
spring:
  mvc:
    view:
      prefix: /WEB-INF/jsp/
      suffix: .jsp
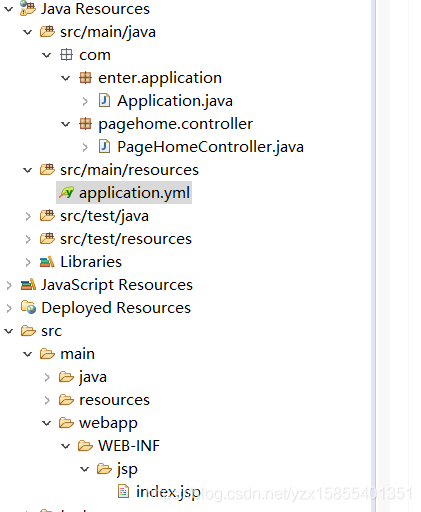
6,项目结构