参考链接:
https://www.linuxidc.com/Linux/2015-08/121322.htm
验证工程:
https://github.com/zenglongGH/stm32f4-CANopen-project
编译工具链下载安装:
The toolchain is here:
https://launchpad.net/gcc-arm-embedded
Find the link for the PPA and add to your system:
https://launchpad.net/~terry.guo/+archive/gcc-arm-embedded

sudo add-apt-repository ppa:terry.guo/gcc-arm-embedded
sudo apt-get update
sudo apt-get install gcc-arm-none-eabi
在Ubuntu上安装ST-LINK烧写软件
Install stlink
sudo apt-get install libusb-1.0
git clone https://github.com/texane/stlink
cd stlink
./autogen.sh
./configure
make
sudo mkdir /opt/stlink
sudo cp st-util st-flash /opt/stlink
sudo cp 49-stlinkv2.rules /etc/udev/rules.d
sudo /etc/init.d/udev restart
Add /opt/stlink to your PATH and test out the st-util utility
st-util -h
编译工程:
Run
make
to build the application code.
Use "make clean" to remove program build files. Use "make realclean" to remove library build files as well.
源码在编译时会出现如下错误:

解决方案是在工程目录下建立bin文件夹:

再执行make即可生成bin文件。
烧写bin到单片机
While your laptop is connected to the board via the debugger run
st-flash write out.bin 0x08000000
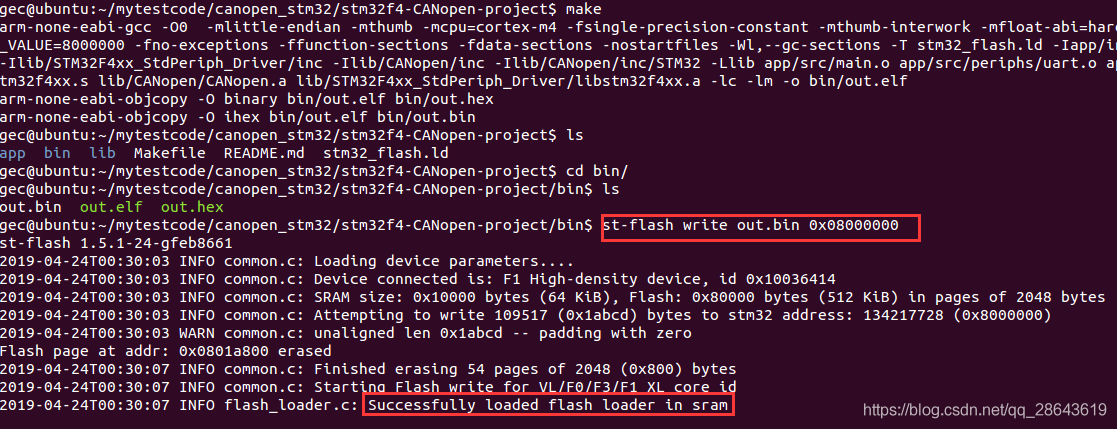
工程是F4的,我的板子是F1的,所以擦除成功,烧写失败。想用Ubuntu开发STM32的童鞋,可以参考这个来进行配置调试,这个也可以进行gdb调试哦。