Java Web安全框架Shiro
相关文章链接:
观前提示:
本文所使用的IDEA版本为ultimate 2019.1,JDK版本为1.8.0_141,Tomcat版本为9.0.12,postman版本为v7.27.1。
1.简介
Apache Shiro是一个强大且易用的Java安全框架,执行身份验证、授权、密码和会话管理。
这里建议大家去shiro官网看一下简介,附上链接:shiro官网
以下为shiro官网的一段引用

Shiro以Shiro开发团队所谓的应用程序安全性的四个基石为目标- Authentication,Authorization,Session Management和Cryptography:
1.Authentication:有时称为“登录”,这是证明用户就是他们所说的身份的行为。
2.Authorization:访问控制的过程,即确定“谁”有权访问“什么”。
3.Session Management:即使在非Web或EJB应用程序中,也可以管理用户特定的会话。
4.Cryptography:使用密码算法保持数据安全,同时仍易于使用。
在不同的应用程序环境中,还具有其他功能来支持和加强这些问题,尤其是:
1.Web Support:Shiro的Web支持API可帮助轻松保护Web应用程序。
2.Caching:缓存是Apache Shiro API的第一层公民,可确保安全操作保持快速有效。
3.Concurrency:Apache Shiro的并发功能支持多线程应用程序。
4.Testing:测试支持可帮助您编写单元测试和集成测试,并确保您的代码将按预期进行保护。
5.“Run As”:一种功能,允许用户采用其他用户的身份(如果允许),有时在管理方案中很有用。
6.“Remember Me”:记住用户在各个会话中的身份,因此他们仅在必要时登录。
2.核心组件
shiro主要有三个核心组件:Subject, SecurityManager 和 Realms

引用shiro官网的介绍
1.Subject:在Subject本质上是当前正在执行的用户的安全特定“视图”。“用户”一词通常表示一个人,一个人Subject可以是一个人,但它也可以表示第三方服务,守护程序帐户,cron作业或类似的东西-基本上是当前与该软件交互的任何东西。
Subject实例都绑定到(并要求)SecurityManager。当您与互动时Subject,这些互动会转化为与主题相关的互动SecurityManager。
2.SecurityManager:SecurityManager是Shiro体系结构的核心,并充当一种“伞”对象,该对象协调其内部安全组件,这些安全组件一起形成对象图。但是,一旦为应用程序配置了SecurityManager及其内部对象图,通常就不理会它,并且应用程序开发人员几乎所有的时间都花在SubjectAPI上。
稍后我们将SecurityManager详细讨论,但是重要的是要意识到,当您与进行交互时Subject,SecurityManager对于任何Subject安全操作而言,确实是幕后工作。这反映在上面的基本流程图中。
3.Realms:Realms充当Shiro与应用程序的安全数据之间的“桥梁”或“连接器”。当真正需要与安全性相关的数据(例如用户帐户)进行交互以执行身份验证(登录)和授权(访问控制)时,Shiro会从一个或多个为应用程序配置的Realms中查找许多此类内容。
从这个意义上说,Realms本质上是特定于安全性的DAO:它封装了数据源的连接详细信息,并根据需要使关联数据可用于Shiro。在配置Shiro时,您必须至少指定一个Realms用于身份验证和/或授权。所述SecurityManager可与多个境界被配置,但至少有一个是必需的。
Shiro提供了开箱即用的Realms,可以连接到许多安全数据源(又名目录),例如LDAP,关系数据库(JDBC),文本配置源(例如INI和属性文件)等。如果默认的Realms无法满足您的需求,那么您可以插入自己的Realm实现以表示自定义数据源。
像其他内部组件一样,Shiro SecurityManager管理着如何使用Realms来获取要表示为Subject实例的安全性和身份数据。
3.详细结构

引用shiro官网的介绍
1.Subject(org.apache.shiro.subject.Subject)
当前与软件进行交互的实体(用户,第三方服务,计划任务等)的特定于安全性的“视图”。
2.SecurityManager(org.apache.shiro.mgt.SecurityManager)
如上所述,这SecurityManager是Shiro体系结构的核心。它主要是一个“伞”对象,用于协调其托管组件以确保它们能够顺利协同工作。它还管理Shiro对每个应用程序用户的视图,因此它知道如何对每个用户执行安全性操作。
3.Authenticator(org.apache.shiro.authc.Authenticator)
负责执行和用户反应,以验证(登录)的尝试的组件。当用户尝试登录时,该逻辑由来执行Authenticator。该Authenticator知道如何与一个或多个协调Realms该商店相关的用户/帐户信息。从这些数据中获得的数据Realms用于验证用户的身份,以确保用户确实是他们所说的真实身份。
4.AuthenticationStrategy(org.apache.shiro.authc.pam.AuthenticationStrategy)
如果Realm配置了多个身份验证策略,则AuthenticationStrategy它将协调领域以确定确定尝试成功或失败的条件(例如,一个领域成功但其他领域失败) ,尝试是否成功?所有领域都必须成功吗?只有第一个领域?)。
5.Authorizer(org.apache.shiro.authz.Authorizer)
负责确定用户在该应用程序的访问控制。它是最终表明是否允许用户做某事的机制。像一样Authenticator,Authorizer还知道如何与多个后端数据源进行协调以访问角色和权限信息。在Authorizer使用该信息来准确确定是否允许用户执行特定的操作。
6.SessionManager(org.apache.shiro.session.mgt.SessionManager)
SessionManager知道如何创建和管理用户Session生命周期,提供在所有环境中的用户强大的会话体验。这是安全框架领域中的一项独特功能-Shiro能够在任何环境中本地管理用户会话,即使没有Web / Servlet或EJB容器也可以。默认情况下,Shiro将使用现有的会话机制(例如Servlet容器)(如果可用),但是如果没有这种机制(例如在独立应用程序或非Web环境中),它将使用其内置的企业会话管理来提供相同的编程经验。的SessionDAO存在允许任何数据源被用来坚持的会议。
7.SessionDAO(org.apache.shiro.session.mgt.eis.SessionDAO)
执行Session持久代(CRUD)操作SessionManager。这允许将任何数据存储插入会话管理基础结构。
8.CacheManager(org.apache.shiro.cache.CacheManager)
创建和管理Cache其他四郎组件使用实例的生命周期。因为Shiro可以访问许多后端数据源以进行身份验证,授权和会话管理,所以缓存一直是框架中的一流架构功能,可以在使用这些数据源时提高性能。可以将任何现代的开源和/或企业缓存产品插入Shiro,以提供快速有效的用户体验。
9.Cryptography (org.apache.shiro.crypto.*)
Cryptography 是企业安全框架的自然补充。Shiro的crypto软件包包含易于使用和理解的加密密码,哈希(又名摘要)和不同编解码器实现的表示形式。该软件包中的所有类都经过精心设计,以使其易于使用和理解。使用Java的本机加密技术支持的任何人都知道,驯服它可能是具有挑战性的动物。Shiro的加密API简化了复杂的Java机制,并使普通人容易使用加密技术。
10.Realm(org.apache.shiro.realm.Realm)
如上所述,Realm充当Shiro与应用程序的安全数据之间的“桥梁”或“连接器”。当真正需要与安全性相关的数据(例如用户帐户)进行交互以执行身份验证(登录)和授权(访问控制)时,Shiro会从一个或多个为应用程序配置的Realm中查找许多此类内容。您可以根据Realms需要配置任意数量(通常每个数据源一个),并且Shiro会根据需要进行协调,以进行身份验证和授权。
4. 例子
4.1 代码
pom.xml引入jar包
<dependency>
    <groupId>org.apache.shiro</groupId>
    <artifactId>shiro-core</artifactId>
    <version>1.5.3</version>
</dependency>

<dependency>
    <groupId>org.apache.shiro</groupId>
    <artifactId>shiro-web</artifactId>
    <version>1.5.3</version>
</dependency>

<dependency>
    <groupId>org.apache.shiro</groupId>
    <artifactId>shiro-spring</artifactId>
    <version>1.5.3</version>
</dependency>

<dependency>
    <groupId>org.apache.shiro</groupId>
    <artifactId>shiro-ehcache</artifactId>
    <version>1.5.3</version>
</dependency>
配置 web.xml
需要添加代码
  <context-param>
    <param-name>contextConfigLocation</param-name>
    <param-value>
     classpath:/spring/applicationContext-shiro.xml
    </param-value>
  </context-param>

  <!-- shiro过滤器 -->
  <filter>
    <filter-name>shiroFilter</filter-name>
    <filter-class>org.springframework.web.filter.DelegatingFilterProxy</filter-class>
    <init-param>
      <param-name>targetFilterLifecycle</param-name>
      <param-value>true</param-value>
    </init-param>
  </filter>
  <filter-mapping>
    <filter-name>shiroFilter</filter-name>
    <url-pattern>/*</url-pattern>
  </filter-mapping>
完整代码如下
<?xml version="1.0" encoding="UTF-8"?>
<web-app xmlns:xsi="http://www.w3.org/2001/XMLSchema-instance" xmlns="http://xmlns.jcp.org/xml/ns/javaee" xsi:schemaLocation="http://xmlns.jcp.org/xml/ns/javaee http://xmlns.jcp.org/xml/ns/javaee/web-app_4_0.xsd" id="WebApp_ID" version="4.0">
  <display-name>MyDemo</display-name>

  <!-- 读取log4j配置文件 -->
  <context-param>
    <param-name>log4jConfigLocation</param-name>
    <param-value>classpath:/config/log4j.xml</param-value>
  </context-param>
  <!-- 添加日志监听器 -->
  <listener>
    <listener-class>org.springframework.web.util.Log4jConfigListener</listener-class>
  </listener>

  <!-- 读取spring配置文件 -->
  <context-param>
    <param-name>contextConfigLocation</param-name>
    <param-value>
      classpath:/spring/applicationContext.xml,
      classpath:/spring/applicationContext-shiro.xml
    </param-value>
  </context-param>
  <!-- 添加spring监听器 -->
  <listener>
    <listener-class>org.springframework.web.context.ContextLoaderListener</listener-class>
  </listener>

  <!-- 配置DispatcherServlet -->
  <servlet>
    <servlet-name>springServlet</servlet-name>
    <servlet-class>org.springframework.web.servlet.DispatcherServlet</servlet-class>
    <!-- servlet配置文件的位置 -->
    <init-param>
      <param-name>contextConfigLocation</param-name>
      <param-value>classpath:/spring/spring-mvc.xml</param-value>
    </init-param>
    <load-on-startup>1</load-on-startup>
  </servlet>
  <!-- 拦截设置 -->
  <servlet-mapping>
    <servlet-name>springServlet</servlet-name>
    <url-pattern>/</url-pattern>
  </servlet-mapping>

  <!-- shiro过滤器 -->
  <filter>
    <filter-name>shiroFilter</filter-name>
    <filter-class>org.springframework.web.filter.DelegatingFilterProxy</filter-class>
    <init-param>
      <param-name>targetFilterLifecycle</param-name>
      <param-value>true</param-value>
    </init-param>
  </filter>
  <filter-mapping>
    <filter-name>shiroFilter</filter-name>
    <url-pattern>/*</url-pattern>
  </filter-mapping>
  <!-- Spring字符集过滤器 -->
  <filter>
    <filter-name>encoding</filter-name>
    <filter-class>org.springframework.web.filter.CharacterEncodingFilter</filter-class>
    <init-param>
      <param-name>encoding</param-name>
      <param-value>UTF-8</param-value>
    </init-param>
  </filter>
  <filter-mapping>
    <filter-name>encoding</filter-name>
    <!--"/*"表示拦截所有的请求 -->
    <url-pattern>/*</url-pattern>
  </filter-mapping>
</web-app>
编写 ** spring-mvc.xml**
需要添加代码
    <!-- 启用shrio授权注解拦截方式 -->
    <aop:config proxy-target-class="true"></aop:config>
    <bean class="org.apache.shiro.spring.security.interceptor.AuthorizationAttributeSourceAdvisor">
        <property name="securityManager" ref="securityManager"/>
    </bean>
完成代码如下
<?xml version="1.0" encoding="UTF-8"?>
<beans xmlns="http://www.springframework.org/schema/beans"
       xmlns:xsi="http://www.w3.org/2001/XMLSchema-instance"
       xmlns:context="http://www.springframework.org/schema/context"
       xmlns:mvc="http://www.springframework.org/schema/mvc"
       xmlns:aop="http://www.springframework.org/schema/aop"
       xsi:schemaLocation="http://www.springframework.org/schema/beans http://www.springframework.org/schema/beans/spring-beans.xsd
        http://www.springframework.org/schema/context http://www.springframework.org/schema/context/spring-context-4.0.xsd
        http://www.springframework.org/schema/mvc http://www.springframework.org/schema/mvc/spring-mvc-4.0.xsd
        http://www.springframework.org/schema/aop http://www.springframework.org/schema/aop/spring-aop-3.2.xsd">

    <!-- 自动扫描且只扫描@Controller -->
    <context:component-scan base-package="com.example" use-default-filters="false">
        <context:include-filter type="annotation" expression="org.springframework.stereotype.Controller"/>
    </context:component-scan>

    <!-- 配置视图解析器 如何把handler 方法返回值解析为实际的物理视图 -->
    <bean class="org.springframework.web.servlet.view.InternalResourceViewResolver">
        <!-- jsp路径前缀 -->
        <property name="prefix" value="/WEB-INF/jsp/"></property>
        <!-- jsp路径后缀 -->
        <property name="suffix" value=".jsp"></property>
    </bean>

    <!-- 注解驱动 -->
    <mvc:annotation-driven/>

    <!-- 拦截器配置,根据自身业务配置,若无需求可不配置 -->
    <mvc:interceptors>
        <mvc:interceptor>
            <mvc:mapping path="/**"/>
            <bean class="com.example.interceptor.RequestMappingInterceptor"></bean>
        </mvc:interceptor>
    </mvc:interceptors>

    <!-- 启用shrio授权注解拦截方式 -->
    <aop:config proxy-target-class="true"></aop:config>
    <bean class="org.apache.shiro.spring.security.interceptor.AuthorizationAttributeSourceAdvisor">
        <property name="securityManager" ref="securityManager"/>
    </bean>

    <!-- 容器默认的DefaultServletHandler处理 所有静态内容与无RequestMapping处理的URL-->
    <mvc:default-servlet-handler/>

    <!-- SpringMVC上传文件时,需要配置MultipartResolver处理器 -->
    <bean id="multipartResolver" class="org.springframework.web.multipart.commons.CommonsMultipartResolver">
        <property name="defaultEncoding" value="UTF-8" />
        <!-- 指定所上传文件的总大小不能超过10485760000B。注意maxUploadSize属性的限制不是针对单个文件,而是所有文件的容量之和 -->
        <property name="maxUploadSize" value="10485760000"></property>
        <property name="maxInMemorySize" value="40960"></property>
    </bean>

    <!-- 静态资源映射 -->
    <mvc:resources mapping="/static/**" location="/WEB-INF/static/"/>
</beans>
编写 applicationContext-shiro.xml
<?xml version="1.1" encoding="UTF-8"?>
<beans xmlns="http://www.springframework.org/schema/beans" xmlns:util="http://www.springframework.org/schema/util"
xmlns:xsi="http://www.w3.org/2001/XMLSchema-instance" xmlns:context="http://www.springframework.org/schema/context"
xsi:schemaLocation="http://www.springframework.org/schema/beans http://www.springframework.org/schema/beans/spring-beans-3.2.xsd
http://www.springframework.org/schema/context http://www.springframework.org/schema/context/spring-context-3.2.xsd
http://www.springframework.org/schema/util http://www.springframework.org/schema/util/spring-util-3.0.xsd"
default-lazy-init="true">
<description>Shiro配置</description>
<!-- Shiro的主要业务层对象基于web的应用程序 -->
<bean id="securityManager" class="org.apache.shiro.web.mgt.DefaultWebSecurityManager">
<property name="realm" ref="securityRealm" />
<!-- <property name="cacheManager" ref="shiroEhcacheManager" />-->
</bean>
<!-- Shiro Filter -->
<bean id="shiroFilter" class="org.apache.shiro.spring.web.ShiroFilterFactoryBean">
<property name="securityManager" ref="securityManager" />
<property name="loginUrl" value="/login" />
<property name="unauthorizedUrl" value="/error/401"/>
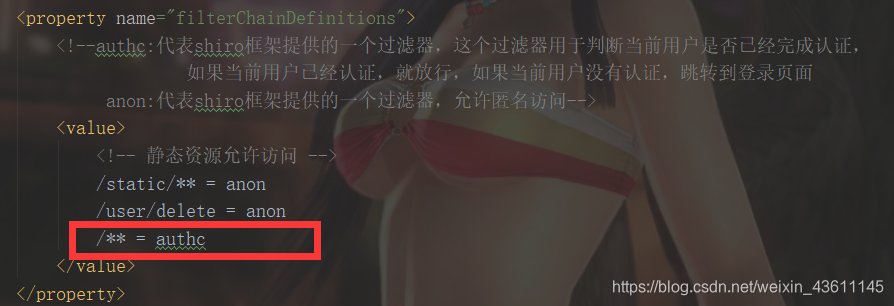
<property name="filterChainDefinitions">
<!--authc:代表shiro框架提供的一个过滤器,这个过滤器用于判断当前用户是否已经完成认证,
如果当前用户已经认证,就放行,如果当前用户没有认证,跳转到登录页面
anon:代表shiro框架提供的一个过滤器,允许匿名访问-->
<value>
<!-- 静态资源允许访问 -->
/static/** = anon
/user/delete = anon
/** = authc
</value>
</property>
</bean>
<!-- 缓存管理器 使用Ehcache实现 -->
<!-- <bean id="shiroEhcacheManager" class="org.apache.shiro.cache.ehcache.EhCacheManager">-->
<!-- <property name="cacheManagerConfigFile" value="classpath:resource/cache/ehcache-shiro.xml"/>-->
<!-- </bean>-->
<!-- Shiro生命周期处理器 -->
<bean id="lifecycleBeanPostProcessor" class="org.apache.shiro.spring.LifecycleBeanPostProcessor"/>
<!-- 会话DAO -->
<bean id="sessionDAO" class="org.apache.shiro.session.mgt.eis.MemorySessionDAO"/>
<!-- 会话管理器 -->
<bean id="sessionManager" class="org.apache.shiro.web.session.mgt.DefaultWebSessionManager">
<property name="sessionDAO" ref="sessionDAO"/>
</bean>
</beans>
编写实现类 SecurityRealm.java
package com.example.security;
import org.apache.shiro.SecurityUtils;
import org.apache.shiro.authc.*;
import org.apache.shiro.authz.AuthorizationInfo;
import org.apache.shiro.authz.SimpleAuthorizationInfo;
import org.apache.shiro.realm.AuthorizingRealm;
import org.apache.shiro.subject.PrincipalCollection;
import org.apache.shiro.subject.Subject;
import org.springframework.stereotype.Component;
import java.util.HashSet;
import java.util.Set;
@Component(value = "securityRealm")
public class SecurityRealm extends AuthorizingRealm {
/**
* 认证回调函数,登录时调用
* @param authcToken
* @return
* @throws AuthenticationException
*/
@Override
protected AuthenticationInfo doGetAuthenticationInfo(AuthenticationToken authcToken) throws AuthenticationException {
UsernamePasswordToken upToken = (UsernamePasswordToken) authcToken;
String account = (String) upToken.getPrincipal();
char[] pwd = upToken.getPassword();
StringBuilder sb = new StringBuilder();
for (char c : pwd) {
sb.append(c);
}
// 1.认证工号
Object principal = account;
// 2.认证密码
Object credentials = sb.toString();
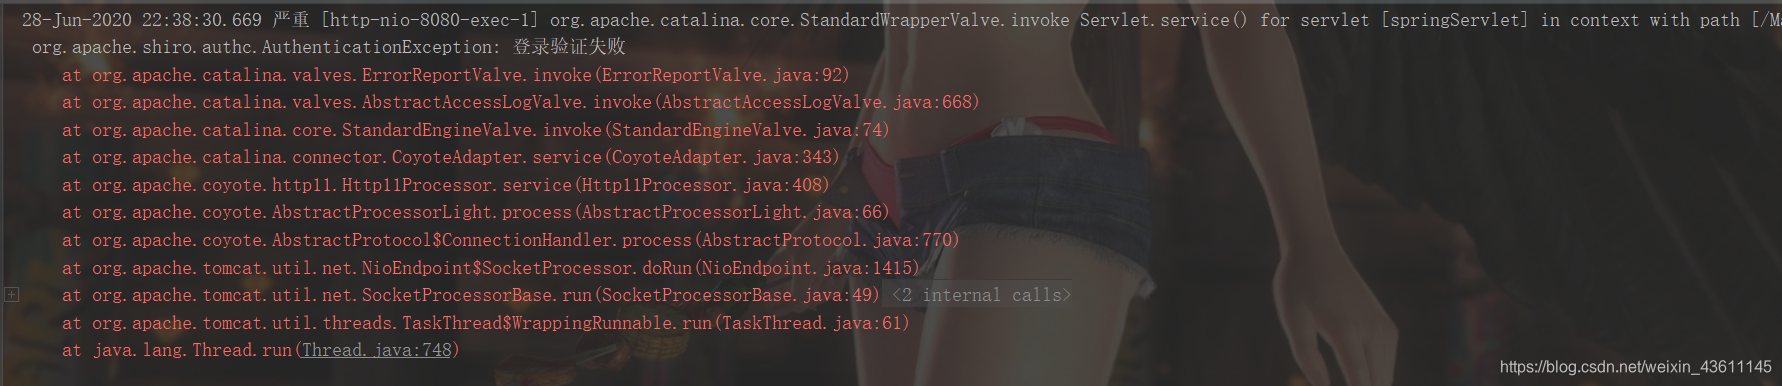
if(!"admin".equals(account) || !"11111111".equals(credentials)){
Subject subject = SecurityUtils.getSubject();
subject.logout();
throw new AuthenticationException("登录验证失败");
}
// 框架进行登录判断
return new SimpleAuthenticationInfo(principal, credentials, getName());
}
/**
* 授权查询回调函数, 进行鉴权但缓存中无用户的授权信息时调用
* @param principals
* @return
*/
@Override
protected AuthorizationInfo doGetAuthorizationInfo(PrincipalCollection principals) {
Subject subject = SecurityUtils.getSubject();
// 查询用户拥有的权限并交给shiro框架
SimpleAuthorizationInfo info = new SimpleAuthorizationInfo();
Set<String> permissionSet = new HashSet<String>();
permissionSet.add("user:search");
//log.info("当前用户拥有的权限包括:{}" ,sns.toString());
info.addStringPermissions(permissionSet);
return info;
}
}
登录 Login.java
package com.example.controller;

import org.apache.shiro.SecurityUtils;
import org.apache.shiro.authc.UsernamePasswordToken;
import org.apache.shiro.subject.Subject;
import org.slf4j.Logger;
import org.slf4j.LoggerFactory;
import org.springframework.stereotype.Controller;
import org.springframework.web.bind.annotation.RequestMapping;

import javax.servlet.http.HttpServletRequest;

/**
 * @Description 登录Controller
 * @author jjy
 * @Creation 2019-02-21
 */
@Controller
public class LoginController {


    private static Logger log = LoggerFactory.getLogger(LoginController.class);

    /**
     * 登录
     * @param request
     * @return
     */
    @RequestMapping(value = "/login")
    public String init(HttpServletRequest request) {


        Subject subject = SecurityUtils.getSubject();
        // 身份验证
        subject.login(new UsernamePasswordToken(request.getParameter("userName"), request.getParameter("password")));

        return "login/login";
    }
}
编写 UserController.java
package com.example.controller;

import org.apache.shiro.authz.annotation.RequiresPermissions;
import org.springframework.stereotype.Controller;
import org.springframework.web.bind.annotation.RequestMapping;
import org.springframework.web.bind.annotation.RequestMethod;
import org.springframework.web.bind.annotation.ResponseBody;

import javax.servlet.http.HttpServletRequest;

@Controller
@RequestMapping("user")
public class UserController {


    @RequestMapping(value = "/search", method = RequestMethod.POST)
    @RequiresPermissions("user:search")
    @ResponseBody
    public String search(HttpServletRequest request) {


        return "success";
    }

    @RequestMapping(value = "/add", method = RequestMethod.POST)
    @RequiresPermissions("user:add")
    @ResponseBody
    public String add(HttpServletRequest request) {


        return "success";
    }

    @RequestMapping(value = "/delete", method = RequestMethod.POST)
    @ResponseBody
    public String delete(HttpServletRequest request) {


        return "success";
    }
}
4.2 测试
测试均使用的postman发送请求
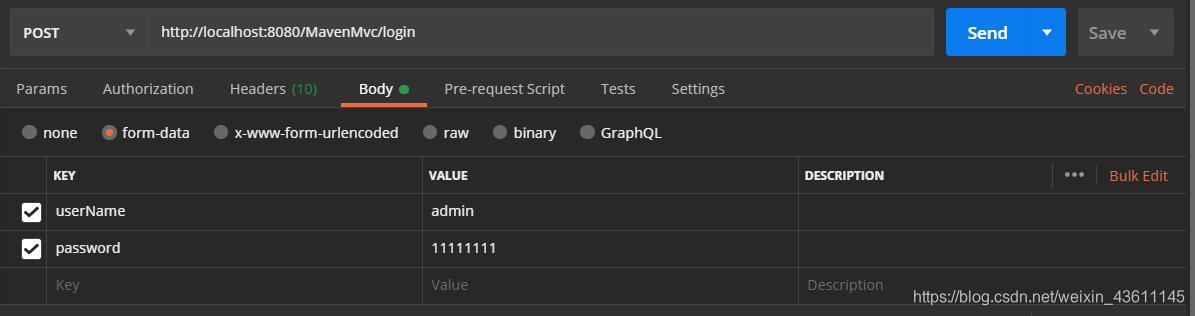
4.2.1 成功登陆
发送请求:http://localhost:8080/MavenMvc/login
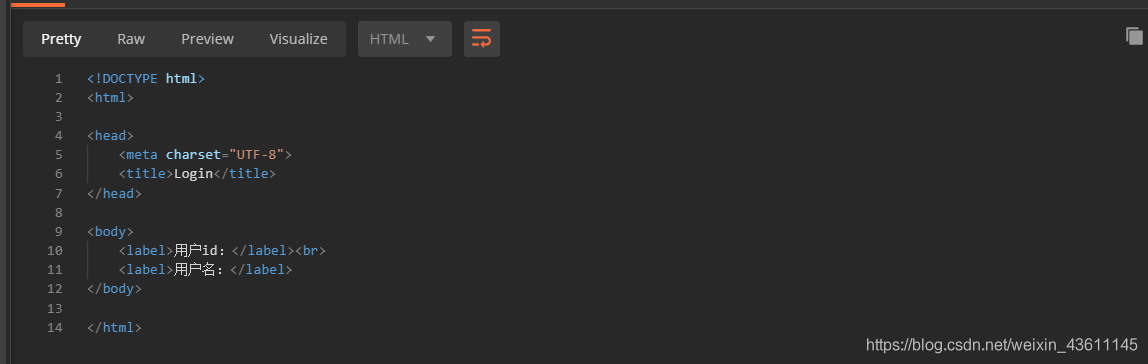
结果成功跳转login.jsp页面为
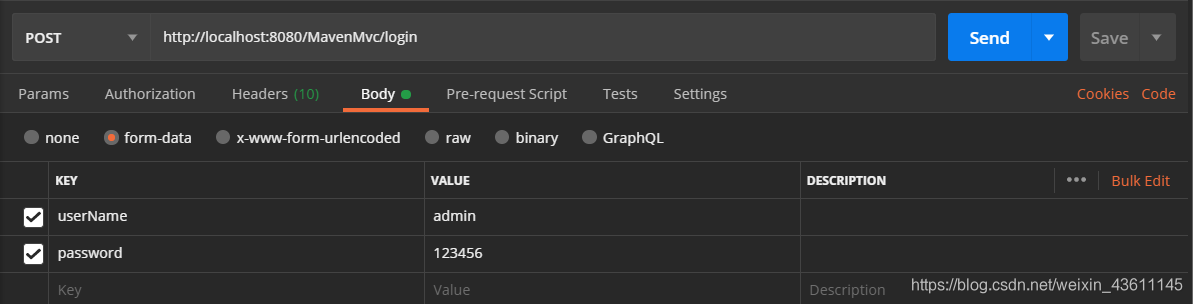
4.2.2 无效用户登陆
发送请求:http://localhost:8080/MavenMvc/login
结果为
4.2.3 测试开放接口
发送请求:http://localhost:8080/MavenMvc/user/delete

结果为

4.2.4 未认证访问接口
发送请求:http://localhost:8080/MavenMvc/user/search

结果为

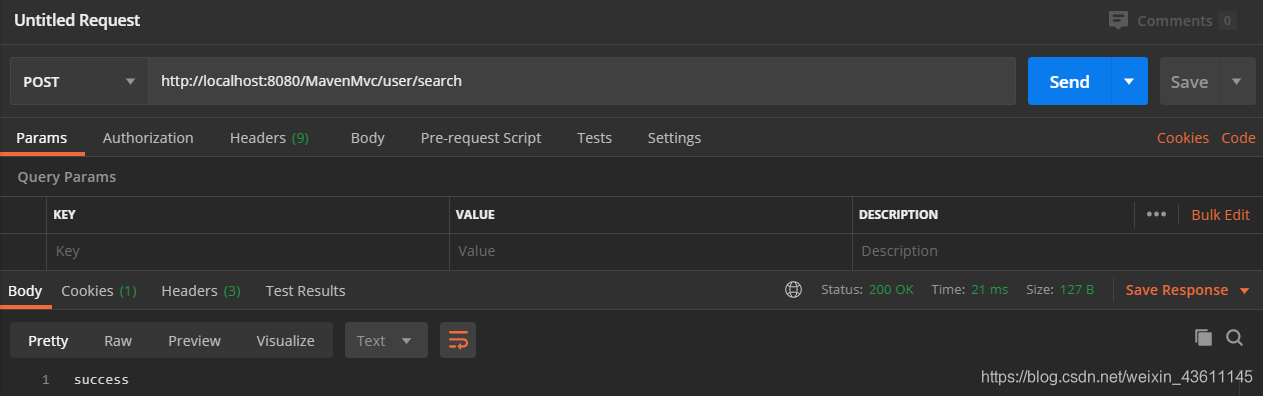
4.2.5 认证成功且拥有访问接口权限
发送请求:http://localhost:8080/MavenMvc/user/search

结果为
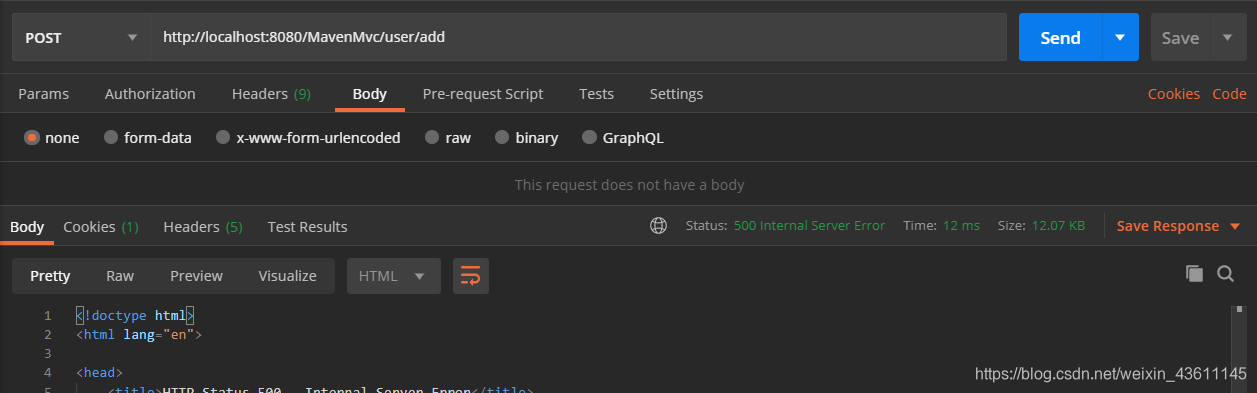
4.2.6 认证成功但没有访问接口权限
发送请求:http://localhost:8080/MavenMvc/user/add

结果为


5.可能遇到的问题(坑)
5.1 没有认证就能访问接口
有可能是因为你没有在 applicationContext-shiro.xml中配置
/** = authc
-
authc:代表shiro框架提供的一个过滤器,这个过滤器用于判断当前用户是否已经完成认证,如果当前用户已经认证,就放行,如果当前用户没有认证,跳转到登录页面
-
anon:代表shiro框架提供的一个过滤器,允许匿名访问
5.2 没有执行doGetAuthorizationInfo进行授权
有可能是你没有在 spring-mvc.xml中配置
    <aop:config proxy-target-class="true"></aop:config>
    <bean class="org.apache.shiro.spring.security.interceptor.AuthorizationAttributeSourceAdvisor">
        <property name="securityManager" ref="securityManager"/>
    </bean>
