springCloud的Eureka理解,以及和zookeeper的差异
Eureka介绍
微服务就是将项目的各个模块拆分为可独立运行、部署、测试的架构设计风格。而在SpringCloud中要实现微服务的架构,就离不开Eureka的使用.Eureka就相当于是zookeeper的一个注册中心,负责管理server和client的连接.
Eureka 是 Netflix 公司开源的一个服务注册与发现的组件 。
• Eureka 包含两个组件:Eureka Server (注册中心) 和 Eureka Client (服务提供者、服务消费者)。
Eureka的基本使用
环境搭建
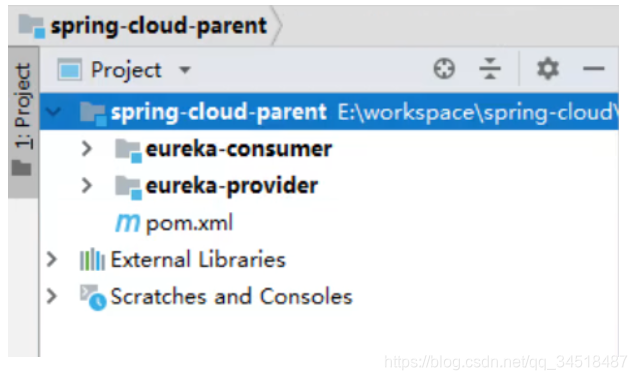
创建父工程
创建module -父工程 Spring-cloud-parent

Spring-cloud-parent pom.xml
   <!--spring boot 环境 -->
    <parent>
        <groupId>org.springframework.boot</groupId>
        <artifactId>spring-boot-starter-parent</artifactId>
        <version>2.1.0.RELEASE</version>
        <relativePath/>
    </parent>


    <properties>
        <project.build.sourceEncoding>UTF-8</project.build.sourceEncoding>
        <project.reporting.outputEncoding>UTF-8</project.reporting.outputEncoding>
        <java.version>1.8</java.version>
    </properties>
创建服务提供者
创建服务提供者eureka-provider

eureka-provider pom.xml
    <dependencies>

        <!--spring boot web-->
        <dependency>
            <groupId>org.springframework.boot</groupId>
            <artifactId>spring-boot-starter-web</artifactId>
        </dependency>

    </dependencies>
GoodsController
package com.itheima.provider.controller;

import com.itheima.provider.domain.Goods;
import com.itheima.provider.service.GoodsService;
import org.springframework.beans.factory.annotation.Autowired;
import org.springframework.web.bind.annotation.GetMapping;
import org.springframework.web.bind.annotation.PathVariable;
import org.springframework.web.bind.annotation.RequestMapping;
import org.springframework.web.bind.annotation.RestController;

/**
 * Goods Controller 服务提供方
 */

@RestController
@RequestMapping("/goods")
public class GoodsController {


    @Autowired
    private GoodsService goodsService;

    @GetMapping("/findOne/{id}")
    public Goods findOne(@PathVariable("id") int id){


        Goods goods = goodsService.findOne(id);

        return goods;
    }
}
GoodsService
package com.itheima.provider.service;

import com.itheima.provider.dao.GoodsDao;
import com.itheima.provider.domain.Goods;
import org.springframework.beans.factory.annotation.Autowired;
import org.springframework.stereotype.Service;

/**
 * Goods 业务层
 */
@Service
public class GoodsService {


    @Autowired
    private GoodsDao goodsDao;


    /**
     * 根据id查询
     * @param id
     * @return
     */
    public Goods findOne(int id){


        return goodsDao.findOne(id);
    }
}
Goods
package com.itheima.provider.domain;

/**
 * 商品实体类
 */
public class Goods {


    private int id;
    private String title;//商品标题
    private double price;//商品价格
    private int count;//商品库存

    public Goods() {


    }

    public Goods(int id, String title, double price, int count) {


        this.id = id;
        this.title = title;
        this.price = price;
        this.count = count;
    }

    public int getId() {


        return id;
    }

    public void setId(int id) {


        this.id = id;
    }

    public String getTitle() {


        return title;
    }

    public void setTitle(String title) {


        this.title = title;
    }

    public double getPrice() {


        return price;
    }

    public void setPrice(double price) {


        this.price = price;
    }

    public int getCount() {


        return count;
    }

    public void setCount(int count) {


        this.count = count;
    }
}
GoodsDao
package com.itheima.provider.dao;

import com.itheima.provider.domain.Goods;
import org.springframework.stereotype.Repository;

import javax.validation.ReportAsSingleViolation;

/**
 * 商品Dao
 */

@Repository
public class GoodsDao {


    public Goods findOne(int id){


        return new Goods(1,"华为手机",3999,10000);
    }
}
ProviderApp
package com.itheima.provider;

import org.springframework.boot.SpringApplication;
import org.springframework.boot.autoconfigure.SpringBootApplication;

/**
 * 启动类
 */

@SpringBootApplication
public class ProviderApp {


    public static void main(String[] args) {


        SpringApplication.run(ProviderApp.class,args);
    }
}
application.yml
server:
  port: 8000
创建服务消费者
- 创建服务消费者eureka-consumer

- 最终目录结构
OrderController
package com.itheima.consumer.controller;


import com.itheima.consumer.domain.Goods;
import org.springframework.beans.factory.annotation.Autowired;
import org.springframework.web.bind.annotation.GetMapping;
import org.springframework.web.bind.annotation.PathVariable;
import org.springframework.web.bind.annotation.RequestMapping;
import org.springframework.web.bind.annotation.RestController;


/**
 * 服务的调用方
 */

@RestController
@RequestMapping("/order")
public class OrderController {


    @GetMapping("/goods/{id}")
    public Goods findGoodsById(@PathVariable("id") int id){


        System.out.println("findGoodsById..."+id);


		//远程调用Goods服务中的findOne接口
        return null;
    }
}
Goods
package com.itheima.consumer.domain;

/**
 * 商品实体类
 */
public class Goods {


    private int id;
    private String title;//商品标题
    private double price;//商品价格
    private int count;//商品库存

    public Goods() {


    }

    public Goods(int id, String title, double price, int count) {


        this.id = id;
        this.title = title;
        this.price = price;
        this.count = count;
    }

    public int getId() {


        return id;
    }

    public void setId(int id) {


        this.id = id;
    }

    public String getTitle() {


        return title;
    }

    public void setTitle(String title) {


        this.title = title;
    }

    public double getPrice() {


        return price;
    }

    public void setPrice(double price) {


        this.price = price;
    }

    public int getCount() {


        return count;
    }

    public void setCount(int count) {


        this.count = count;
    }
}
ConsumerApp
package com.itheima.consumer;

import org.springframework.boot.SpringApplication;
import org.springframework.boot.autoconfigure.SpringBootApplication;

@SpringBootApplication
public class ConsumerApp {


    public static void main(String[] args) {


        SpringApplication.run(ConsumerApp.class,args);
    }
}
application.yml
server:
  port: 9000
RestTemplate远程调用
• Spring提供的一种简单便捷的模板类,用于在 java 代码里访问 restful 服务。
• 其功能与 HttpClient 类似,但是 RestTemplate 实现更优雅,使用更方便。
修改消费方代码
RestTemplateConfig
package com.itheima.consumer.config;


import org.springframework.context.annotation.Bean;
import org.springframework.context.annotation.Configuration;
import org.springframework.web.client.RestTemplate;

@Configuration
public class RestTemplateConfig {


    @Bean
    public RestTemplate restTemplate(){


        return new RestTemplate();
    }
}
OrderController
package com.itheima.consumer.controller;


import com.itheima.consumer.domain.Goods;
import org.springframework.beans.factory.annotation.Autowired;
import org.springframework.web.bind.annotation.GetMapping;
import org.springframework.web.bind.annotation.PathVariable;
import org.springframework.web.bind.annotation.RequestMapping;
import org.springframework.web.bind.annotation.RestController;
import org.springframework.web.client.RestTemplate;

/**
 * 服务的调用方
 */

@RestController
@RequestMapping("/order")
public class OrderController {


    @Autowired
    private RestTemplate restTemplate;

    @GetMapping("/goods/{id}")
    public Goods findGoodsById(@PathVariable("id") int id){


        System.out.println("findGoodsById..."+id);
        /*
            //远程调用Goods服务中的findOne接口
            使用RestTemplate
            1. 定义Bean  restTemplate
            2. 注入Bean
            3. 调用方法
         */

        String url = "http://localhost:8000/goods/findOne/"+id;
        // 3. 调用方法
        Goods goods = restTemplate.getForObject(url, Goods.class);
        return goods;
    }
}
但是此种方式调用路径被写死,必须调用指定路径的工程才能够实现,所以我们要修改成为能够动态获取所有provider路径,这里我们就要使用Eureka.
Eureka Server搭建
① 创建 eureka-server 模块
② 引入 SpringCloud 和 euraka-server 相关依赖
Spring-cloud-parent pom.xml
<properties>
        <project.build.sourceEncoding>UTF-8</project.build.sourceEncoding>
        <project.reporting.outputEncoding>UTF-8</project.reporting.outputEncoding>
        <java.version>1.8</java.version>
        <!--spring cloud 版本-->
        <spring-cloud.version>Greenwich.RELEASE</spring-cloud.version>
    </properties>

    <!--引入Spring Cloud 依赖-->
    <dependencyManagement>
        <dependencies>
            <dependency>
                <groupId>org.springframework.cloud</groupId>
                <artifactId>spring-cloud-dependencies</artifactId>
                <version>${spring-cloud.version}</version>
                <type>pom</type>
                <scope>import</scope>
            </dependency>
        </dependencies>
    </dependencyManagement>
eureka-server pom.xml
 <dependencies>

        <dependency>
            <groupId>org.springframework.boot</groupId>
            <artifactId>spring-boot-starter-web</artifactId>
        </dependency>

        <!-- eureka-server -->
        <dependency>
            <groupId>org.springframework.cloud</groupId>
            <artifactId>spring-cloud-starter-netflix-eureka-server</artifactId>
        </dependency>
    </dependencies>
EurekaApp
package com.itheima.eureka;

import org.springframework.boot.SpringApplication;
import org.springframework.boot.autoconfigure.SpringBootApplication;
import org.springframework.cloud.netflix.eureka.server.EnableEurekaServer;

@SpringBootApplication
// 启用EurekaServer
@EnableEurekaServer
public class EurekaApp {


    public static void main(String[] args) {


        SpringApplication.run(EurekaApp.class,args);
    }
}
③ 完成 Eureka Server 相关配置
application.yml
server:
  port: 8761

# eureka 配置
# eureka 一共有4部分 配置
# 1. dashboard:eureka的web控制台配置
# 2. server:eureka的服务端配置
# 3. client:eureka的客户端配置
# 4. instance:eureka的实例配置


eureka:
  instance:
    hostname: localhost # 主机名
  client:
    service-url:
      defaultZone: http://${

    eureka.instance.hostname}:${

    server.port}/eureka # eureka服务端地址,将来客户端使用该地址和eureka进行通信

    register-with-eureka: false # 是否将自己的路径 注册到eureka上。eureka server 不需要的,eureka provider client 需要
    fetch-registry: false # 是否需要从eureka中抓取路径。eureka server 不需要的,eureka consumer client 需要
④ 启动该模块
Eureka Client
① 引 eureka-client 相关依赖
eureka-provider pom.xml
  <dependencies>

        <!--spring boot web-->
        <dependency>
            <groupId>org.springframework.boot</groupId>
            <artifactId>spring-boot-starter-web</artifactId>
        </dependency>

        <!-- eureka-client -->
        <dependency>
            <groupId>org.springframework.cloud</groupId>
            <artifactId>spring-cloud-starter-netflix-eureka-client</artifactId>
        </dependency>

    </dependencies>
ProviderApp
package com.itheima.provider;

import org.springframework.boot.SpringApplication;
import org.springframework.boot.autoconfigure.SpringBootApplication;
import org.springframework.cloud.netflix.eureka.EnableEurekaClient;

/**
 * 启动类
 */

@EnableEurekaClient //该注解 在新版本中可以省略
@SpringBootApplication
public class ProviderApp {


    public static void main(String[] args) {


        SpringApplication.run(ProviderApp.class,args);
    }
}
② 完成 eureka client 相关配置
application.yml
server:
  port: 8001


eureka:
  instance:
    hostname: localhost # 主机名
  client:
    service-url:
      defaultZone: http://localhost:8761/eureka # eureka服务端地址,将来客户端使用该地址和eureka进行通信
spring:
  application:
    name: eureka-provider # 设置当前应用的名称。将来会在eureka中Application显示。将来需要使用该名称来获取路径
③ 启动 测试
[外链图片转存失败,源站可能有防盗链机制,建议将图片保存下来直接上传(img-eORQjULf-1602151445599)(img/1587525778719.png)]
服务消费者eureka-consumer通过修改,也可以展示在控制台
eureka-consumer在这里仅仅是我们人为定义为消费者,作为一个服务,其实既可以作为服务提供方,同时也可以作为服务消费方
ConsumerApp添加@EnableEurekaClient
package com.itheima.consumer;

import org.springframework.boot.SpringApplication;
import org.springframework.boot.autoconfigure.SpringBootApplication;
import org.springframework.cloud.client.discovery.EnableDiscoveryClient;
import org.springframework.cloud.netflix.eureka.EnableEurekaClient;


@EnableEurekaClient
@SpringBootApplication
public class ConsumerApp {


    public static void main(String[] args) {


        SpringApplication.run(ConsumerApp.class,args);
    }
}
application.yml
server:
  port: 9000


eureka:
  instance:
    hostname: localhost # 主机名
  client:
    service-url:
      defaultZone: http://localhost:8761/eureka # eureka服务端地址,将来客户端使用该地址和eureka进行通信
spring:
  application:
    name: eureka-consumer # 设置当前应用的名称。将来会在eureka中Application显示。将来需要使用该名称来获取路径
动态获取路径
需要导入DiscoveryClient,从而获取到配置文件中的ip和端口号
ConsumerApp添加@EnableDiscoveryClient
package com.itheima.consumer;

import org.springframework.boot.SpringApplication;
import org.springframework.boot.autoconfigure.SpringBootApplication;
import org.springframework.cloud.client.discovery.EnableDiscoveryClient;
import org.springframework.cloud.netflix.eureka.EnableEurekaClient;

@EnableDiscoveryClient // 激活DiscoveryClient
@EnableEurekaClient
@SpringBootApplication
public class ConsumerApp {


    public static void main(String[] args) {


        SpringApplication.run(ConsumerApp.class,args);
    }
}
OrderController修改代码动态获取路径
package com.itheima.consumer.controller;


import com.itheima.consumer.domain.Goods;
import org.springframework.beans.factory.annotation.Autowired;
import org.springframework.cloud.client.ServiceInstance;
import org.springframework.cloud.client.discovery.DiscoveryClient;
import org.springframework.web.bind.annotation.GetMapping;
import org.springframework.web.bind.annotation.PathVariable;
import org.springframework.web.bind.annotation.RequestMapping;
import org.springframework.web.bind.annotation.RestController;
import org.springframework.web.client.RestTemplate;

import java.util.List;

/**
 * 服务的调用方
 */

@RestController
@RequestMapping("/order")
public class OrderController {


    @Autowired
    private RestTemplate restTemplate;

    @Autowired
    private DiscoveryClient discoveryClient;

    @GetMapping("/goods/{id}")
    public Goods findGoodsById(@PathVariable("id") int id){


        System.out.println("findGoodsById..."+id);


        /*
            //远程调用Goods服务中的findOne接口
            使用RestTemplate
            1. 定义Bean  restTemplate
            2. 注入Bean
            3. 调用方法
         */

        /*
            动态从Eureka Server 中获取 provider 的 ip 和端口
             1. 注入 DiscoveryClient 对象.激活
             2. 调用方法
         */

        //演示discoveryClient 使用
       List<ServiceInstance> instances = discoveryClient.getInstances("EUREKA-PROVIDER");

        //判断集合是否有数据
        if(instances == null || instances.size() == 0){


            //集合没有数据
            return null;
        }

        ServiceInstance instance = instances.get(0);
        String host = instance.getHost();//获取ip
        int port = instance.getPort();//获取端口

        System.out.println(host);
        System.out.println(port);

        String url = "http://"+host+":"+port+"/goods/findOne/"+id;
        // 3. 调用方法
        Goods goods = restTemplate.getForObject(url, Goods.class);


        return goods;
    }
}
Eureka和Zookeeper的差异
当我们使用Dubbo时,使用zookeeper作为我们的注册中心,但是为了防止注册中心宕机,我们通常配置多个zk作为集群,来同时对消费者和提供者提供服务.但是zk作为集群,会有一个较大的问题.
zk集群的三种情况进行leader选举:
- zk启动时
- 半数的flower挂掉时,需要重新选举
- leader挂掉时
我们都知道zk集群在面对三种情况时,会重新进行leader选举,而由于zk为了保持一致性和分区容错性,就会牺牲一部分的可用性. 当重新进行leader选举的时候整个zk集群都会停止对外提供服务,直到新的leader选举出来之后才会重新对外提供服务,而通常一次选举在30s-90s之间,而这一段时间都处于宕机状态,这对于一些项目来说是不可容忍的.所以面对这种情况,Eureka的设计时不同于zk.
在Eureka的集群中,我们通常主要保证集群的高可用性和分区容错性,牺牲一部分的一致性.在Eureka集群中没有Leader和Flower之分,每一个节点都是平等的,并且在Eureka中存在自我保护机制(即使这个节点有问题,但是依然处于集群中,不会断掉).从而保证即使一个节点宕机,但是整个集群依然对外提供服务,只是可能会产生部分数据丢失.