author2有几个基本角色:
资源所有者:即用户
客户端:但三方应用
授权服务器:用来验证用户提供的信息是否正确,并返回一个令牌
资源服务器:提供给用户资源的服务器
授权模式:
授权码模式:功能最完整,流程最严谨的。通过客户端服务器与授权授权服务器交互。国内常见的第三方平台登入就是使用这个功能实现的。
简化模式:不需要客户端服务器的参与,直接在浏览器中向授权服务器申请令牌,一般网站是纯静态页面的,可以使用这个方法。
密码模式:直接把用户名和密码告诉客户端,客户端使用这些信息向授权服务器申请令牌。
客户端模式:客户端使用自己的名义而不是用户的名义向服务器一共申请授权。
接下来开始springboot整合author2,github:https://github.com/fengqing11/springboot-oauth2
创建项目,依赖如下:
由于springboot中的oauth协议实在spring security的基础上完成的,因此需要添加spring security依赖。
- 令牌存储在redis缓存服务器上,同时redis具有过期功能,很适合令牌的存储,因此也加入redis的依赖。
<?xml version="1.0" encoding="UTF-8"?>
<project xmlns="http://maven.apache.org/POM/4.0.0" xmlns:xsi="http://www.w3.org/2001/XMLSchema-instance"
xsi:schemaLocation="http://maven.apache.org/POM/4.0.0 http://maven.apache.org/xsd/maven-4.0.0.xsd">
<modelVersion>4.0.0</modelVersion><groupId>org.sang</groupId>
<artifactId>oauth2</artifactId>
<version>0.0.1-SNAPSHOT</version>
<packaging>jar</packaging><name>oauth2</name>
<description>Demo project for Spring Boot</description><parent>
<groupId>org.springframework.boot</groupId>
<artifactId>spring-boot-starter-parent</artifactId>
<version>2.0.3.RELEASE</version>
<relativePath/> <!-- lookup parent from repository -->
</parent><properties>
<project.build.sourceEncoding>UTF-8</project.build.sourceEncoding>
<project.reporting.outputEncoding>UTF-8</project.reporting.outputEncoding>
<java.version>1.8</java.version>
</properties><dependencies>
<dependency>
<groupId>org.springframework.boot</groupId>
<artifactId>spring-boot-starter-security</artifactId>
</dependency>
<dependency>
<groupId>org.springframework.boot</groupId>
<artifactId>spring-boot-starter-web</artifactId>
</dependency>
<dependency>
<groupId>org.springframework.boot</groupId>
<artifactId>spring-boot-starter-data-redis</artifactId>
</dependency>
<dependency>
<groupId>org.springframework.security.oauth</groupId>
<artifactId>spring-security-oauth2</artifactId>
<version>2.3.3.RELEASE</version>
</dependency>
</dependencies>
<build>
<plugins>
<plugin>
<groupId>org.springframework.boot</groupId>
<artifactId>spring-boot-maven-plugin</artifactId>
</plugin>
</plugins>
</build>
</project>
配置文件:
spring.redis.database=0
spring.redis.host=localhost
spring.redis.port=6379
spring.redis.password=
spring.redis.jedis.pool.max-active=8
spring.redis.jedis.pool.max-idle=8
spring.redis.jedis.pool.max-wait=-1ms
spring.redis.jedis.pool.min-idle=0
配置授权服务器:
授权服务器和资源服务器可一是同一台服务器,也可以是不同的服务器,这里使用同一服务器。
通过不同的配置分开授权服务器和资源服务器。
继承AuthorizationServerConfigurerAdapter,完成对授权服务器的配置,然后通过@EnableAuthorizationServer注解开启授权服务器。
AuthenticationManager对象用来支持password授权模式。
RedisConnectionFactory对象用来完成redis的缓存。
UserDetailsService对象为刷新token提供支持。
authorizedGrantTypes()方法配置授权模式为password和refresh_token,其实在标准的oauth中并没有refresh_token,但是spring security中将其归为一种,因此要实现access_token的刷新就需要refresh_token。
accessTokenValiditySeconds()方法设置token的过期时间。
resourceIds()方法配置资源id。
secret()方法配置了加密后的密码,明文是123。
package org.sang.oauth2;
import org.springframework.beans.factory.annotation.Autowired;
import org.springframework.context.annotation.Bean;
import org.springframework.context.annotation.Configuration;
import org.springframework.data.redis.connection.RedisConnectionFactory;
import org.springframework.security.authentication.AuthenticationManager;
import org.springframework.security.core.userdetails.UserDetailsService;
import org.springframework.security.crypto.bcrypt.BCryptPasswordEncoder;
import org.springframework.security.crypto.password.PasswordEncoder;
import org.springframework.security.oauth2.config.annotation.configurers.ClientDetailsServiceConfigurer;
import org.springframework.security.oauth2.config.annotation.web.configuration.AuthorizationServerConfigurerAdapter;
import org.springframework.security.oauth2.config.annotation.web.configuration.EnableAuthorizationServer;
import org.springframework.security.oauth2.config.annotation.web.configurers.AuthorizationServerEndpointsConfigurer;
import org.springframework.security.oauth2.config.annotation.web.configurers.AuthorizationServerSecurityConfigurer;
import org.springframework.security.oauth2.provider.token.store.redis.RedisTokenStore;@Configuration
@EnableAuthorizationServer
public class AuthorizationServerConfig
extends AuthorizationServerConfigurerAdapter {
@Autowired
AuthenticationManager authenticationManager;
@Autowired
RedisConnectionFactory redisConnectionFactory;
@Autowired
UserDetailsService userDetailsService;
@Bean
PasswordEncoder passwordEncoder() {
return new BCryptPasswordEncoder();
}
@Override
public void configure(ClientDetailsServiceConfigurer clients)
throws Exception {
clients.inMemory()
.withClient("password")
.authorizedGrantTypes("password", "refresh_token")
.accessTokenValiditySeconds(1800)
.resourceIds("rid")
.scopes("all")
.secret("$2a$10$RMuFXGQ5AtH4wOvkUqyvuecpqUSeoxZYqilXzbz50dceRsga.WYiq");
}
@Override
public void configure(AuthorizationServerEndpointsConfigurer endpoints)
throws Exception {
endpoints.tokenStore(new RedisTokenStore(redisConnectionFactory))
.authenticationManager(authenticationManager)
.userDetailsService(userDetailsService);
}
@Override
public void configure(AuthorizationServerSecurityConfigurer security)
throws Exception {
security.allowFormAuthenticationForClients();
}
}
配置资源服务器:
继承ResourceServerConfigurerAdapter,并使用@EnableResourceServer注解开启资源服务器配置。
resourceId()来配置资源id,这里的id和授权服务器的资源id要一样。
stateless()方法设置这些资源仅基于令牌验证。
package org.sang.oauth2;
import org.springframework.context.annotation.Configuration;
import org.springframework.security.config.annotation.web.builders.HttpSecurity;
import org.springframework.security.oauth2.config.annotation.web.configuration.EnableResourceServer;
import org.springframework.security.oauth2.config.annotation.web.configuration.ResourceServerConfigurerAdapter;
import org.springframework.security.oauth2.config.annotation.web.configurers.ResourceServerSecurityConfigurer;@Configuration
@EnableResourceServer
public class ResourceServerConfig
extends ResourceServerConfigurerAdapter {
@Override
public void configure(ResourceServerSecurityConfigurer resources)
throws Exception {
resources.resourceId("rid").stateless(true);
}
@Override
public void configure(HttpSecurity http) throws Exception {
http.authorizeRequests()
.antMatchers("/admin/**").hasRole("admin")
.antMatchers("/user/**").hasRole("user")
.anyRequest().authenticated();
}
}
配置security:
和前面的没什么区别,唯一不同的是多了两个@bean注解,这两个Bean将注入到授权服务器中使用。
这里的HttpSecurity配置主要配置/oauth/**的URL,这一类的请求直接放行。在资源服务器配置中也有一个HttpSecurity,这里的HttpSecurity优先于资源服务器的HttpSecurity。
package org.sang.oauth2;
import org.springframework.context.annotation.Bean;
import org.springframework.context.annotation.Configuration;
import org.springframework.security.authentication.AuthenticationManager;
import org.springframework.security.config.annotation.authentication.builders.AuthenticationManagerBuilder;
import org.springframework.security.config.annotation.web.builders.HttpSecurity;
import org.springframework.security.config.annotation.web.configuration.WebSecurityConfigurerAdapter;
import org.springframework.security.core.userdetails.UserDetailsService;
import org.springframework.security.crypto.bcrypt.BCryptPasswordEncoder;
import org.springframework.security.crypto.password.PasswordEncoder;@Configuration
public class WebSecurityConfig extends WebSecurityConfigurerAdapter {
@Bean
@Override
public AuthenticationManager authenticationManagerBean() throws Exception {
return super.authenticationManagerBean();
}
@Bean
@Override
protected UserDetailsService userDetailsService() {
return super.userDetailsService();
}
@Override
protected void configure(AuthenticationManagerBuilder auth) throws Exception {
auth.inMemoryAuthentication()
.withUser("admin")
.password("$2a$10$RMuFXGQ5AtH4wOvkUqyvuecpqUSeoxZYqilXzbz50dceRsga.WYiq")
.roles("admin")
.and()
.withUser("sang")
.password("$2a$10$RMuFXGQ5AtH4wOvkUqyvuecpqUSeoxZYqilXzbz50dceRsga.WYiq")
.roles("user");
}
@Override
protected void configure(HttpSecurity http) throws Exception {
http.antMatcher("/oauth/**").authorizeRequests()
.antMatchers("/oauth/**").permitAll()
.and().csrf().disable();
}
}
启动服务器后POST访问:http://127.0.0.1:8080/oauth/token?username=sang&password=123&grant_type=password&client_id=password&scope=all&client_secret=123
这里参数都写在url上,方便,但也是一个post请求:
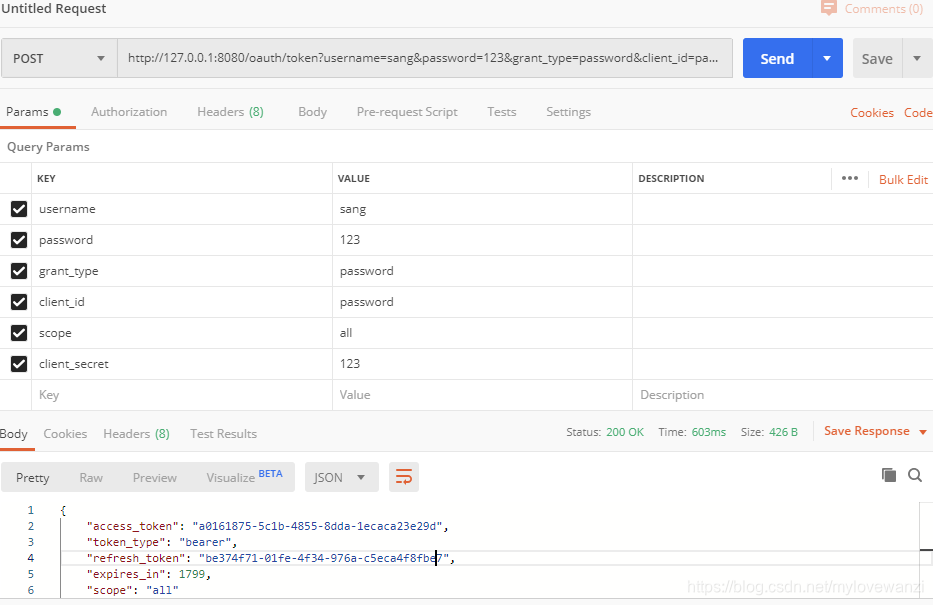
请求参数:
username:用户名
password:面膜
grant_type:授权模式
client_id:资源服务器id
scope:资源服务器范围
client_secret:资源服务器密码
返回内容:
access_token:就是令牌
token_type:
refresh_token:用来刷新令牌,可以用来刷新token,前提是token未过期
expires_in:token的过期时间,再次刷新可以发现实现不在是1800,他减少了
scope:
刷新token访问:http://127.0.0.1:8080/oauth/token?grant_type=refresh_token&refresh_token=6bef362e-a96c-48af-a310-b9623d7c69a4&client_id=password&client_secret=123

访问资源,访问:http://localhost:8080/user/hello?access_token=cf4d8b09-3fe1-4671-91f3-4703d6e75c91
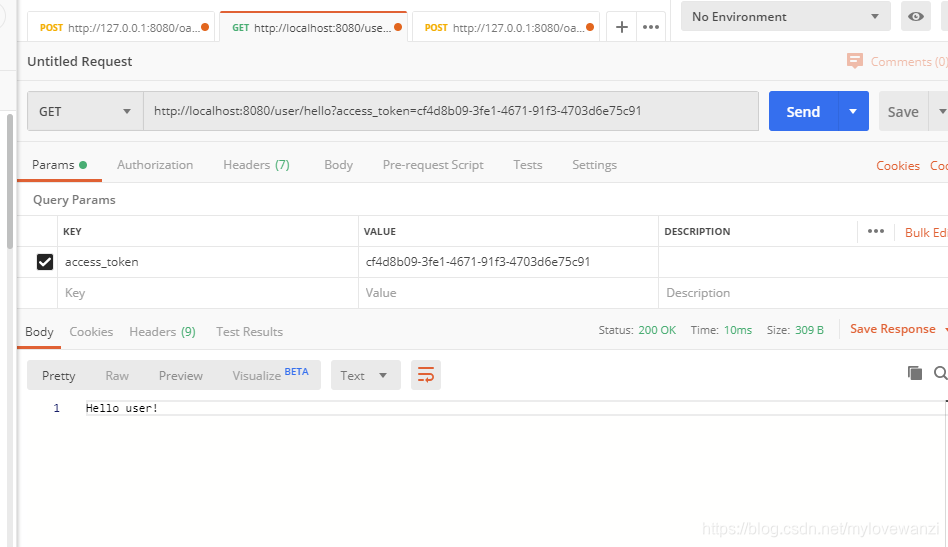
至此,一个password模式的oauth认证体系就搭建好了。
-end-