通过设置图层的Theme属性为SharpMap.Rendering.Thematics.CustomTheme,即可实现使用渐变色填充多边形。
具体代码如下:
SharpMap.Rendering.Thematics.CustomTheme customTheme = new SharpMap.Rendering.Thematics.CustomTheme(GetCustomStyle);
 SharpMap.Styles.VectorStyle defaultstyle = new SharpMap.Styles.VectorStyle();
 defaultstyle.Fill = Brushes.Blue;
 customTheme.DefaultStyle = defaultstyle;
 lyr(需要设置样式的图层).Theme = customTheme;`
其中GetCustomStyle为自定义方法:
 private SharpMap.Styles.VectorStyle GetCustomStyle(FeatureDataRow row)
 {
 SharpMap.Styles.VectorStyle style = new SharpMap.Styles.VectorStyle();
 Color color1 = 需要绘制的起始颜色;
 Color color2 = 需要绘制的终止颜色;
 //通过两点来确定渐变色的方向,此处需要将地理坐标转换为屏幕坐标赋给LinearGradientBrush.
 PointF point1= mapBox1.Map.WorldToImage(row.Geometry.Coordinates[0]);
 PointF point2 = mapBox1.Map.WorldToImage(row.Geometry.Coordinates[2]);
 System.Drawing.Drawing2D.LinearGradientBrush lineGrBrush = new System.Drawing.Drawing2D.LinearGradientBrush(point1, point2, color1, color2);
 style.Fill = lineGrBrush;
 style.Line.Color = Color.White;
 return style;
 }
这样通过传入的row的属性来设置起止颜色,控件在绘制图层时,会依次遍历每个要素,根据要素的不同属性来绘制多边形。
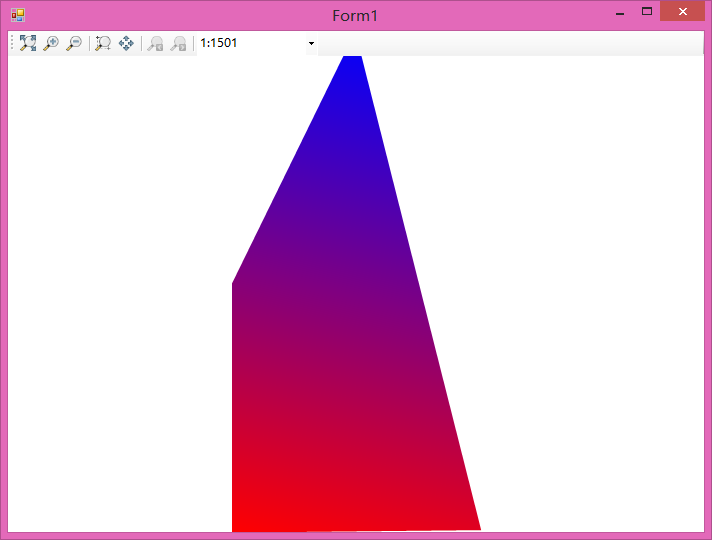
效果图:
SharpMap渐变色填充多边形
猜你喜欢
转载自blog.csdn.net/yue1241630499/article/details/52769487
今日推荐
周排行