一、配置chrony服务,实现服务器时间自动同步。
1、服务端安装chrony,设置开机启动。
[root@centos76 ~]#yum install -y chrony

[root@centos76 ~]#systemctl enable --now chronyd
2、修改/etc/chrony.conf
修改server为国内NTP服务器,例如阿里云等,可设置多条,防止单点故障。
server ntp.aliyun.com  iburst

server ntp1.s1c.time.edu.cn iburst 国内NTP服务器:ntp.aliyun.com,ntp1-7.aliyun.com
s1a.time.edu.cn 北京邮电大学
s1b.time.edu.cn 清华大学
s1c.time.edu.cn 北京大学
210.72.145.44 国家授时中心服务器
去掉#local stratum 10前的#,如服务器无法连接互联网的NTP也可为局域网内部提供服务。
去掉#allow 192.168.0.0/16前的#,并修改允许访问的ip地址段,全部允许可设置为allow 0.0.0.0/0。
3、重启chrony服务。
[root@centos76 ~]#systemctl restart chronyd4、客户端也需要安装chrony,并将/etc/chrony.conf的server设置为服务端地址即可,其他地方不需要修改。
5、测试一下,客户端设置错误时间后,重启chrony服务即可立即同步时间。
[root@centos8 ~]#date -s '1 year'
Fri Dec 24 16:32:54 CST 2021

[root@centos8 ~]#systemctl restart chronyd

[root@centos8 ~]#chronyc sources -v
210 Number of sources = 1

  .-- Source mode  '^' = server, '=' = peer, '#' = local clock.
 / .- Source state '*' = current synced, '+' = combined , '-' = not combined,
| /   '?' = unreachable, 'x' = time may be in error, '~' = time too variable.
||                                                 .- xxxx [ yyyy ] +/- zzzz
||      Reachability register (octal) -.           |  xxxx = adjusted offset,
||      Log2(Polling interval) --.      |          |  yyyy = measured offset,
||                                \     |          |  zzzz = estimated error.
||                                 |    |           \

MS Name/IP address         Stratum Poll Reach LastRx Last sample

^* 10.0.0.77                     3   6     7     1    -12us[ +8760h] +/-   29ms

[root@centos8 ~]#date
Thu Dec 24 16:33:13 CST 2020
6、每隔几分钟chrony就会自动同步时间,以保证服务器时间正确。
[root@centos8 ~]#date
Fri Dec 24 16:43:31 CST 2021
[root@centos8 ~]#date
Fri Dec 24 16:43:33 CST 2021
[root@centos8 ~]#date
Thu Dec 24 16:43:33 CST 2020
二、实现cobbler+pxe自动化装机。
1、安装cobbler和相关软件,并启动服务。cobbler不支持centos8。
[root@centos7 ~]#yum install dhcp cobbler cobbler-web pykickstart
[root@centos7 ~]#systemctl enable --now cobblerd httpd tftp
2、运行cobbler check检查,按提示解决存在问题。
1)更改/etc/xinetd.d/tftp配置文件。
[root@centos7 ~]#vim /etc/xinetd.d/tftp
修改disable = yes --> disable = no
[root@centos7 ~]#systemctl restart xinetd
2)联网下载boot引导程序文件。
[root@centos7 ~]#cobbler get-loaders
3)更改/etc/cobbler/settings配置文件的server项为提供cobblerd服务的主机地址,也就是本机地址。
sed -nri 's#server:127.0.0.1#server:10.0.0.77#' /etc/cobbler/settings
4)更改/etc/cobbler/settings配置文件的next_server项,指明tftp服务器地址,使得客户端能够找到TFTP服务器。
[root@centos7 ~]#sed -i.bak 's/next_server: 127.0.0.1/next_server: 10.0.0.77/'
5)更改/etc/cobbler/settings配置文件的选项来使用cobbler管理dhcp服务和tftp服务。
manage_dhcp:1
manage_tftpd:1
配置完成后重启cobbler服务
systemctl restart cobblerd
3、更改dhcp服务的配置模板文件,启动dhcp服务。
要先关闭vmware自带的dhcp和其他虚拟机的所有dhcp,以免发生冲突。
#修改dhcp的模版文件下面的行,用来生成dhcp的配置文件,ip地址段要根据自己实际网段进行设置。
[root@centos7 ~]#vim /etc/cobbler/dhcp.template
subnet 10.0.0.0 netmask 255.255.255.0 {
option routers 10.0.0.2;
option domain-name-servers 10.0.0.2,114.114.114.114;
option subnet-mask 255.255.255.0;
range dynamic-bootp 10.0.0.200 10.0.0.240;
[root@centos7 ~]#cobbler sync
[root@centos7 ~]#systemctl start dhcpd
4、修改启动菜单提示信息(可选),可以使启动菜单显示个性化信息。
[root@centos7 ~]#vim /etc/cobbler/pxe/pxedefault.template

[root@centos7 ~]#cobbler sync
5、导入CentOS系统的安装文件,生成相应的YUM源。
安装光盘iso文件要先先准备好。
[root@centos7 ~]#cobbler import --name=centos-7.6-x86_64 --path=/misc/cd --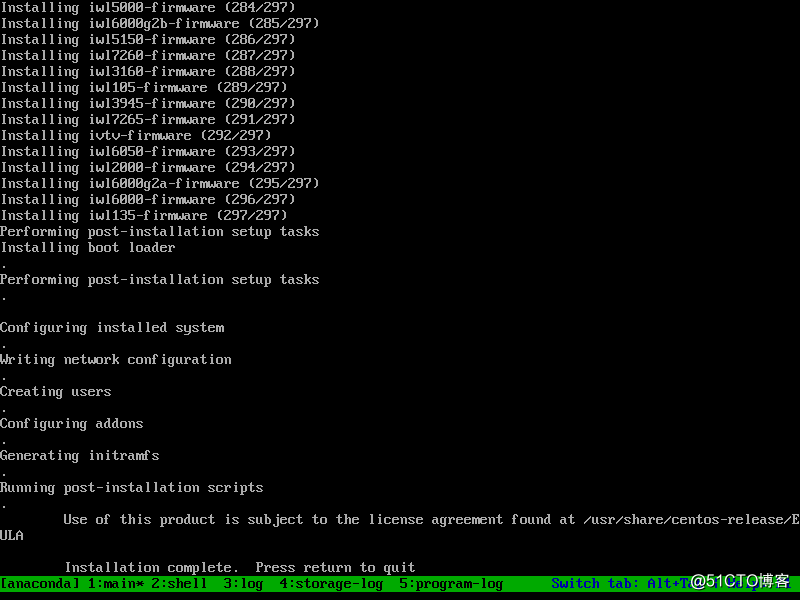
arch=x86_64 导入完成后cobbler已生成最小安装的配置文件,此文件安装的系统root密码为cobbler。
6、准备 安装自动应答文件,并关联至指定的YUM源。
准备好自己的 kickstart文件,可使用system-config-kickstart生成,此工具centos8不在提供。
生成的文件中可能存在中文,一定要删掉,否则无法在cobbler中使用。
修改文件中的安装源地址行 url --url=$tree。
7、配置linux发行版和关联相应的ks文件。
事先准备好的ks文件一定要复制至/var/lib/cobbler/kickstarts目录下。
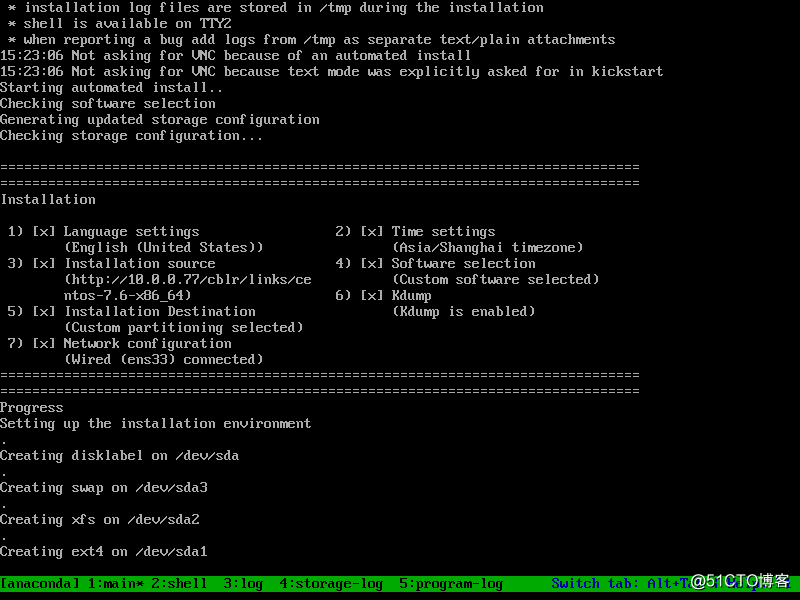
配置文件的安装内容不要超出导入的安装文件范围,例如只导入了最小安装光盘,配置文件里就不要选其他软件包了。
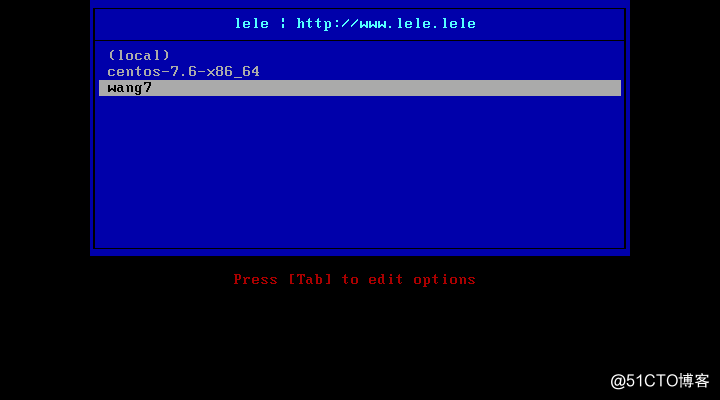
[root@centos7 ~]#cobbler profile add --name=wang7 --distro=centos-7.6-x86_64 --kickstart=/var/lib/cobbler/kickstarts/ks7.cfg
[root@centos7 ~]#systemctl restart cobblerd
[root@centos7 ~]#cobbler sync
8、如需要在UEFI模式下启动还需要修改配置文件。
[root@centos7 ~]#vim /etc/cobbler/pxe/efidefault.template
修改timeout=0为timeout=20
[root@centos7 ~]#cobbler sync
8、建立新的虚拟机测试。
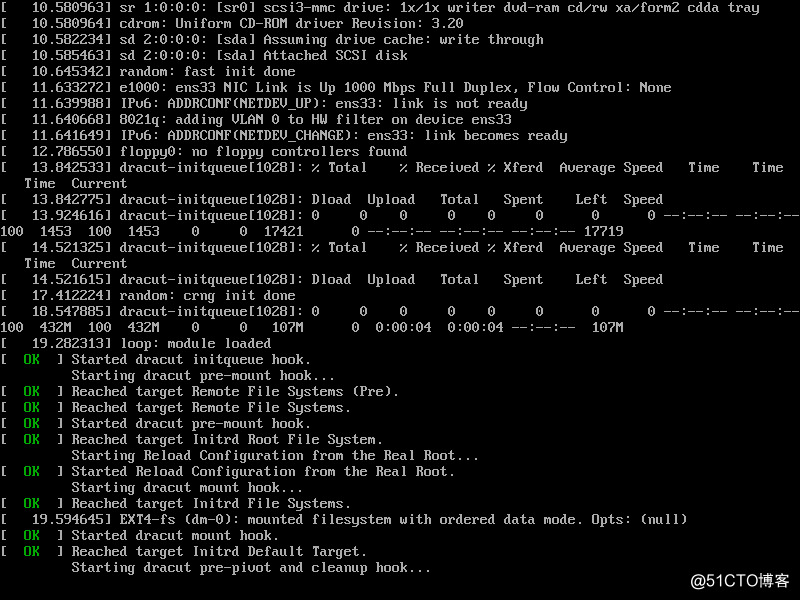
新虚拟机内存至少2G,硬盘大小要大于ks文件里硬盘分区总和。全新的虚拟机会自动从网卡启动,如已有系统等情况可以在开机时迅速按一下Esc键,然后选择从网卡启动即可开始全自动安装。