乐优商城学习Day03:
注意:此次代码都是在第二天的基础上
第二天的链接如下:
https://blog.csdn.net/zcylxzyh/article/details/97811223
此次笔记内容主要为:
1.后台实现新增
2.绕过ZUUL缓存
3.FastDFS安装
4.FastDFS的Nginx模块
5.配置nginx开机启动
6.实现图片上传
下面开始第三天的学习:
1.后台实现新增
首先在ly-item-interface中创建名为Brand的实体类,具体位置如下:

Brand代码如下:
package com.leyou.item.pojo;

import lombok.Data;
import tk.mybatis.mapper.annotation.KeySql;

import javax.persistence.Id;
import javax.persistence.Table;

@Data
@Table(name = "tb_brand")
public class Brand {


    @Id
    @KeySql(useGeneratedKeys = true)
    private Long id;
    private String name;// 品牌名称
    private String image;// 品牌图片
    private Character letter;
    // getter setter 略
}
然后在ly-item-service中创建
1.BrandMapper 接口
2.BrandService 类
3.BrandController 类
具体位置如下:

BrandMapper
分析:通用Mapper只能处理单表,也就是Brand的数据,因此我们手动编写一个方法及sql,实现中间表的新增:
全部代码如下
package com.leyou.item.mapper;

import com.leyou.item.pojo.Brand;
import org.apache.ibatis.annotations.Insert;
import org.apache.ibatis.annotations.Param;
import tk.mybatis.mapper.common.Mapper;

public interface BrandMapper extends Mapper<Brand> {


    @Insert("INSERT INTO tb_category_brand (category_id,brand_id) VALUES (#{cid},#{bid})")
    int insertCategoryBrand(@Param("cid") Long cid ,@Param("bid") Long bid);
}
BrandService
分析:这里要注意,我们不仅要新增品牌,还要维护品牌和商品分类的中间表。这里调用了brandMapper中的一个自定义方法,来实现中间表的数据新增。
这里要再去枚举里添加一个新的量
全部 代码如下
package com.leyou.item.service;
import com.github.pagehelper.PageHelper;
import com.github.pagehelper.PageInfo;
import com.leyou.common.enums.ExceptionEnum;
import com.leyou.common.exception.LyException;
import com.leyou.common.vo.PageResult;
import com.leyou.item.mapper.BrandMapper;
import com.leyou.item.pojo.Brand;
import org.apache.commons.lang3.StringUtils;
import org.springframework.beans.factory.annotation.Autowired;
import org.springframework.stereotype.Service;
import org.springframework.transaction.annotation.Transactional;
import org.springframework.util.CollectionUtils;
import tk.mybatis.mapper.entity.Example;
import java.util.List;
@Service
public class BrandService {
@Autowired
private BrandMapper brandMapper;
//sortBy 根据什么排序,比如id
public PageResult<Brand> queryBrandByPage(Integer page, Integer rows, String sortBy, Boolean desc, String key) {
//分页,使用分页助手,在查询语句前调用这个方法就能实现分页,这里是page,rows
PageHelper.startPage(page,rows);//第一个参数:当前页,第二个参数:每页大小
//Example需要一个实体类(字节码),让他知道去哪个表查
Example example = new Example(Brand.class);
//条件过滤,查询用的,这里是key
if (StringUtils.isNotBlank(key)){
//过滤条件,也就是sql语句
/*
* WHERE 'name' LIKE "%X%" OR letter =='X'
* ORDER BY id DESC
* */
//key.toUpperCase()转大写
example.createCriteria().orLike("name","%"+key+"%")
.orEqualTo("letter",key.toUpperCase());
}
//排序
if(StringUtils.isNotBlank(sortBy)){
String orderByClause = sortBy+ (desc ? "DESC":"ASC");
example.setOrderByClause(orderByClause);
}
//查询
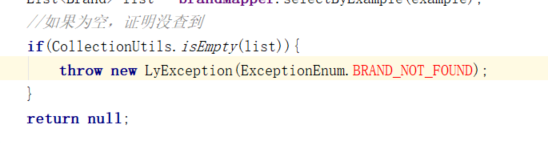
List<Brand> list = brandMapper.selectByExample(example);
//如果为空,证明没查到
if(CollectionUtils.isEmpty(list)){
throw new LyException(ExceptionEnum.BRAND_NOT_FOUND);
}
//解析分页结果
PageInfo<Brand> info = new PageInfo<>(list);
//返回总条数和list
return new PageResult<>(info.getTotal(),list);
}
//新增,因为复杂需要加上事务注解
@Transactional
public void saveBrand(Brand brand, List<Long> cids) {
//新增品牌
brand.setId(null);
int count = brandMapper.insert(brand);
if(count!=1){
throw new LyException(ExceptionEnum.BRAND_SAVE_ERROR);
}
//新增中间表
for (Long cid : cids) {
count=brandMapper.insertCategoryBrand(cid,brand.getId());
if(count != 1){
throw new LyException(ExceptionEnum.BRAND_SAVE_ERROR);
}
}
}
}
BrandController
分析:还是一样,先分析四个内容:

- 请求方式:刚才看到了是POST
- 请求路径:/brand
- 请求参数:brand对象,外加商品分类的id数组cids
- 返回值:无
代码如下
package com.leyou.item.web;

import com.leyou.common.vo.PageResult;
import com.leyou.item.pojo.Brand;
import com.leyou.item.service.BrandService;
import org.springframework.beans.factory.annotation.Autowired;
import org.springframework.http.HttpStatus;
import org.springframework.http.ResponseEntity;
import org.springframework.stereotype.Service;
import org.springframework.web.bind.annotation.*;

import java.util.List;

@RestController
@RequestMapping("brand")
public class BrandController {


    @Autowired
    private BrandService brandService;

    /*
     * 1.请求方式:Get
     * 2.请求路径:
     * 3.请求参数:5个
     * 4.返回值类型:封装成一个对象。因此我们需要封装一个类PageResult来表示分页结果。
     * */
//分页查询品牌:
    //1,2
    @GetMapping("page")
    //4 ResponseEntity<PageResult<Brand>>
    //rest风格都是ResponseEntity<PageResult//返回值<Brand>//PageResult里面装的>
    public ResponseEntity<PageResult<Brand>> queryBrandByPage(
            //3.参数
            @RequestParam(value = "page", defaultValue = "1") Integer page,
            @RequestParam(value = "rows", defaultValue = "5") Integer rows,
            @RequestParam(value = "sortBy", required = false) String sortBy,
            @RequestParam(value = "desc", defaultValue = "false") Boolean desc,
            @RequestParam(value = "key",required = false) String key
    ) {


        //编写业务

        return ResponseEntity.ok(brandService.queryBrandByPage(page, rows, sortBy, desc, key));
    }

    //新增品牌
    @PostMapping
    public ResponseEntity<Void> saveBrand(Brand brand , @RequestParam("cids")List<Long> cids){


        brandService.saveBrand(brand,cids);
        return ResponseEntity.status(HttpStatus.CREATED).build();
    }

}
在ly-common中写名为PageResult的类具体位置如下:

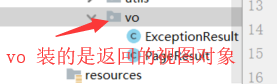
PageResult是一个通用的封装类
PageResult代码如下:
package com.leyou.common.vo;

import lombok.Data;

import java.util.List;
// view object
@Data
public class PageResult<T> {


    private Long total;// 总条数
    private Integer totalPage;// 总页数
    private List<T> items;// 当前页数据

    public PageResult() {


    }

    public PageResult(Long total, List<T> items) {


        this.total = total;
        this.items = items;
    }

    public PageResult(Long total, Integer totalPage, List<T> items) {


        this.total = total;
        this.totalPage = totalPage;
        this.items = items;
    }

}
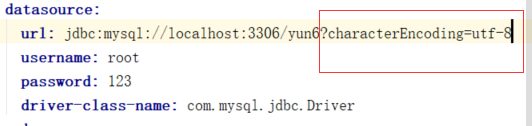
注:数据库插入的中文乱码问题解决方法:
1.确定你的数据库和表的编码格式是UTF-8
2.在配置文件中
修改后的枚举类:(注:这是今天学习添加过所有新枚举后的枚举类,一些上面没有使用的会在文章下面使用)
package com.leyou.common.enums;

        import lombok.AllArgsConstructor;
        import lombok.Getter;
        import lombok.NoArgsConstructor;

@Getter
@NoArgsConstructor
@AllArgsConstructor
//枚举是指只能有固定实例个数的类
public enum ExceptionEnum {


    PRICE_CANNOT_BE_NULL(400,"价格不能为空!"),
    CATEGORY_NOT_FOND(404,"商品分类没查到"),
    BRAND_NOT_FOUND(404,"品牌不存在"),
    BRAND_SAVE_ERROR(500,"新增品牌失败"),
    UPLOAD_FILE_ERROR(500,"文件上传失败"),
    INVALID_FILE_TYPE(400,"无效的文件类型"),
    ;
    private  int code ;
    private  String msg ;

}
测试:


至此,第一部分结束。
2.绕过ZUUL缓存
图片上传是文件的传输,如果也经过Zuul网关的代理,文件就会经过多次网路传输,造成不必要的网络负担。在高并发时,可能导致网络阻塞,Zuul网关不可用。这样我们的整个系统就瘫痪了。
所以,我们上传文件的请求就不经过网关来处理了。
通过nginx绕过ZUUL缓存:
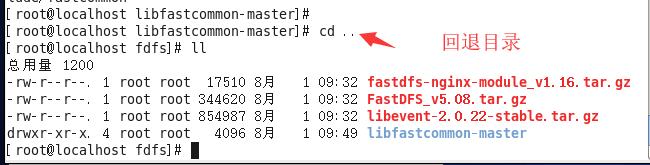
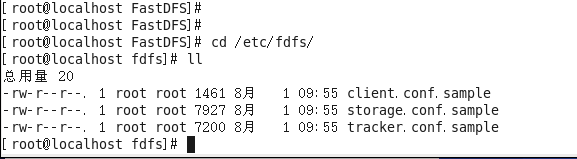
先进入到这层目录:

然后


修改了nginx.conf后就绕过了ZUUL缓存。(注:因为后面还需要修改它,所以等文章最后再给nginx.conf代码。)
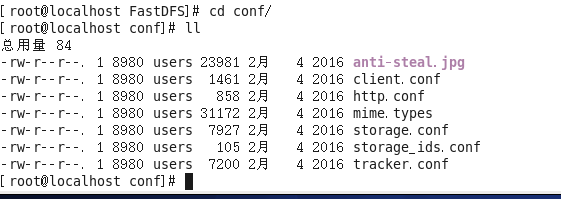
3.FastDFS安装
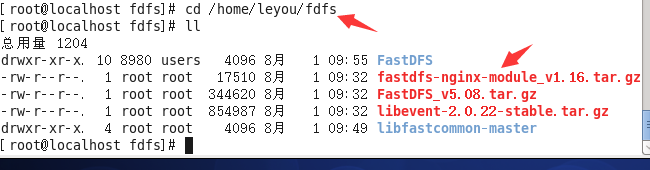
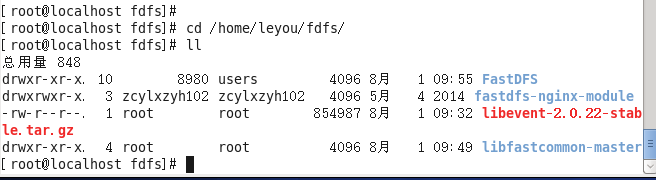
首先,创建目录:


然后考入安装包:

然后安装FastDFS所需要的依赖:
FastDFS运行需要一些依赖,在课前资料提供的虚拟中已经安装好了这些依赖,如果大家想要从头学习,可以按下面方式安装:
安装GCC依赖
GCC用来对C语言代码进行编译运行,使用yum命令安装:
sudo yum -y install gcc
安装unzip工具
unzip工具可以帮我们对压缩包进行解压
sudo yum install -y unzip zip
安装libevent
sudo yum -y install libevent
安装libfastcommon-master
这个没有yum包,只能通过编译安装:
- 解压刚刚上传的libfastcommon-master.zip
-
tar -xvf libfastcommon-master.zip
然后:
-
进入解压完成的目录:
cd libfastcommon-master
编译安装:

-
解压
tar -xvf FastDFS_v5.08.tar.gz


-
进入目录
cd FastDFS -
编译并安装


修改配置文件:(文章最后提供修改后的文件的代码)
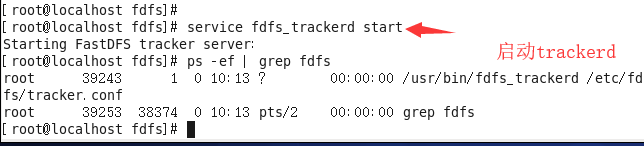
启动tracker
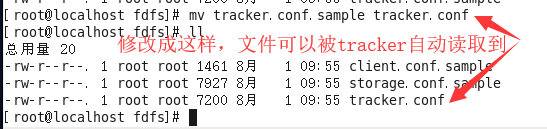
修改文件就用vim命令
打开tracker.conf,修改base_path配置:
base_path=/leyou/fdfs/tracker # tracker的数据和日志存放目录


创建目录
刚刚配置的目录可能不存在,我们创建出来


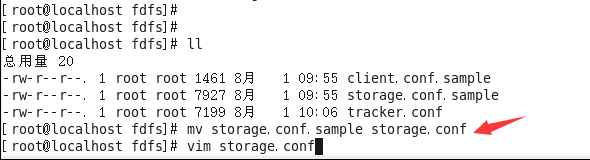
启动storage
打开storage.conf,修改base_path配置:
    base_path=/leyou/fdfs/storage # storage的数据和日志存放目录
    store_path0=/leyou/fdfs/storage # storage的上传文件存放路径
    tracker_server=192.168.56.101:22122 # tracker的地址,每个人不同


测试用的:


先点ESC


至此,安装结束。
文件代码:
tracker.conf:
# is this config file disabled
# false for enabled
# true for disabled
disabled=false

# bind an address of this host
# empty for bind all addresses of this host
bind_addr=

# the tracker server port
port=22122

# connect timeout in seconds
# default value is 30s
connect_timeout=30

# network timeout in seconds
# default value is 30s
network_timeout=60

# the base path to store data and log files
base_path=/leyou/fdfs/tracker

# max concurrent connections this server supported
max_connections=256

# accept thread count
# default value is 1
# since V4.07
accept_threads=1

# work thread count, should <= max_connections
# default value is 4
# since V2.00
work_threads=4

# the method of selecting group to upload files
# 0: round robin
# 1: specify group
# 2: load balance, select the max free space group to upload file
store_lookup=2

# which group to upload file
# when store_lookup set to 1, must set store_group to the group name
store_group=group2

# which storage server to upload file
# 0: round robin (default)
# 1: the first server order by ip address
# 2: the first server order by priority (the minimal)
store_server=0

# which path(means disk or mount point) of the storage server to upload file
# 0: round robin
# 2: load balance, select the max free space path to upload file
store_path=0

# which storage server to download file
# 0: round robin (default)
# 1: the source storage server which the current file uploaded to
download_server=0

# reserved storage space for system or other applications.
# if the free(available) space of any stoarge server in
# a group <= reserved_storage_space,
# no file can be uploaded to this group.
# bytes unit can be one of follows:
### G or g for gigabyte(GB)
### M or m for megabyte(MB)
### K or k for kilobyte(KB)
### no unit for byte(B)
### XX.XX% as ratio such as reserved_storage_space = 10%
reserved_storage_space = 10%

#standard log level as syslog, case insensitive, value list:
### emerg for emergency
### alert
### crit for critical
### error
### warn for warning
### notice
### info
### debug
log_level=info

#unix group name to run this program,
#not set (empty) means run by the group of current user
run_by_group=

#unix username to run this program,
#not set (empty) means run by current user
run_by_user=

# allow_hosts can ocur more than once, host can be hostname or ip address,
# "*" (only one asterisk) means match all ip addresses
# we can use CIDR ips like 192.168.5.64/26
# and also use range like these: 10.0.1.[0-254] and host[01-08,20-25].domain.com
# for example:
# allow_hosts=10.0.1.[1-15,20]
# allow_hosts=host[01-08,20-25].domain.com
# allow_hosts=192.168.5.64/26
allow_hosts=*

# sync log buff to disk every interval seconds
# default value is 10 seconds
sync_log_buff_interval = 10

# check storage server alive interval seconds
check_active_interval = 120

# thread stack size, should >= 64KB
# default value is 64KB
thread_stack_size = 64KB

# auto adjust when the ip address of the storage server changed
# default value is true
storage_ip_changed_auto_adjust = true

# storage sync file max delay seconds
# default value is 86400 seconds (one day)
# since V2.00
storage_sync_file_max_delay = 86400

# the max time of storage sync a file
# default value is 300 seconds
# since V2.00
storage_sync_file_max_time = 300

# if use a trunk file to store several small files
# default value is false
# since V3.00
use_trunk_file = false

# the min slot size, should <= 4KB
# default value is 256 bytes
# since V3.00
slot_min_size = 256

# the max slot size, should > slot_min_size
# store the upload file to trunk file when it's size <=  this value
# default value is 16MB
# since V3.00
slot_max_size = 16MB

# the trunk file size, should >= 4MB
# default value is 64MB
# since V3.00
trunk_file_size = 64MB

# if create trunk file advancely
# default value is false
# since V3.06
trunk_create_file_advance = false

# the time base to create trunk file
# the time format: HH:MM
# default value is 02:00
# since V3.06
trunk_create_file_time_base = 02:00

# the interval of create trunk file, unit: second
# default value is 38400 (one day)
# since V3.06
trunk_create_file_interval = 86400

# the threshold to create trunk file
# when the free trunk file size less than the threshold, will create
# the trunk files
# default value is 0
# since V3.06
trunk_create_file_space_threshold = 20G

# if check trunk space occupying when loading trunk free spaces
# the occupied spaces will be ignored
# default value is false
# since V3.09
# NOTICE: set this parameter to true will slow the loading of trunk spaces
# when startup. you should set this parameter to true when neccessary.
trunk_init_check_occupying = false

# if ignore storage_trunk.dat, reload from trunk binlog
# default value is false
# since V3.10
# set to true once for version upgrade when your version less than V3.10
trunk_init_reload_from_binlog = false

# the min interval for compressing the trunk binlog file
# unit: second
# default value is 0, 0 means never compress
# FastDFS compress the trunk binlog when trunk init and trunk destroy
# recommand to set this parameter to 86400 (one day)
# since V5.01
trunk_compress_binlog_min_interval = 0

# if use storage ID instead of IP address
# default value is false
# since V4.00
use_storage_id = false

# specify storage ids filename, can use relative or absolute path
# since V4.00
storage_ids_filename = storage_ids.conf

# id type of the storage server in the filename, values are:
## ip: the ip address of the storage server
## id: the server id of the storage server
# this paramter is valid only when use_storage_id set to true
# default value is ip
# since V4.03
id_type_in_filename = ip

# if store slave file use symbol link
# default value is false
# since V4.01
store_slave_file_use_link = false

# if rotate the error log every day
# default value is false
# since V4.02
rotate_error_log = false

# rotate error log time base, time format: Hour:Minute
# Hour from 0 to 23, Minute from 0 to 59
# default value is 00:00
# since V4.02
error_log_rotate_time=00:00

# rotate error log when the log file exceeds this size
# 0 means never rotates log file by log file size
# default value is 0
# since V4.02
rotate_error_log_size = 0

# keep days of the log files
# 0 means do not delete old log files
# default value is 0
log_file_keep_days = 0

# if use connection pool
# default value is false
# since V4.05
use_connection_pool = false

# connections whose the idle time exceeds this time will be closed
# unit: second
# default value is 3600
# since V4.05
connection_pool_max_idle_time = 3600

# HTTP port on this tracker server
http.server_port=8080

# check storage HTTP server alive interval seconds
# <= 0 for never check
# default value is 30
http.check_alive_interval=30

# check storage HTTP server alive type, values are:
#   tcp : connect to the storge server with HTTP port only,
#        do not request and get response
#   http: storage check alive url must return http status 200
# default value is tcp
http.check_alive_type=tcp

# check storage HTTP server alive uri/url
# NOTE: storage embed HTTP server support uri: /status.html
http.check_alive_uri=/status.html
storage.conf代码如下:
# is this config file disabled
# false for enabled
# true for disabled
disabled=false

# the name of the group this storage server belongs to
#
# comment or remove this item for fetching from tracker server,
# in this case, use_storage_id must set to true in tracker.conf,
# and storage_ids.conf must be configed correctly.
group_name=group1

# bind an address of this host
# empty for bind all addresses of this host
bind_addr=

# if bind an address of this host when connect to other servers
# (this storage server as a client)
# true for binding the address configed by above parameter: "bind_addr"
# false for binding any address of this host
client_bind=true

# the storage server port
port=23000

# connect timeout in seconds
# default value is 30s
connect_timeout=30

# network timeout in seconds
# default value is 30s
network_timeout=60

# heart beat interval in seconds
heart_beat_interval=30

# disk usage report interval in seconds
stat_report_interval=60

# the base path to store data and log files
base_path=/leyou/fdfs/storage

# max concurrent connections the server supported
# default value is 256
# more max_connections means more memory will be used
max_connections=256

# the buff size to recv / send data
# this parameter must more than 8KB
# default value is 64KB
# since V2.00
buff_size = 256KB

# accept thread count
# default value is 1
# since V4.07
accept_threads=1

# work thread count, should <= max_connections
# work thread deal network io
# default value is 4
# since V2.00
work_threads=4

# if disk read / write separated
##  false for mixed read and write
##  true for separated read and write
# default value is true
# since V2.00
disk_rw_separated = true

# disk reader thread count per store base path
# for mixed read / write, this parameter can be 0
# default value is 1
# since V2.00
disk_reader_threads = 1

# disk writer thread count per store base path
# for mixed read / write, this parameter can be 0
# default value is 1
# since V2.00
disk_writer_threads = 1

# when no entry to sync, try read binlog again after X milliseconds
# must > 0, default value is 200ms
sync_wait_msec=50

# after sync a file, usleep milliseconds
# 0 for sync successively (never call usleep)
sync_interval=0

# storage sync start time of a day, time format: Hour:Minute
# Hour from 0 to 23, Minute from 0 to 59
sync_start_time=00:00

# storage sync end time of a day, time format: Hour:Minute
# Hour from 0 to 23, Minute from 0 to 59
sync_end_time=23:59

# write to the mark file after sync N files
# default value is 500
write_mark_file_freq=500

# path(disk or mount point) count, default value is 1
store_path_count=1

# store_path#, based 0, if store_path0 not exists, it's value is base_path
# the paths must be exist
store_path0=/leyou/fdfs/storage
#store_path1=/home/yuqing/fastdfs2

# subdir_count  * subdir_count directories will be auto created under each
# store_path (disk), value can be 1 to 256, default value is 256
subdir_count_per_path=256

# tracker_server can ocur more than once, and tracker_server format is
#  "host:port", host can be hostname or ip address
tracker_server=192.168.133.128:22122

#standard log level as syslog, case insensitive, value list:
### emerg for emergency
### alert
### crit for critical
### error
### warn for warning
### notice
### info
### debug
log_level=info

#unix group name to run this program,
#not set (empty) means run by the group of current user
run_by_group=

#unix username to run this program,
#not set (empty) means run by current user
run_by_user=

# allow_hosts can ocur more than once, host can be hostname or ip address,
# "*" (only one asterisk) means match all ip addresses
# we can use CIDR ips like 192.168.5.64/26
# and also use range like these: 10.0.1.[0-254] and host[01-08,20-25].domain.com
# for example:
# allow_hosts=10.0.1.[1-15,20]
# allow_hosts=host[01-08,20-25].domain.com
# allow_hosts=192.168.5.64/26
allow_hosts=*

# the mode of the files distributed to the data path
# 0: round robin(default)
# 1: random, distributted by hash code
file_distribute_path_mode=0

# valid when file_distribute_to_path is set to 0 (round robin),
# when the written file count reaches this number, then rotate to next path
# default value is 100
file_distribute_rotate_count=100

# call fsync to disk when write big file
# 0: never call fsync
# other: call fsync when written bytes >= this bytes
# default value is 0 (never call fsync)
fsync_after_written_bytes=0

# sync log buff to disk every interval seconds
# must > 0, default value is 10 seconds
sync_log_buff_interval=10

# sync binlog buff / cache to disk every interval seconds
# default value is 60 seconds
sync_binlog_buff_interval=10

# sync storage stat info to disk every interval seconds
# default value is 300 seconds
sync_stat_file_interval=300

# thread stack size, should >= 512KB
# default value is 512KB
thread_stack_size=512KB

# the priority as a source server for uploading file.
# the lower this value, the higher its uploading priority.
# default value is 10
upload_priority=10

# the NIC alias prefix, such as eth in Linux, you can see it by ifconfig -a
# multi aliases split by comma. empty value means auto set by OS type
# default values is empty
if_alias_prefix=

# if check file duplicate, when set to true, use FastDHT to store file indexes
# 1 or yes: need check
# 0 or no: do not check
# default value is 0
check_file_duplicate=0

# file signature method for check file duplicate
## hash: four 32 bits hash code
## md5: MD5 signature
# default value is hash
# since V4.01
file_signature_method=hash

# namespace for storing file indexes (key-value pairs)
# this item must be set when check_file_duplicate is true / on
key_namespace=FastDFS

# set keep_alive to 1 to enable persistent connection with FastDHT servers
# default value is 0 (short connection)
keep_alive=0

# you can use "#include filename" (not include double quotes) directive to
# load FastDHT server list, when the filename is a relative path such as
# pure filename, the base path is the base path of current/this config file.
# must set FastDHT server list when check_file_duplicate is true / on
# please see INSTALL of FastDHT for detail
##include /home/yuqing/fastdht/conf/fdht_servers.conf

# if log to access log
# default value is false
# since V4.00
use_access_log = false

# if rotate the access log every day
# default value is false
# since V4.00
rotate_access_log = false

# rotate access log time base, time format: Hour:Minute
# Hour from 0 to 23, Minute from 0 to 59
# default value is 00:00
# since V4.00
access_log_rotate_time=00:00

# if rotate the error log every day
# default value is false
# since V4.02
rotate_error_log = false

# rotate error log time base, time format: Hour:Minute
# Hour from 0 to 23, Minute from 0 to 59
# default value is 00:00
# since V4.02
error_log_rotate_time=00:00

# rotate access log when the log file exceeds this size
# 0 means never rotates log file by log file size
# default value is 0
# since V4.02
rotate_access_log_size = 0

# rotate error log when the log file exceeds this size
# 0 means never rotates log file by log file size
# default value is 0
# since V4.02
rotate_error_log_size = 0

# keep days of the log files
# 0 means do not delete old log files
# default value is 0
log_file_keep_days = 0

# if skip the invalid record when sync file
# default value is false
# since V4.02
file_sync_skip_invalid_record=false

# if use connection pool
# default value is false
# since V4.05
use_connection_pool = false

# connections whose the idle time exceeds this time will be closed
# unit: second
# default value is 3600
# since V4.05
connection_pool_max_idle_time = 3600

# use the ip address of this storage server if domain_name is empty,
# else this domain name will ocur in the url redirected by the tracker server
http.domain_name=

# the port of the web server on this storage server
http.server_port=8888
client.conf代码如下:
# connect timeout in seconds
# default value is 30s
connect_timeout=30

# network timeout in seconds
# default value is 30s
network_timeout=60

# the base path to store log files
base_path=/tmp

# tracker_server can ocur more than once, and tracker_server format is
#  "host:port", host can be hostname or ip address
tracker_server=192.168.133.128:22122

#standard log level as syslog, case insensitive, value list:
### emerg for emergency
### alert
### crit for critical
### error
### warn for warning
### notice
### info
### debug
log_level=info

# if use connection pool
# default value is false
# since V4.05
use_connection_pool = false

# connections whose the idle time exceeds this time will be closed
# unit: second
# default value is 3600
# since V4.05
connection_pool_max_idle_time = 3600

# if load FastDFS parameters from tracker server
# since V4.05
# default value is false
load_fdfs_parameters_from_tracker=false

# if use storage ID instead of IP address
# same as tracker.conf
# valid only when load_fdfs_parameters_from_tracker is false
# default value is false
# since V4.05
use_storage_id = false

# specify storage ids filename, can use relative or absolute path
# same as tracker.conf
# valid only when load_fdfs_parameters_from_tracker is false
# since V4.05
storage_ids_filename = storage_ids.conf


#HTTP settings
http.tracker_server_port=80

#use "#include" directive to include HTTP other settiongs
##include http.conf
至此,第三部分结束。
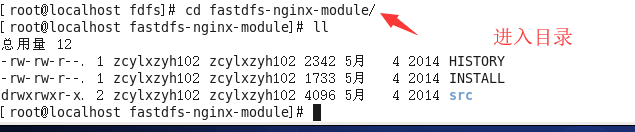
4.FastDFS的Nginx模块
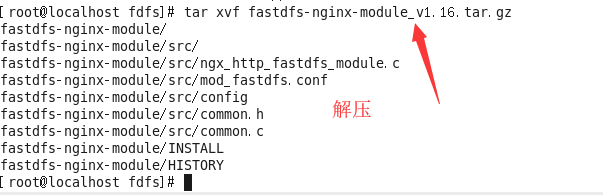
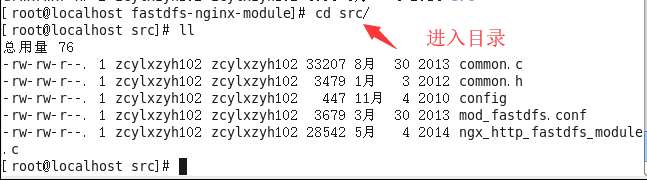
进入目录
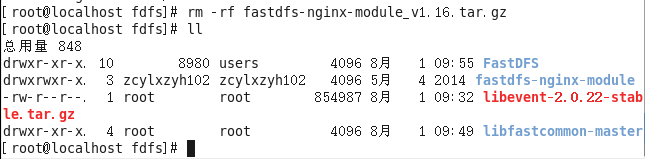
删除没用的安装包


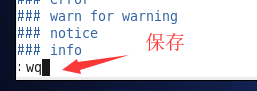
替换完成后保存

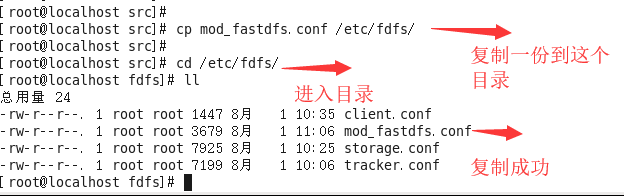
修改配置:
connect_timeout=10                  		# 客户端访问文件连接超时时长(单位:秒)

tracker_server=192.168.56.101:22122  	# tracker服务IP和端口

url_have_group_name=true            		# 访问链接前缀加上组名

store_path0=/leyou/fdfs/storage        		# 文件存储路径

进入目录


至此,模块配置完毕。
mod_fastdfs.conf文件代码:
# connect timeout in seconds
# default value is 30s
connect_timeout=10

# network recv and send timeout in seconds
# default value is 30s
network_timeout=30

# the base path to store log files
base_path=/tmp

# if load FastDFS parameters from tracker server
# since V1.12
# default value is false
load_fdfs_parameters_from_tracker=true

# storage sync file max delay seconds
# same as tracker.conf
# valid only when load_fdfs_parameters_from_tracker is false
# since V1.12
# default value is 86400 seconds (one day)
storage_sync_file_max_delay = 86400

# if use storage ID instead of IP address
# same as tracker.conf
# valid only when load_fdfs_parameters_from_tracker is false
# default value is false
# since V1.13
use_storage_id = false

# specify storage ids filename, can use relative or absolute path
# same as tracker.conf
# valid only when load_fdfs_parameters_from_tracker is false
# since V1.13
storage_ids_filename = storage_ids.conf

# FastDFS tracker_server can ocur more than once, and tracker_server format is
#  "host:port", host can be hostname or ip address
# valid only when load_fdfs_parameters_from_tracker is true
tracker_server=192.168.133.128:22122

# the port of the local storage server
# the default value is 23000
storage_server_port=23000

# the group name of the local storage server
group_name=group1

# if the url / uri including the group name
# set to false when uri like /M00/00/00/xxx
# set to true when uri like ${group_name}/M00/00/00/xxx, such as group1/M00/xxx
# default value is false
url_have_group_name = true

# path(disk or mount point) count, default value is 1
# must same as storage.conf
store_path_count=1

# store_path#, based 0, if store_path0 not exists, it's value is base_path
# the paths must be exist
# must same as storage.conf
store_path0=/leyou/fdfs/storage
#store_path1=/home/yuqing/fastdfs1

# standard log level as syslog, case insensitive, value list:
### emerg for emergency
### alert
### crit for critical
### error
### warn for warning
### notice
### info
### debug
log_level=info

# set the log filename, such as /usr/local/apache2/logs/mod_fastdfs.log
# empty for output to stderr (apache and nginx error_log file)
log_filename=

# response mode when the file not exist in the local file system
## proxy: get the content from other storage server, then send to client
## redirect: redirect to the original storage server (HTTP Header is Location)
response_mode=proxy

# the NIC alias prefix, such as eth in Linux, you can see it by ifconfig -a
# multi aliases split by comma. empty value means auto set by OS type
# this paramter used to get all ip address of the local host
# default values is empty
if_alias_prefix=

# use "#include" directive to include HTTP config file
# NOTE: #include is an include directive, do NOT remove the # before include
#include http.conf


# if support flv
# default value is false
# since v1.15
flv_support = true

# flv file extension name
# default value is flv
# since v1.15
flv_extension = flv


# set the group count
# set to none zero to support multi-group
# set to 0  for single group only
# groups settings section as [group1], [group2], ..., [groupN]
# default value is 0
# since v1.14
group_count = 0

# group settings for group #1
# since v1.14
# when support multi-group, uncomment following section
#[group1]
#group_name=group1
#storage_server_port=23000
#store_path_count=2
#store_path0=/home/yuqing/fastdfs
#store_path1=/home/yuqing/fastdfs1

# group settings for group #2
# since v1.14
# when support multi-group, uncomment following section as neccessary
#[group2]
#group_name=group2
#storage_server_port=23000
#store_path_count=1
#store_path0=/home/yuqing/fastdfs
至此,第四部分结束。
注:
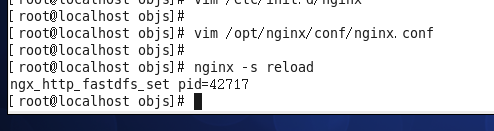
修改nginx:
进入目录

重新配置

重新编译


编辑配置文件:

然后重启nginx

去浏览器访问

至此配置完成。
经过上面所有的之后的nginx.conf代码如下:
#user  nobody;
worker_processes  1;

#error_log  logs/error.log;
#error_log  logs/error.log  notice;
#error_log  logs/error.log  info;

#pid        logs/nginx.pid;


events {
    worker_connections  1024;
}


http {
    include       mime.types;
    default_type  application/octet-stream;
    client_max_body_size 10m;
    #log_format  main  '$remote_addr - $remote_user [$time_local] "$request" '
    #                  '$status $body_bytes_sent "$http_referer" '
    #                  '"$http_user_agent" "$http_x_forwarded_for"';

    #access_log  logs/access.log  main;

    sendfile        on;
    #tcp_nopush     on;

    #keepalive_timeout  0;
    keepalive_timeout  65;

    #gzip  on;
	server {
        listen       80;
        server_name  manage.leyou.com;

        proxy_set_header X-Forwarded-Host $host;
        proxy_set_header X-Forwarded-Server $host;
        proxy_set_header X-Forwarded-For $proxy_add_x_forwarded_for;

        location / {
			proxy_pass http://192.168.31.193:9001;
			proxy_connect_timeout 600;
			proxy_read_timeout 600;
        }
    }
	server {
        listen       80;
        server_name  api.leyou.com;

        proxy_set_header X-Forwarded-Host $host;
        proxy_set_header X-Forwarded-Server $host;
        proxy_set_header X-Forwarded-For $proxy_add_x_forwarded_for;

		location /api/upload {
		    rewrite "^/(.*)$" /zuul/$1;
		}

        location / {
			proxy_pass http://192.168.31.193:10010;
			proxy_connect_timeout 600;
			proxy_read_timeout 600;
        }
    }
    server {
        listen       80;
        server_name  image.leyou.com;

    	# 监听域名中带有group的,交给FastDFS模块处理
        location ~/group([0-9])/ {
            ngx_fastdfs_module;
        }

        location / {
            root   html;
            index  index.html index.htm;
        }

        error_page   500 502 503 504  /50x.html;
        location = /50x.html {
            root   html;
        }

    }
    server {
        listen       80;
        server_name  localhost;

        #charset koi8-r;

        #access_log  logs/host.access.log  main;

        location / {
            root   html;
            index  index.html index.htm;
        }

        #error_page  404              /404.html;

        # redirect server error pages to the static page /50x.html
        #
        error_page   500 502 503 504  /50x.html;
        location = /50x.html {
            root   html;
        }

        # proxy the PHP scripts to Apache listening on 127.0.0.1:80
        #
        #location ~ \.php$ {
        #    proxy_pass   http://127.0.0.1;
        #}

        # pass the PHP scripts to FastCGI server listening on 127.0.0.1:9000
        #
        #location ~ \.php$ {
        #    root           html;
        #    fastcgi_pass   127.0.0.1:9000;
        #    fastcgi_index  index.php;
        #    fastcgi_param  SCRIPT_FILENAME  /scripts$fastcgi_script_name;
        #    include        fastcgi_params;
        #}

        # deny access to .htaccess files, if Apache's document root
        # concurs with nginx's one
        #
        #location ~ /\.ht {
        #    deny  all;
        #}
    }


    # another virtual host using mix of IP-, name-, and port-based configuration
    #
    #server {
    #    listen       8000;
    #    listen       somename:8080;
    #    server_name  somename  alias  another.alias;

    #    location / {
    #        root   html;
    #        index  index.html index.htm;
    #    }
    #}


    # HTTPS server
    #
    #server {
    #    listen       443 ssl;
    #    server_name  localhost;

    #    ssl_certificate      cert.pem;
    #    ssl_certificate_key  cert.key;

    #    ssl_session_cache    shared:SSL:1m;
    #    ssl_session_timeout  5m;

    #    ssl_ciphers  HIGH:!aNULL:!MD5;
    #    ssl_prefer_server_ciphers  on;

    #    location / {
    #        root   html;
    #        index  index.html index.htm;
    #    }
    #}

}
5.配置nginx开机启动
配置nginx开机启动
#!/bin/sh
#
# nginx - this script starts and stops the nginx daemon
#
# chkconfig:   - 85 15
# description:  NGINX is an HTTP(S) server, HTTP(S) reverse \
#               proxy and IMAP/POP3 proxy server
# processname: nginx
# config:      /etc/nginx/nginx.conf
# config:      /etc/sysconfig/nginx
# pidfile:     /var/run/nginx.pid

# Source function library.
. /etc/rc.d/init.d/functions

# Source networking configuration.
. /etc/sysconfig/network

# Check that networking is up.
[ "$NETWORKING" = "no" ] && exit 0

nginx="/usr/bin/nginx"
prog=$(basename $nginx)

NGINX_CONF_FILE="/opt/nginx/conf/nginx.conf"

[ -f /etc/sysconfig/nginx ] && . /etc/sysconfig/nginx

lockfile=/var/lock/subsys/nginx

make_dirs() {
   # make required directories
   user=`$nginx -V 2>&1 | grep "configure arguments:.*--user=" | sed 's/[^*]*--user=\([^ ]*\).*/\1/g' -`
   if [ -n "$user" ]; then
      if [ -z "`grep $user /etc/passwd`" ]; then
         useradd -M -s /bin/nologin $user
      fi
      options=`$nginx -V 2>&1 | grep 'configure arguments:'`
      for opt in $options; do
          if [ `echo $opt | grep '.*-temp-path'` ]; then
              value=`echo $opt | cut -d "=" -f 2`
              if [ ! -d "$value" ]; then
                  # echo "creating" $value
                  mkdir -p $value && chown -R $user $value
              fi
          fi
       done
    fi
}

start() {
    [ -x $nginx ] || exit 5
    [ -f $NGINX_CONF_FILE ] || exit 6
    make_dirs
    echo -n $"Starting $prog: "
    daemon $nginx -c $NGINX_CONF_FILE
    retval=$?
    echo
    [ $retval -eq 0 ] && touch $lockfile
    return $retval
}

stop() {
    echo -n $"Stopping $prog: "
    killproc $prog -QUIT
    retval=$?
    echo
    [ $retval -eq 0 ] && rm -f $lockfile
    return $retval
}

restart() {
    configtest || return $?
    stop
    sleep 1
    start
}

reload() {
    configtest || return $?
    echo -n $"Reloading $prog: "
    killproc $nginx -HUP
    RETVAL=$?
    echo
}

force_reload() {
    restart
}

configtest() {
  $nginx -t -c $NGINX_CONF_FILE
}

rh_status() {
    status $prog
}

rh_status_q() {
    rh_status >/dev/null 2>&1
}

case "$1" in
    start)
        rh_status_q && exit 0
        $1
        ;;
    stop)
        rh_status_q || exit 0
        $1
        ;;
    restart|configtest)
        $1
        ;;
    reload)
        rh_status_q || exit 7
        $1
        ;;
    force-reload)
        force_reload
        ;;
    status)
        rh_status
        ;;
    condrestart|try-restart)
        rh_status_q || exit 0
            ;;
    *)
        echo $"Usage: $0 {start|stop|status|restart|condrestart|try-restart|reload|force-reload|configtest}"
        exit 2
esac
-
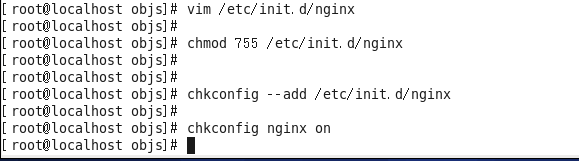
修改文件权限,并加入服务列表
# 修改权限chmod 777 /etc/init.d/nginx # 添加到服务列表 chkconfig --add /etc/init.d/nginx -
设置开机启动
-
chkconfig nginx on
至此,第五部分结束。
6.实现图片上传
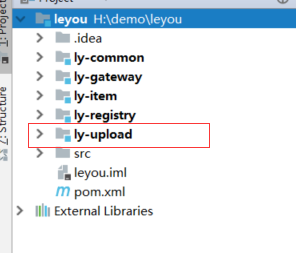
因为许多的服务都会用到上传,因此我们把它独立成一个微服务。
首先我们创建上传微服务:
创建的方式和前两天是一样的,我们起名为ly-upload,创建之后如下:
然后我们引入依赖:
pom文件如下:
<?xml version="1.0" encoding="UTF-8"?>
<project xmlns="http://maven.apache.org/POM/4.0.0"
         xmlns:xsi="http://www.w3.org/2001/XMLSchema-instance"
         xsi:schemaLocation="http://maven.apache.org/POM/4.0.0 http://maven.apache.org/xsd/maven-4.0.0.xsd">
    <parent>
        <artifactId>leyou</artifactId>
        <groupId>com.leyou.parent</groupId>
        <version>1.0.0-SNAPSHOT</version>
    </parent>
    <modelVersion>4.0.0</modelVersion>

    <groupId>com.leyou.service</groupId>
    <artifactId>ly-upload</artifactId>

    <dependencies>
        <dependency>
            <groupId>org.springframework.cloud</groupId>
            <artifactId>spring-cloud-starter-netflix-eureka-client</artifactId>
        </dependency>
        <dependency>
            <groupId>org.springframework.boot</groupId>
            <artifactId>spring-boot-starter-web</artifactId>
        </dependency>
        <dependency>
            <groupId>org.springframework.boot</groupId>
            <artifactId>spring-boot-starter-test</artifactId>
        </dependency>
        <dependency>
            <groupId>com.leyou.common</groupId>
            <artifactId>ly-common</artifactId>
            <version>1.0.0-SNAPSHOT</version>
        </dependency>
        <dependency>
            <groupId>com.github.tobato</groupId>
            <artifactId>fastdfs-client</artifactId>
        </dependency>
    </dependencies>
</project>
在编写配置文件,创建application.yml

application.yml代码如下:(注:这里的是完整的配置,包括了fdfs的配置)
server:
  port: 8082
spring:
  application:
    name: upload-service
  servlet:
    multipart:
      max-file-size: 5MB # 限制文件上传的大小
eureka:
  client:
    service-url:
      defaultZone: http://127.0.0.1:10086/eureka
  instance:
    ip-address: 127.0.0.1
    prefer-ip-address: true
fdfs:
  so-timeout: 2500
  connect-timeout: 600
  thumb-image: # 缩略图
    width: 60
    height: 60
  tracker-list: # tracker地址
    - 192.168.133.128:22122
ly:
  upload:
    baseUrl: http://image.leyou.com/
    allowTypes:
      - image/jpeg
      - image/png
      - image/bmp
创建启动类LyUploadApplication
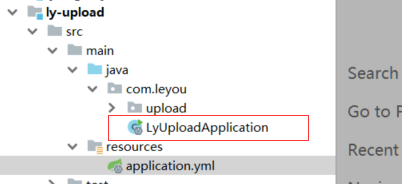
LyUploadApplication代码如下:
package com.leyou;

import org.springframework.boot.SpringApplication;
import org.springframework.boot.autoconfigure.SpringBootApplication;
import org.springframework.cloud.client.discovery.EnableDiscoveryClient;

@SpringBootApplication
@EnableDiscoveryClient
public class LyUploadApplication {


    public static void main(String[] args) {


        SpringApplication.run(LyUploadApplication.class);
    }
}
然后编写:
1.UploadController 类
2.UploadService 类
3.FastClientImporter 类
4.UploadProperties 类

UploadController 类
分析:编写controller需要知道4个内容:
- 请求方式:上传肯定是POST
- 请求路径:/upload/image
- 请求参数:文件,参数名是file,SpringMVC会封装为一个接口:MultipleFile
- 返回结果:上传成功后得到的文件的url路径
代码如下:(注:是最终版的代码)
package com.leyou.upload.web;

import com.leyou.upload.service.UploadService;
import org.springframework.beans.factory.annotation.Autowired;
import org.springframework.http.ResponseEntity;
import org.springframework.web.bind.annotation.PostMapping;
import org.springframework.web.bind.annotation.RequestMapping;
import org.springframework.web.bind.annotation.RequestParam;
import org.springframework.web.bind.annotation.RestController;
import org.springframework.web.multipart.MultipartFile;

@RestController
@RequestMapping("upload")
public class UploadController {


    @Autowired
    private UploadService uploadService;
    //上传图片
    @PostMapping("image")
    public ResponseEntity<String> uploadImage(@RequestParam("file")MultipartFile file){


        return ResponseEntity.ok(uploadService.uploadImage(file));
    }
}
UploadService 类
在上传文件过程中,我们需要对上传的内容进行校验:
- 校验文件大小
- 校验文件的媒体类型
- 校验文件的内容
文件大小在Spring的配置文件中设置,因此已经会被校验,我们不用管。
代码如下:(注:是最终版的代码)
package com.leyou.upload.service;

import com.github.tobato.fastdfs.domain.StorePath;
import com.github.tobato.fastdfs.service.FastFileStorageClient;
import com.leyou.common.enums.ExceptionEnum;
import com.leyou.common.exception.LyException;
import com.leyou.upload.config.UploadProperties;
import lombok.extern.slf4j.Slf4j;
import org.apache.commons.lang3.StringUtils;
import org.springframework.beans.factory.annotation.Autowired;
import org.springframework.boot.context.properties.EnableConfigurationProperties;
import org.springframework.stereotype.Service;
import org.springframework.web.multipart.MultipartFile;

import javax.imageio.ImageIO;
import java.awt.image.BufferedImage;
import java.io.IOException;

@Service
@Slf4j
@EnableConfigurationProperties(UploadProperties.class)
public class UploadService {


    @Autowired
    private FastFileStorageClient storageClient;

    @Autowired
    private UploadProperties prop;

    // private static final List<String> ALLOW_TYPES = Arrays.asList("image/jpeg", "image/png", "image/bmp");

    public String uploadImage(MultipartFile file) {


        try {


            //校验文件类型
            String contentType = file.getContentType();
            if (!prop.getAllowTypes().contains(contentType)) {


                throw new LyException(ExceptionEnum.INVALID_FILE_TYPE);
            }

            //校验文件内容
            BufferedImage image = ImageIO.read(file.getInputStream());
            if (image == null) {


                throw new LyException(ExceptionEnum.INVALID_FILE_TYPE);
            }

            //上传到FastDFS
            //获取后缀名
            String extension = StringUtils.substringAfterLast(file.getOriginalFilename(),".");
            StorePath storePath = storageClient.uploadFile(file.getInputStream(), file.getSize(), extension, null);


            //返回路径
            return prop.getBaseUrl() + storePath.getFullPath();
        } catch (IOException e) {


            //上传失败
            log.error("【文件上传】上传文件失败", e);
            throw new LyException(ExceptionEnum.UPLOAD_FILE_ERROR);
        }

    }
}
FastClientImporter 类:是FastDFS的配置类
代码如下:
package com.leyou.upload.config;

import com.github.tobato.fastdfs.FdfsClientConfig;
import org.springframework.context.annotation.Configuration;
import org.springframework.context.annotation.EnableMBeanExport;
import org.springframework.context.annotation.Import;
import org.springframework.jmx.support.RegistrationPolicy;

@Configuration
@Import(FdfsClientConfig.class)
// 解决jmx重复注册bean的问题
@EnableMBeanExport(registration = RegistrationPolicy.IGNORE_EXISTING)
public class FastClientImporter {


}
UploadProperties 类:封装了配置文件的属性用于Service调用
代码如下:
package com.leyou.upload.config;

import lombok.Data;
import org.springframework.boot.context.properties.ConfigurationProperties;

import java.util.List;
@Data
@ConfigurationProperties(prefix = "ly.upload")
public class UploadProperties {


    private String baseUrl;
    private List<String> allowTypes;
}
注意:在网关里添加路由
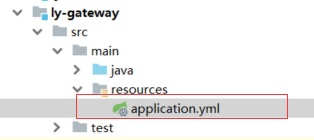
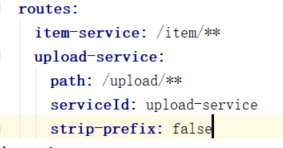
修改后代码:
server:
  port: 10010
spring:
  application:
    name: api-gateway
eureka:
  client:
    service-url:
      defaultZone: http://127.0.0.1:10086/eureka
zuul:
  prefix: /api # 添加路由前缀
  routes:
    item-service: /item/**
    upload-service:
      path: /upload/**
      serviceId: upload-service
      strip-prefix: false
hystrix:
  command:
    default:
      execution:
        isolation:
          thread:
            timeoutInMillisecond: 5000 # 熔断超时时长:5000ms
ribbon:
  ConnectTimeout: 1000 # 连接超时时间(ms)
  ReadTimeout: 3500 # 通信超时时间(ms)
  MaxAutoRetriesNextServer: 0 # 同一服务不同实例的重试次数
  MaxAutoRetries: 0 # 同一实例的重试次数

至此,第六部分结束。
可以修改文件上传大小:(注:nginx.conf代码在上面)
至此,今天的学习结束。