springboot简单使用
创建maven项目,不选骨架
加入父依赖和web启动器
pom如下
<?xml version="1.0" encoding="UTF-8"?>
<project xmlns="http://maven.apache.org/POM/4.0.0"
         xmlns:xsi="http://www.w3.org/2001/XMLSchema-instance"
         xsi:schemaLocation="http://maven.apache.org/POM/4.0.0 http://maven.apache.org/xsd/maven-4.0.0.xsd">
    <modelVersion>4.0.0</modelVersion>

    <groupId>com.book</groupId>
    <artifactId>springboot-demo</artifactId>
    <version>1.0-SNAPSHOT</version>
    <parent>
        <groupId>org.springframework.boot</groupId>
        <artifactId>spring-boot-starter-parent</artifactId>
        <version>2.0.6.RELEASE</version>
    </parent>
    <dependencies>
        <dependency>
            <groupId>org.springframework.boot</groupId>
            <artifactId>spring-boot-starter-web</artifactId>
        </dependency>
    </dependencies>

</project>
主启动类
@SpringBootApplication
public class App {
    public static void main(String[] args) {
        SpringApplication.run(App.class,args);
    }
}
controller代码
@RestController
public class HelloController {


    @GetMapping("/hello")
    public String hello(){
        return "hello";
    }

}
启动主启动类,访问http://localhost:8080/hello即可看到hello
springboot读取配置文件三种方式
Environment和@Value和自定义配置类
@RestController
public class HelloController {
    @Autowired
    private Environment environment;
    @Value("${server.port}")
    private String port;

    @Autowired
    private MyConfig myConfig;

    @GetMapping("/properties1")
    public String properties1(){
        return environment.getProperty("server.port");
    }

    @GetMapping("/properties2")
    public String properties2(){
        return port;
    }

    @GetMapping("/properties3")
    public String properties3(){
        return myConfig.getPort()+"aaaaaa";
    }
}
@ConfigurationProperties(prefix = "server")
@Component
public class MyConfig {
    private String port;

    public String getPort() {
        return port;
    }

    public void setPort(String port) {
        this.port = port;
    }
}
application.yml
server:
  port: 8080
自定义配置类还有一种方式,可以不加@Component,而在controller加上@EnableConfigurationProperties(MyConfig.class)
改动如下:
@ConfigurationProperties(prefix = "server")
public class MyConfig {
    private String port;

    public String getPort() {
        return port;
    }

    public void setPort(String port) {
        this.port = port;
    }
}
@RestController
@EnableConfigurationProperties(MyConfig.class)
public class HelloController {

    @Autowired
    private MyConfig myConfig;


    @GetMapping("/properties3")
    public String properties3(){
        return myConfig.getPort();
    }
}
虽然idea注入报红

但是访问显示正常,@EnableConfigurationProperties 相当于把使用 @ConfigurationProperties 的类注入到容器中,当然用@Component也是可以的
还可以引入外部配置文件来配置(只测试通过了properties配置文件,yml测试不通过)
test.properties内容如下
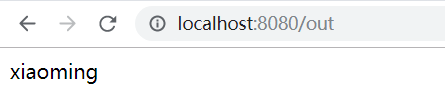
test.name=xiaoming
@Component
@PropertySource(value = "classpath:test.properties") //指明外部配置文件位置
@ConfigurationProperties(prefix = "test")
public class TestOutProperties {
    private String name;

    public String getName() {
        return name;
    }

    public void setName(String name) {
        this.name = name;
    }
}
@RestController
public class TestController {
    @Autowired
    private TestOutProperties properties;
    @GetMapping("/out")
    public String testOutProperties(){
        return properties.getName();
    }
}
访问http://localhost:8080/out显示
springboot多环境配置
application.yml
spring:
  profiles:
    active: dev
表明使用application-dev.yml为配置文件
application-dev.yml
server:
  port: 8082
启动后发现8082端口启动了
热部署
   <dependency>
            <groupId>org.springframework.boot</groupId>
            <artifactId>spring-boot-devtools</artifactId>
        </dependency>
idea配置
1) “File” -> “Settings” -> “Build,Execution,Deplyment” -> “Compiler”,勾选 “Build project automatically” 。
2) 组合键:“Shift+Ctrl+Alt+/” ,选择 “Registry” ,选勾选 “compiler.automake.allow.when.app.running”
改动代码,springboot会自动重启
actuator监控
加入依赖
  <dependency>
            <groupId>org.springframework.boot</groupId>
            <artifactId>spring-boot-starter-actuator</artifactId>
        </dependency>
访问/actuator/health显示
{“status”:“UP”}
application.yml文件配置
server:
  port: 8080
management:
  endpoints:
    web:
      exposure:
        include: "*"  #开启暴露所有的端点信息
      base-path: /  #更改监控访问路径,默认/actuator
  server:
    port: 9001  #更改监控访问端口,默认应用启动端口
  endpoint:
    health:
      show-details: always  #显示健康具体信息  默认不会显示详细信息
    shutdown:
      enabled: true #优雅停机,使用post请求实现优雅停机
此时访问http://localhost:9001/health将显示健康状态详细信息

由于开启了所有端点(默认开启health和info),可以访问http://localhost:9001/beans查看容器中的bean

访问http://localhost:9001/shutdown优雅停掉应用,必须post请求
