趣味密码学入门–cryptohack
前言
Awesome CTF中发现了一个有趣的密码学挑战平台–cryptohack,小白的我通过做题来学习密码学知识吧
cryptohack平台官网:https://cryptohack.org/
cryptohack平台的题目几乎都是Python3编写,题目类型有三个:
- 下载易受攻击的源代码并确定如何破解输出。
- 向服务器发出Web请求并缓慢提取机密数据。
- 连接到端口,并对试图进行通信的两方进行中间人攻击。
由此,通过做题熟悉python相关密码库的应用及密码学知识
题目面板如下,本篇文章介绍INTRODUCTION/GENERAL基础内容

注意:由于平台公告超过10分以上的题目题解不允许发送到公网,以打码来处理~
INTRODUCTION
包含三个入门级别的挑战来帮助我们了解解题的基本方法和提交flag
Finding Flags

每个题目都要求我们找到一个“flag”,将flag提交到题目下方的表单中,即可完成此题。若flag正确会提示"You have solved this challenge!"
Great Snakes

下载并运行"great_snakes.py"

提交flag,得到"You have solved this challenge!"
Network Attacks

根据题目介绍,本题使用中间人攻击的方式获取flag。使用telnetlib库对socket.cryptohack.org 11112端口已JSON对象的方式进行请求,下载样例telnetlib_example.py
#!/usr/bin/env python3

import telnetlib
import json

HOST = "socket.cryptohack.org"
PORT = 11112

tn = telnetlib.Telnet(HOST, PORT)


def readline():
    return tn.read_until(b"\n")

def json_recv():
    line = readline()
    return json.loads(line.decode())

def json_send(hsh):
    request = json.dumps(hsh).encode()
    tn.write(request)


print(readline())
print(readline())
print(readline())
print(readline())


request = {


    "buy": "clothes"   # clothes--> flag
}
json_send(request)

response = json_recv()

print(response)
将clothes改为flag,即可拿到flag

GENERAL
学习现代密码学之前的基础知识,相关在线工具都可以使用,这里使用python3进行解题
ENCODING
ASCII

ord = [99, 114, 121, 112, 116, 111, 123, 65, 83, 67, 73, 73, 95, 112, 114, 49, 110, 116, 52, 98, 108, 51, 125]

print(''.join(chr(o) for o in ord))

Hex

有时候我们加密之后的密文包含不可见的ASCII字符,为了更加方便的分享密文,通常使用HEX编码以便适配不同的操作系统
from binascii import a2b_hex,unhexlify
# binascii模块包含很多转换二进制和各种ASCII编码的二进制表示法
# binascii.a2b_hex(hexstr) 和binascii.unhexlify(hexstr):从十六进制字符串hexstr返回二进制数据
h = '63727970746f7b596f755f77696c6c5f62655f776f726b696e675f776974685f6865785f737472696e67735f615f6c6f747d'
print(a2b_hex(h))
# print(unhexlify(h))
拿到flag

Base64

Base64编码也是非常常见的一种编码方式,以64个字符组成的ASCII字符串来表示二进制数据。其中Base64中的字符编码6位,4个字符编码为3个字节
from binascii import a2b_hex,unhexlify  # binascii模块包含很多用来方法来转换二进制和各种ASCII编码的二进制表示法
import base64
h = '72bca9b68fc16ac7beeb8f849dca1d8a783e8acf9679bf9269f7bf'
print(a2b_hex(h))  # hex --> bytes
print(base64.b64encode(a2b_hex(h)))  # 进行一波base64编码
print(base64.encodebytes(a2b_hex(h)).decode('utf-8'))  #  bytes --> str

Bytes and Big Integers

类似于RSA的加密算法通常作用于数字,但我们通常需要加密的信息是一段字符串,那么我们如何将信息转化为数字来进行算法加密呢?
通常的方法是将消息以字节为顺序转为十六进制,依次进行连接,同样也可以使用base16/base10来表示,示例如下:
message: HELLO
ascii bytes: [72, 69, 76, 76, 79]
hex bytes: [0x48, 0x45, 0x4c, 0x4c, 0x4f]
base-16: 0x48454c4c4f
base-10: 310400273487
from Crypto.Util.number import long_to_bytes
# PyCryptodome是一个低级密码基元的独立Python包
n = 11515195063862318899931685488813747395775516287289682636499965282714637259206269

print(long_to_bytes(n))
print(long_to_bytes(n).decode())

Encoding Challenge

你能生100个等级拿到flag吗?此题要求使用脚本自动化实现前面所学的基础内容
我们首先执行nc socket.cryptohack.org 13377

发现连接到服务端后,会先响应一段JSON字符串,结合服务器源码13377.py分析
#!/usr/bin/env python3

from Crypto.Util.number import bytes_to_long, long_to_bytes
from utils import listener # this is cryptohack's server-side module and not part of python
import base64
import codecs
import random

FLAG = "crypto{????????????????????}"   # 需要想办法拿到的flag值
ENCODINGS = [    # 5种编码方式
    "base64",
    "hex",
    "rot13",
    "bigint",
    "utf-8",
]
with open('/usr/share/dict/words') as f:  # 从words文件以行为单位生成WORDS列表
    WORDS = [line.strip().replace("'", "") for line in f.readlines()]


class Challenge():
    def __init__(self):
        self.challenge_words = ""
        self.stage = 0

    def create_level(self):    # 升级方法
        self.stage += 1        # 每次执行此方法就升一级
        self.challenge_words = "_".join(random.choices(WORDS, k=3)) # 从WORDS列表中随机选取三个元素以"_"连接,如"blabs_thats_Wallss"
        encoding = random.choice(ENCODINGS) # 随机选择一种编码方式进行编码

        if encoding == "base64":
            encoded = base64.b64encode(self.challenge_words.encode()).decode() # wow so encode
        elif encoding == "hex":
            encoded = self.challenge_words.encode().hex()
        elif encoding == "rot13":
            encoded = codecs.encode(self.challenge_words, 'rot_13')
        elif encoding == "bigint":
            encoded = hex(bytes_to_long(self.challenge_words.encode()))
        elif encoding == "utf-8":
            encoded = [ord(b) for b in self.challenge_words]


        return {

    "type": encoding, "encoded": encoded} # 返回编码类型及数据到客户端

    #
    # This challenge function is called on your input, which must be JSON
    # encoded
    #
    def challenge(self, your_input):
        if self.stage == 0:    # 客户端连接时执行challenge函数,stage初始值为0
            return self.create_level() # 执行一次升级方法
        elif self.stage == 100:  # 当stage=100时返回flag
            self.exit = True
            return {

    "flag": FLAG}

        if self.challenge_words == your_input["decoded"]: # 客户端发送来的JSON对象中的decoded值与challenge_words相等时,执行升级函数,否则等级stage停留在0
            return self.create_level()

        return {

    "error": "Decoding fail"}


listener.start_server(port=13377)
当客户端向socket.cryptohack.org 13377发起连接后,服务端首先执行challenge函数,初始化并执行一次create_level方法返回了编码类型及数据。
若想将stage的值等于100拿到flag,我们需要发送如下your_input值到服务器
# 服务器源码中的your_input
your_input={

    "decoded": "graceless_misfits_snots"}
服务器将其值与当前的challenge_words进行判断,相等时才会继续执行升级方法create_level使stage增加。
我们发现,首次连接服务端发回的已编码的值,我们将其按照编码类型进行解码,解码后的值以your_input值的形式发送到服务端,即可使上述判断相等,执行方法create_level,stage自增一级,challenge_words重新随机分配,随机编码后返回客户端,客户端接着解码发送到服务端。
由此进行100次循环后,stage值达到100,就可以顺利拿到flag
pwntools_example.py和telnetlib_example.py为解题代码的一部分,我们选择一个使用就好
# pwntools_example.py
from pwn import * # pip install pwntools
import json

r = remote('socket.cryptohack.org', 13377, level = 'debug')  # 连接服务端

def json_recv():   # 读取接收到的数据,识别字符串中的json格式并转化为dict格式
    line = r.recvline()
    return json.loads(line.decode())

def json_send(hsh):  # 将dict格式转化成json格式的字符串发送给客户端
    request = json.dumps(hsh).encode()
    r.sendline(request)


received = json_recv() # 接收服务端信息赋值给received

print("Received type: ")
print(received["type"])
print("Received encoded value: ")
print(received["encoded"])

to_send = {

        # 发送的信息,主要改变changeme内容
    "decoded": "changeme"
}
json_send(to_send)

json_recv()
结合服务器源码分析,完善客户端解题代码如下
import telnetlib
import json
import base64
from pwn import * # pip install pwntools
import json
from Crypto.Util.number import bytes_to_long,long_to_bytes
import codecs
from binascii import a2b_hex,unhexlify
r = remote('socket.cryptohack.org', 13377)
def json_recv():
line = r.recvline()
return json.loads(line.decode())
def json_send(hsh):
request = json.dumps(hsh).encode()
r.sendline(request)
challenge_words = [] # 建立接收数据的列表
for i in range(100):
received = json_recv()
#print("Received type: ")
#print(received["type"])
#print("Received encoded value: ")
#print(received["encoded"])
if received["type"] == "base64": # 根据编码类型解码加入到列表中
challenge_words.append(base64.b64decode(received["encoded"].encode()).decode()) # wow so encode
elif received["type"] == "hex":
challenge_words.append(unhexlify(received["encoded"]).decode())
elif received["type"] == "rot13":
challenge_words.append(codecs.decode(received["encoded"], 'rot_13'))
elif received["type"] == "bigint":
challenge_words.append(long_to_bytes(int(received["encoded"], 16)).decode())
elif received["type"] == "utf-8":
challenge_words.append(''.join(chr(b) for b in received["encoded"]))
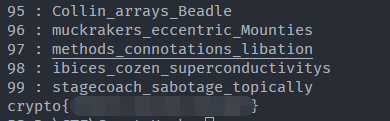
print("%d : %s" % (i, challenge_words[i])) # 打印出本次要发送到服务端的值
to_send = {
"decoded": challenge_words[i]
}
json_send(to_send)
received = json_recv() # 接收flag数据
print(received["flag"])
执行后拿到flag
XOR
XOR Starter
XOR是一种按位运算符,当用来比较的比特位相同时返回0,否则返回1
| A | B | Output |
|---|---|---|
| 0 | 0 | 0 |
| 0 | 1 | 1 |
| 1 | 0 | 1 |
| 1 | 1 | 0 |

- 对于长二进制数字,bit对应bit进行异或
- 对于十进制整数,将其转化为二进制进行异或操作
- 对于字符串,将其每个字符转化为代表Unicode字符的整数来对字符串进行异或
def XOR(str, key):
    o = []
    for s in str:  # 将字符串转为其整数表示,在与key进行异或操作,形成列表o
        o.append(ord(s)^key)
    #print(o)

    return ''.join(chr(i) for i in o) # 输出异或后的列表并转为字符传


if __name__ == "__main__":
    flag = XOR('label',13)
    print('crypto{%s}'% flag)
XOR Properties
XOR的四个属性:
- Commutative: A ⊕ B = B ⊕ A
- Associative: A ⊕ (B ⊕ C) = (A ⊕ B) ⊕ C
- Identity: A ⊕ 0 = A
- Self-Inverse: A ⊕ A = 0
根据上面的四个属性,结合下面给出的数据,我们想办法拿到flag
KEY1 = a6c8b6733c9b22de7bc0253266a3867df55acde8635e19c73313
KEY2 ^ KEY1 = 37dcb292030faa90d07eec17e3b1c6d8daf94c35d4c9191a5e1e
KEY2 ^ KEY3 = c1545756687e7573db23aa1c3452a098b71a7fbf0fddddde5fc1
FLAG ^ KEY1 ^ KEY3 ^ KEY2 = 04ee9855208a2cd59091d04767ae47963170d1660df7f56f5faf
分析:
(KEY2 ^ KEY1) ^ KEY1 = KEY2 ^ (KEY1 ^ KEY1) = KEY2 ^ 0 = KEY2
同理
KEY2 ^ (KEY2 ^ KEY3) = (KEY2 ^ KEY2) ^ KEY3 = 0 ^ KEY3 = KEY3
即
(FLAG ^ KEY1 ^ KEY3 ^ KEY2) ^ KEY1 ^ KEY3 ^ KEY2 = FLAG
代码解题:
from pwn import xor
from binascii import unhexlify

KEY1 = 'a6c8b6733c9b22de7bc0253266a3867df55acde8635e19c73313'
K21 = '37dcb292030faa90d07eec17e3b1c6d8daf94c35d4c9191a5e1e'
K23 = 'c1545756687e7573db23aa1c3452a098b71a7fbf0fddddde5fc1'
FK123 = '04ee9855208a2cd59091d04767ae47963170d1660df7f56f5faf'

# KEY2 = xor(unhexlify(KEY1), unhexlify(K21), 52)
# # print(type(KEY2))
# KEY3 = xor(KEY2, unhexlify(K23), 52)
# # print(KEY3)
# K123 = xor(unhexlify(K21), KEY3, 52)
# # print(K123)
FLAG = xor(unhexlify(FK123), unhexlify(KEY1), unhexlify(K23))
print(FLAG.decode())
Favourite byte

题目将flag数据与一个简单的字节异或,通过遍历可能的这个字节拿到flag
data = '73626960647f6b206821204f21254f7d694f7624662065622127234f726927756d'
decoded_data = bytes.fromhex(data)
print(decoded_data)
# print(string.ascii_letters)
for i in range(256):  # 遍历0-255中可能的异或
    try:
        # print(str(i) + " : " + xor(str(i), data).decode())
        flag = ''.join(chr(d ^ i) for d in decoded_data)
        print(str(i) + " : " + flag)
    except :
        print("无法解码")
You either know, XOR you don’t

题目提到flag的格式有助于我们找到key,因此我们将密文转化为bytes格式与’crypto{'按照字节顺序进行异或查看结果
data = '0e0b213f26041e480b26217f27342e175d0e070a3c5b103e2526217f27342e175d0e077e263451150104'
decoded_data = bytes.fromhex(data)  # hex-->byte
print(decoded_data)
str = 'crypto{'
# for i in range(7):
#     key.append(chr(decoded_data[i] ^ ord(str[i])))
key = ''.join((chr(decoded_data[i] ^ ord(str[i]))) for i in range(7))
print(key)

由此我们猜测key可能是myXORkey,使用xor函数解密即可得到flag
from pwn import xor

data = '0e0b213f26041e480b26217f27342e175d0e070a3c5b103e2526217f27342e175d0e077e263451150104'
decoded_data = bytes.fromhex(data)
# print(decoded_data)
str = 'crypto{'
key = ''.join((chr(decoded_data[i] ^ ord(str[i]))) for i in range(7))
key = key + 'y'
# print(key)
flag = xor(decoded_data, key.encode())  # xor函数自动将key匹配为与密文长度一致进行异或解密
print(flag)
Lemur XOR

两张图片分别用相同的密钥进行XOR进行异或,如下图

由XOR的属性可知,如果将两张图片按照像素点进行异或,实际上将会进行两次密钥异或等于0,异或的结果就是原始的两张图片的结合,代码实现如下
from cv2 import cv2

flag_data = cv2.imread(r"D:\CTF\CryptoHack\XOR\flag.png")
lemu_data = cv2.imread(r"D:\CTF\CryptoHack\XOR\lemu.png")

dse = cv2.bitwise_xor(flag_data, lemu_data)
cv2.imshow("XORdemo", dse)

cv2.waitKey(0)
同样,也可以用Stegsolve 工具进行异或操作

总结
本平台题目涵盖基本编码知识、数学公式、分组密码、RSA、公钥密码算法等题目,循序渐进的游戏式的方式做题进行了解并学习密码学知识
觉得这个网站好玩儿的小伙伴一定要自己动手做一做,千万不要直接照抄哟